8
EngLIsh
Optional Accessories
WARNING:
Since accessories, other than those offered
by FACOM, have not been tested with this product, use
of such accessories with this tool could be hazardous.
To reduce the risk of injury, only FACOM recommended
accessories should be used with this product.
Consult your dealer for further information on the
appropriate accessories.
D
Cleaning
WARNING:
Never use solvents or other harsh chemicals
for cleaning the non-metallic parts of the tool. These
chemicals may weaken the materials used in these parts.
Use a cloth dampened only with water and mild soap.
Never let any liquid get inside the tool; never immerse any
part of the tool into a liquid.
C
Lubrication
Your tool requires no additional lubrication.
MAINTENANCE
Your FACOM hand tool has been designed to operate over
a long period of time with a minimum of maintenance.
Continuous satisfactory operation depends upon proper tool
care and regular cleaning.
Rivet Nut Application (Fig. A, F–K)
1. Select correct rivet nut size for your application.
2. Ensure the tie rod
5
matches the size of the rivet nut
8
you
are operating with.
3. Drill a hole that matches the rivet thickness through the
materials you intend to rivet.
4. Thread the appropriate sized rivet nut
8
onto the assembly.
5. Insert the rivet nut
8
into the hole
9
of the workpiece and
ensure the rivet nut
8
is flush with the workpiece as shown
in Fig. G.
6. Ensure the rivet nut pliers
1
are perpendicular with the
workpiece as shown in Fig. K.
7. With the handles
2
in the open postion, squeeze the
handles together to the closed position to install the rivet
nut
8
to the workpiece as shown in Fig. F, H, I.
8. Remove the rivet nut pliers
1
from the workpiece by
rotating the install knob
3
counterclockwise.
9. The rivet nut is ready for you to install the threaded
component of your choice.
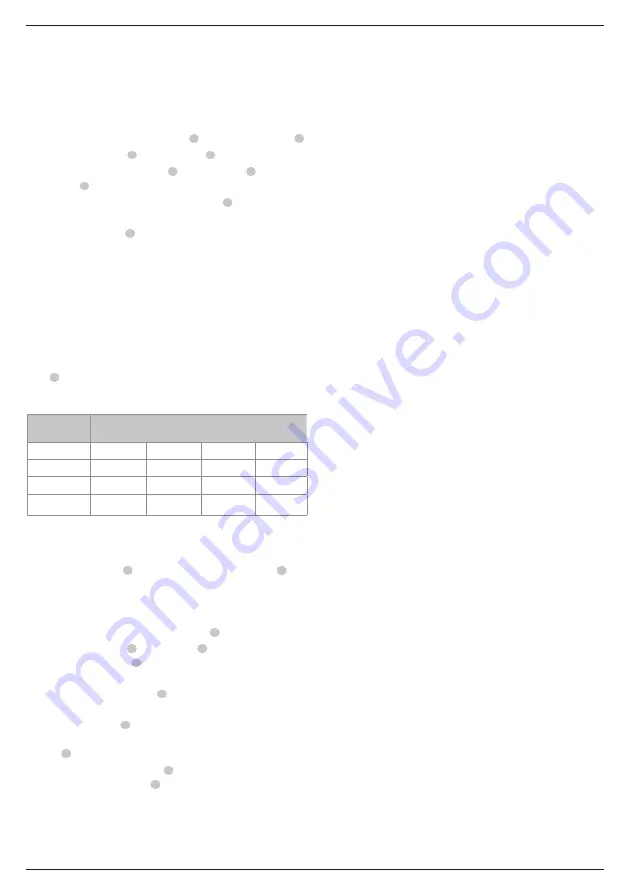
Rivet Nut Size Reference Chart
nut
MAtERIAL
RIVET NUT SIZE
M4
M5
M6
M8
Aluminum
X
X
X
X
Steel
X
X
X
X
Stainless Steel
X
X
Proper Hand Position (Fig. F)
WARNING:
To avoid risk of serious injury, ensure both
hands are on the handle grips during operation.
Proper hand position requires both hands on the handle
grips
2
.
OPERATION
CAUTION:
Wear safety glasses and gloves
during operation.
Riveting Nut Assembly (Fig. A–E)
1. Insert the appropriate sized tie rod
5
into the rivet nut plier
1
.
2. Thread the bushing
6
over the tie tod
5
3. Thread the threaded bushing
4
over the tie rod
5
and
bushing
6
. Ensure its fully tightened before using.
4. Thread the appropriate sized threaded nut
7
onto
the assembly.
5. The rivet nut pliers
1
are now ready to use.
Batteries
Chargers/Charge Times (Minutes)
Cat #
DC
Weight
*Date code 201811475B or later
**Date code 201536 or later
• This product is not intended for use by persons (including
children) suffering from diminished physical, sensory or
mental abilities; lack of experience, knowledge or skills
unless they are supervised by a person responsible for their
safety. Children should never be left alone with this product.
Содержание Y.107CPB
Страница 1: ...P Y 107CPB WWW FACOM COM...
Страница 3: ...1 Fig A Fig B Fig D Fig C Fig E 1 2 3 4 5 6 7 5 1 5 1 6 5 1 4 6 1 7...
Страница 4: ...2 Fig J Fig K Fig F Fig G Fig H Fig I 1 8 9 5 8 9 5 8 9 5 5 8 2...
Страница 29: ...27 Fig A 1 2 3 1 1 4 4 1 1 a Y 107CPB 1 10 C 50 C 14 F 122 F kg 0 99 FACOM FACOM Y 107CPB...
Страница 31: ...29 FACOM FACOM D...
Страница 32: ...79004716 06 21...


