background image


Chapter 9 – Care & Maintenance 


User Manual 

90 

Vortex

®

 Precedence


Rev 3.6 


Replacing Batteries 

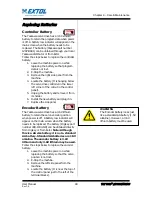
Controller Battery 

The Yaskawa servo drive has a 3.6V lithium 

battery to retain the program data when power 

is off. A battery low indicator will appear on the 

main screen when the battery needs to be 

replaced. The battery (Yaskawa part number 

JZSP-BA01) can be obtained through your local 

Yaskawa distributor or from Extol. 

Follow the steps below to replace the controller 

battery. 

1.


Leave the machine power on while 

replacing the battery so that program 

data is not lost. 

2.


E-Stop the machine. 

3.


Remove the right side panel from the 

machine. 

4.


Locate the battery (It is hanging below 

the servo drive controller in the lower 

left corner of the cutout in the control 

panel). 

5.


Unplug the battery and remove it from 

its holder. 

6.


Install the new battery and plug it in. 

7.


Replace the side panel. 

Encoder Battery 

The Yaskawa servo drive has a 3.6V lithium 

battery to retain the servo encoder position 

when power is off. A battery low indicator will 

appear on the main screen when the battery 

needs to be replaced. The battery (Digikey part 

number 439-1034-ND) can be obtained directly 

from Digikey or from Extol. Note: Although 

this is a AA size battery it is not a standard 

AA battery. Standard AA batteries are 1.5V 

alkaline. The encoder battery is 3.6V 

lithium and only 3.6V lithium may be used. 

Follow the steps below to replace the encoder 

battery. 

1.


Leave the machine power on while 

replacing the battery so that the servo 

position is not lost. 

2.


E-Stop the machine. 

3.


Remove the left side panel from the 

machine. 

4.


Locate the battery (It is near the top of 

the control panel just to the left of the 

terminal blocks). 

WARNING 

The Encoder battery looks just 

like a standard AA battery (1.5V 

alkaline). However, a 3.6V 

lithium battery must be used. 

Содержание VORTEX PRECEDENCE G1

Страница 1: ...Vortex Precedence Servo Spin Welder User Manual G1 G3 G5 models User Manual Rev 3 6 extolinc com SA D 723 11 18 ...

Страница 2: ...extolinc com User Manual ii Vortex Precedence Rev 3 6 This page intentionally left almost blank ...

Страница 3: ...eature description 5 27 2008 2 3 Added Appendix C for custom features 3 11 2009 3 0 New PRECEDENCE Model 6 1 2011 3 1 Repositioned fuse and disconnect Added alarm 3407 010C 5 4 2012 3 2 Updated table drawing on page 15 Updated spindle bolt pattern drawing on page 16 6 14 2012 3 4 Updated Moment of Inertia screenshots Approach Speed nomenclature Vacuum or Pressure selection options screenshots FC W...

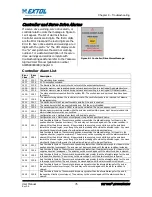
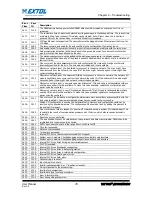
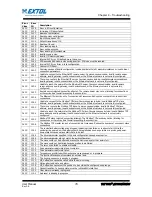
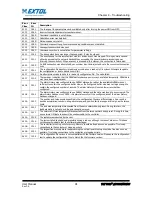
Страница 4: ... 14 Tool I O Connections 17 Light Curtain Connection 18 Remote Interface Connection 19 Power On Sequence 21 Chapter 4 Display Screens 23 All Screens 24 Home Tab 24 Main Screen 25 Password Screen 26 About Screen 27 System Setup Screen 28 Time Date Setting Screen 29 Setup Tab Recipe Setup 30 Parameters Screen 30 Machine Home Window 31 Head Down Window 31 Weld Process Revolutions Mode 32 Weld Process...

Страница 5: ...47 Part Present Input Usage 47 4 Enter Recipe Parameters 48 a Machine Home 48 Upper Load 48 Vacuum Pressure Load 48 Vac Pickup Prs Pickup Load 48 Detent Load 48 Start Mode 48 Static start 48 Dynamic start 48 Start Angle 49 b Head Down 49 Speed Transition 49 Approach Speed 49 Trigger 49 Trigger Window 50 Max Collapse 50 c Weld Process 50 Weld Mode 50 1 Revolutions 50 Revolutions 50 Orientation 50 F...

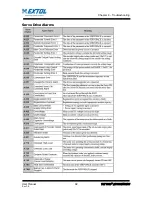
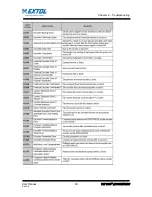
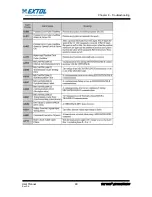
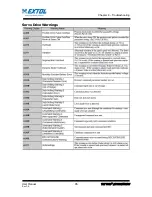
Страница 6: ...e Setup 68 Remote Interface 69 Wiring 69 Programming sequence 69 Chapter 8 Troubleshooting 73 Troubleshooting Guide 74 Fault Messages 75 Controller and Servo Drive Alarms 76 Controller Alarm List 76 Servo Drive Alarms 82 Servo Drive Warnings 85 Contact Extol 86 Chapter 9 Care Maintenance 87 Periodic Maintenance 88 Replacing Fuses 88 Main Power Fuses 88 Control Power Fuses 89 24 VDC Fuse 89 Replaci...

Страница 7: ...lower tool to the lower tool plate using M8 x 1 25mm SHCS 6 Use the Machine Manual screen to jog the head down and check alignment between the upper and lower tool If the tools are not aligned follow the leveling and centering procedure in Chapter 3 7 Set the mechanical stop to prevent upper and lower tooling contact when no part is present 8 Set the safety trigger to allow the operator to remove ...

Страница 8: ...s and can be released once the head down motion has stopped 14 Wait for the cycle to complete then remove the part Evaluate the integrity of the weld and adjust the setup parameters accordingly Refer to Appendix A for help adjusting the parameters to achieve a good weld ...

Страница 9: ...r 1 Introduction User Manual 3 Vortex Precedence Rev 3 6 Chapter 1 Introduction In this Chapter Manual Organization Abbreviation of Terms Vortex Features Vortex Options Warranty Extol Inc Contact Information ...

Страница 10: ... setup the weld control parameters and the pass fail criteria Chapter 6 Operation explains machine startup shutdown and the machine sequence of operations Chapter 7 Remote Interface Tool I O connector contains connection diagrams for wiring the DB9 connector on the side of the Vortex It also explains how to program a PLC to control the Vortex remotely and how to control Tool I O through the DB9 co...

Страница 11: ...nputs outputs LH Left hand MCR Master control relay OEM Original equipment manufacturer OSHA Occupational Safety And Health Administration PB Push button PF Press fit dowel P N Part number PLC Programmable logic controller PSI Pounds square inch PSIG Pounds square inch gage Prox Proximity switch Ret Retract s RH Right hand SCFH Standard cubic feet hour SCFM Standard cubic feet minute SF Slip fit d...

Страница 12: ...gree o Time mode controls weld duration o Distance mode collapse travel controls weld joint displacement o Distance mode total travel controls final part height Time and Distance modes available with or without final orientation positioning Five operation modes o Detent Operator loads the components into the upper and lower tools The upper tool holds the part in place with a detent o Vacuum Operat...

Страница 13: ...ct in materials and workmanship for 2 years Extol Inc Contact Information Extol Incorporated 651 Case Karsten Drive Zeeland MI 49464 USA Phone 616 748 9955 Toll Free 1 800 324 6205 Fax 616 748 0555 Sales or general inquiries Phone 1 800 324 6205 M F 8 00am 5 00pm EST Email sales extolinc com Web www extolinc com Technical Support Phone 1 800 324 6205 ...

Страница 14: ...Chapter 1 Introduction User Manual 8 Vortex Precedence Rev 3 6 This page intentionally left almost blank ...

Страница 15: ...Chapter 2 Safety User Manual 9 Vortex Precedence Rev 3 6 Chapter 2 Safety In this Chapter Cautions Warnings Operator Safety Tips Electrical Safety Notice Standards Compliance Plastics Health Notice ...

Страница 16: ...rate this machine with any guard removed Do not attempt to bypass the two hand anti tie down feature either mechanically or electrically Do not operate while under the influence of drugs or alcohol Electrical Safety Notice This machine contains hazardous voltages that can cause serious injury or death Unplug the machine and follow appropriate lockout tagout procedures before removing any guard or ...

Страница 17: ...ics Health Notice Be aware of any governmental regulations concerning the plastic s you are assembling Certain types of plastics may emit hazardous fumes or gases while being processed Proper ventilation or respiratory protection should be utilized where necessary ...

Страница 18: ...Chapter 2 Safety User Manual 12 Vortex Precedence Rev 3 6 This page intentionally left almost blank ...

Страница 19: ...ortex Precedence Rev 3 6 Chapter 3 Unpacking Installation In this Chapter Package Contents Location mounting Power Connections Tool Leveling Centering Mounting Tool I O Connections Light Curtain Connection Remote Interface Connection Power On Sequence ...

Страница 20: ... machine The Vortex is capable of operating within the range of 323 528 VAC 50 60 Hz 3 phase 240V option 180 253 VAC 50 60Hz 3 phase The Vortex is internally fused at 12 Amperes 240V option 20 A The SCCR Short Circuit Current Rating of this machine is 100 000 Amps Use a quick disconnect fitting to connect the compressed air supply to the machine The Vortex requires 0 59 MPa 85 psi minimum of non l...

Страница 21: ...ine base 5 Adjust each of the 4 leveling bolts so that there is as little indicator movement as possible as you rotate the indicator around the lower tool plate 6 Tighten the 4 locknuts and rotate the indicator around again to verify that the plate is level If it is not level loosen the locknuts re adjust the leveling bolt and re tighten one bolt at a time until the lower tool plate is level Tool ...

Страница 22: ...ntering procedure with the new reference point Note plastic parts have irregularities More indicator movement can be expected when using the actual part as an indicator surface Upper Tool Mounting 1 Refer to the diagram in Figure 3 2 for the upper tool bolt pattern 2 Place the upper tool on the spindle using the dowel for location 3 Bolt the upper tool to the spindle using M6 x 1mm SHCS Note If th...

Страница 23: ...put connections There is additional information about how to configure the Vortex for tool I O in Chapter 6 Table 3 1 Pin Function Description 23 24 VDC 24VDC for Inputs 9 Output 2 Vacuum Vacuum output to activate lower tool vacuum at the same time as upper tool vacuum N1o2 2 10 Output 3 Configurable spare output for use with tools N1o2 3 11 Output 4 Configurable spare output for use with tools N1...

Страница 24: ...d Reset button The safe output from the light curtain is also wired to this control cable Refer to the electrical schematic and Figure 3 5 for control cable wiring information The control cable wires colors functions are in Table 3 2 Table 3 2 Wire ID Color In Out Function 24 VDC WHT BLK RED Output 24VDC for Inputs DC COM GRN BLK WHT RED BLK WHT Output 0VDC 302 BLK WHT RED Input Control Power On I...

Страница 25: ...RED BLK WHT Output 0VDC 302 BLK WHT RED Input Control Power On Input safe output from E Stop 309 ORG GRN Input Press Enable Input safe output from a safety relay CN13 i2 BLK Input Cycle Start Input CN13 i4 WHT Input Machine Reset Input toggle to reset machine to start position or to clear machine faults CN13 i5 RED Input Part Failed Acknowledge Input toggle to acknowledge the part failed output CN...

Страница 26: ...Chapter 3 Unpacking Installation User Manual 20 Vortex Precedence Rev 3 6 Figure 3 6 Output and Enable Wiring Diagram ...

Страница 27: ...wer switch located on the right side cover of the machine Pull up the red E Stop button located on the front cover Press reset to retract the head and return the spindle to the start position WARNING Moving parts can crush and cut Do not operate with guard removed Do not bypass any safety devices on this machine WARNING Rotating tool can cause injury Keep hands loose clothing and long hair away wh...

Страница 28: ...Chapter 3 Unpacking Installation User Manual 22 Vortex Precedence Rev 3 6 This page intentionally left almost blank ...

Страница 29: ...Chapter 4 Display Screens User Manual 23 Vortex Precedence Rev 3 6 Chapter 4 Display Screens In this Chapter All Screens Home Tab Setup Tab SPC Tab Machine Tab ...

Страница 30: ...on refer to Chapter 6 All Screens All screens contain the features described below Recipe Number Weld Mode Icon Indicates the selected weld mode Angle Time Distance Collapse Distance Total Security Key Icon Indicates that secure features are enabled Screen Title Current Time Touch to go to Time Date setting screen Tabs Touch repeatedly to cycle through available screens for each tab Screens Touch ...

Страница 31: ...splayed here Z height graph shows vertical position of spindle Controller and Encoder Battery Low indicators only appear when battery is low Machine Reset button Press when message box prompts that a reset is required Angular orientation indicator shows angular position of tool Angular position in degrees Message Box Displays machine messages to operator Current screen name is shown highlighted Lo...

Страница 32: ...ws the recipe to be edited Password is 1111 User level 2 Allows machine configuration parameters to be edited Password is 7896 Note A security key icon will appear to indicate that a correct password has been entered Security Log Out Touch to exit secure mode You will automatically be logged out of secure mode when secure features have not been accessed for 10 minutes User Level 0 none 1 Recipe Ed...

Страница 33: ...ral machine information Extol Inc contact information Machine power requirements Display Units Standard or Metric Current Language Touch to toggle through language options Non resettable machine lifetime cycle counter Machine IP Address Machine Name Touch name to access system setup screen User level 2 required ...

Страница 34: ...the current recipe and sets all parameters to default values Level 1 Password Password that allows editing of setup parameters Fault Reset Password If the Alarm Mode is set to Latching on the Pass Fail screen this password must be entered to continue machine operation after a part fault Overtime Enter the maximum cycle time allowed before a cycle overtime fault is generated Flow Control FC setting...

Страница 35: ...Screen The Time Date setting screen allows the user to set the current time and date Touch each item to set the correct time and date secure feature Hours must be entered in 24 hr time but will be displayed in 12hr time Touch the time on any screen to access the Time Date setting screen ...

Страница 36: ...splays a process flowchart Each phase of the Vortex assembly process is depicted and category boxes can be touched to bring up a window for editing its associated parameters The following pages describe the parameters in each window Process Flowchart Touch each box of the flowchart to edit the associated parameters Head Up There are no editable parameters associated with this phase of the process ...

Страница 37: ...art onto the upper tool and presses the Load Upper button on the main screen to turn on the vacuum pressure Detent No vacuum pressure required Operator loads the upper part onto a detented upper tool Vac Pickup Prs Pickup Operator loads both components into lower tool The head descends and engages the upper part before welding Start Mode Touch to toggle between options Static upper and lower part ...

Страница 38: ... rotates for the programmed amount of time Current Position and Angle Displays the current vertical position and angular orientation of the spindle Start Delay Enter a time to dwell after the parts are together before welding static mode only Orientation Determines whether the spindle will end at a specific angle or not always on for Revolutions Mode Final Angle Enter the angular orientation of th...

Страница 39: ...rocess Distance 2 Total Travel Mode Collapse Distance In Distance1 Collapse Mode the spindle rotates until the part has collapsed the specified distance Total Distance In Distance2 Total Travel Mode the spindle rotates until the specified Z Axis position is reached Also referred to as the final position of the spindle ...

Страница 40: ...eens User Manual 34 Vortex Precedence Rev 3 6 Hold Settings Hold Time Duration in seconds to apply the hold force after the weld cycle is complete Hold Force The force exerted by the spindle after the weld cycle is complete ...

Страница 41: ...r Limits Enter the acceptable amount above and below the target value Touch to go to Pass Fail Screen 2 Angle Time Collapse values are explained in Weld Modes section on Parameter Screen Alarm Mode No Latch Alarms are displayed to the operator and Reset must be pressed to clear the alarm Latching Alarms require a password to be reset Machine will not cycle until alarm is cleared The password is se...

Страница 42: ...recedence Rev 3 6 Pass Fail Screen 2 Total Total travel distance is explained in Weld Modes section on the Parameter Screen Touch to go to Pass Fail Screen 1 Revolutions Revolutions is the number of spindle revolutions made after the trigger position ...

Страница 43: ...g during deceleration Decrease the accel if the tool has high inertia and the machine lurches during startup Decrease the decel to increase final positioning accuracy or reduce oscillation during final positioning Tool Inertia Enter the rotary inertia of the tool This can be calculated by mechanical design software e g Solidworks or manual calculators on the internet Positioning Gain Select High M...

Страница 44: ...en The Local SPC Screens contain part data from the previous 50 cycles Local SPC Screen 1 Touch to scroll up and down through data Touch to go to the next Local SPC screen Final Angle data Weld Time data Collapse Travel Distance data Total Travel Distance data Line Number There are 50 lines of data Line 1 is the data from the most recent cycle ...

Страница 45: ...al SPC Screen 2 Line Number There are 50 lines of data Line 1 is the data from the most recent cycle Touch to scroll up and down through data Touch to go to the previous Local SPC screen Actual maximum RPM s achieved during cycle Number of revolutions counted during cycle ...

Страница 46: ...een Remote SPC allows the user to log extensive part data to a remote PC See Appendix B for instructions on the Remote SPC data collection Touch to enter unlock code When a valid code has been entered a new button appears which allows the Remote SPC output to be enabled or disabled ...

Страница 47: ...tical graph of spindle position Numeric display of spindle position Touch to move the spindle down You will be prompted to push the start buttons to initiate spindle motion Touch to turn the vacuum pressure on Touch to turn the vacuum pressure off Touch to rotate the spindle clockwise Touch to rotate the spindle counter clockwise Angular indicator of spindle position Numeric display of spindle pos...

Страница 48: ...ual 42 Vortex Precedence Rev 3 6 Input Status Screen The Input Status Screen displays the current status of the machine inputs Green Indicator Input is on Red Indicator Input is off Displayed value of Analog input List of machine inputs ...

Страница 49: ...43 Vortex Precedence Rev 3 6 Output Status Screen The Output Status Screen displays the current status of the machine outputs Green Indicator Output is on Red Indicator Output is off Displayed value of Analog output List of machine outputs ...

Страница 50: ...Chapter 4 Display Screens User Manual 44 Vortex Precedence Rev 3 6 This page intentionally left almost blank ...

Страница 51: ...r Manual 45 Vortex Precedence Rev 3 6 Chapter 5 Recipe Setup In this Chapter Overview Adjust Column Height Select Recipe Enter Tool Parameters Enter Recipe Parameters Enter Pass Fail Limits Set Safety Trigger Set Mechanical Stop ...

Страница 52: ...roke to minimize cycle time 2 Select Recipe Number On the Home Main screen select the recipe number that you wish to setup Figure 5 1 3 Enter Tool Parameters Go to the Setup Tool screen Figure 5 2 Recipe Name Touch the box and use the alphanumeric keypad to enter the recipe name Tool Weight Touch the box and enter the weight of the upper tool Tool Inertia Touch the box and enter the inertia of the...

Страница 53: ...t with a high acceleration to achieve weld speed quickly Decrease the acceleration if the tool has a high rotational inertia and erratic motion or faults are occurring when rotation begins Servo Decel Touch the box and enter the servo deceleration value as a percent of maximum A high deceleration is good because it will reduce the possibility of weld cooling and solidification during deceleration ...

Страница 54: ...he head comes down and the upper tool vacuum pressure turns on to engage the upper part before welding begins Detent Load The lower part is loaded into the lower tool and the upper part is loaded into the upper tool The upper tool is designed with a detent so that it retains the upper part without vacuum Start Mode Static start The head comes down and presses the upper and lower part halves togeth...

Страница 55: ...at is high enough numerically lower above the trigger position to account for this Approach Speed Specify head speed as it approaches the trigger from the speed transition Trigger The trigger has a different function depending on the Start Mode and Load Mode If the Load Mode is Vac Pickup or the Start Mode is Static the trigger function checks the height of the assembled parts prior to welding If ...

Страница 56: ... delay weld force and weld speed Note Only the selected weld mode controls the welding process Un selected modes can be ignored Weld Mode 1 Revolutions Beginning from the specified start angle the upper tool will rotate the number of revolutions specified and then continue rotating in the same direction until it reaches the final angle Revolutions Enter the number of revolutions to spin from the s...

Страница 57: ...mic start weld time begins at the trigger position 3 Distance 1 collapse Beginning from the specified start angle the upper tool rotates until the part has collapsed the specified distance and then quickly decelerates to a stop Collapse Specify the distance that the part is to collapse Note the actual collapse distance will be greater because of the welding that continues during deceleration and a...

Страница 58: ...ht of the spindle and tool then adjusts the air pressure in the cylinder to achieve the specified force Weld Speed Specify the rotational speed of the tool Enter a positive value for clockwise rotation Enter a negative value for counterclockwise rotation Note Actual top speed may be less if other parameters do not allow enough time to reach full speed d Hold Settings Touch the Hold area of the pro...

Страница 59: ...n is typically used only when the weld mode is Angle or orientation mode is on The target value is set to the specified final angle Specify the amount above and below the target value that is acceptable for a good part The angle is specified in degrees Time Specify the target time duration for the weld process and specify the amount above and below the target value that is acceptable for a good pa...

Страница 60: ...safety trigger is set manually and is not controlled by the machine program Instructions for setting the safety trigger 1 Place an unassembled part in the machine 2 Use the Machine Manual screen to jog the spindle down on the parts to the trigger position 3 Loosen the jam nut on the left adjustment knob behind the spindle see Figure 5 10 4 Watch the trigger actuator in the window and turn the adju...

Страница 61: ...g the spindle down on the parts to the trigger position 3 Loosen the jam nut on the right adjustment knob behind the spindle see Figure 5 10 4 Turn the adjustment knob CW until it stops 5 Watch the hard stop in the window and back it off the stop a small amount The amount to back off is determined by how far the tooling can travel before a crash occurs Note 1 turn 1 16 1 5mm travel 6 Tighten the j...

Страница 62: ...Chapter 5 Recipe Setup User Manual 56 Vortex Precedence Rev 3 6 This page intentionally left almost blank ...

Страница 63: ...Chapter 6 Operation User Manual 57 Vortex Precedence Rev 3 6 Chapter 6 Operation In this Chapter Power On Sequence Sequence of Operation Power Off Sequence ...

Страница 64: ...per load mode that you specified o Vacuum Load the upper part into the upper tool and press the Load Upper button o Vac Pickup Load the upper part onto the lower part o Detent Load the upper part into the upper tool Activate the dual opto touch start buttons to begin the cycle Continue to hold the dual opto touch start buttons until the head is completely down o Once the head is down and the safet...

Страница 65: ...3 6 return the head to the start position After the cycle completes remove the finished part If a fault occurs the head will not retract Identify the fault then press the reset button to retract the head Remove the part and place it in a failed part container ...

Страница 66: ...Chapter 6 Operation User Manual 60 Vortex Precedence Rev 3 6 Sequence of Operations Flowchart ...

Страница 67: ...Chapter 6 Operation User Manual 61 Vortex Precedence Rev 3 6 Sequence of Operations Flowchart continued ...

Страница 68: ...Chapter 6 Operation User Manual 62 Vortex Precedence Rev 3 6 Sequence of Operations Flowchart continued ...

Страница 69: ...Chapter 6 Operation User Manual 63 Vortex Precedence Rev 3 6 ...

Страница 70: ...er Pressure Regulator Up Force Equation Force Up Force Down Total Weight Desired Down Force Force Down Value Set Above Down Force from Upper Pressure Regulator Total Weight Spindle Weight Gear Box Weight Sin Mounting Angle Spindle Weight 65 lbs Gear Box Weight G1 0 lbs or G3 12 lbs or G5 12 lbs Mounting Angle 90 to 90 The Electronic Flow Control EFC is adjusted based on the desired Force A series ...

Страница 71: ...y mounted machine otherwise it would be 25 psi Lower Pressure Regulator Up Force Equation Pressure 80 psi This equals about 340 lbs of up force with the 63mm cylinder The EFC is set to a value preparing for the next cycle The EFC is not used during the head retract so motion is not affected If the desired Transition Speed is less than 20 the EFC value is increased by 20 If the desired Transition S...

Страница 72: ... Power Off Sequence When powering off your Vortex spin welder use the following procedure Remove all parts from the machine Press the red E Stop button located on the front cover of the machine base Turn off the main power switch located on the right side cover ...

Страница 73: ... Tool I O Remote Interface User Manual 67 Vortex Precedence Rev 3 6 Chapter 7 Tool I O Remote Interface In this Chapter Tool I O Wiring Tool I O Machine Setup Remote Interface Wiring Remote Interface Programming ...

Страница 74: ...on 23 24 VDC 24VDC for Inputs 9 Output 2 Pressure Vacuum Vacuum pressure output to activate lower tool pressure vacuum at the same time as upper tool pressure vacuum N1o2 2 10 Output 3 Configurable spare output for use with tools N1o2 3 11 Output 4 Configurable spare output for use with tools N1o2 4 3 Input 5 Spare input for use with tooling CN13 i5 4 Input 6 Spare input for use with tooling CN13 ...

Страница 75: ...ure 7 2 is a state graph showing how a reset is performed Figure 7 3 is a state graph showing a normal cycle with a good part Figure 7 4 is a state graph showing a normal cycle with a failed part Figure 7 5 is sample ladder logic for controlling the Vortex via the remote interface Table 7 2 Wire ID Color In Out Function 24 VDC WHT BLK RED Output 24VDC for Inputs DC COM GRN BLK WHT RED BLK WHT Outp...

Страница 76: ...Chapter 7 Tool I O Remote Interface User Manual 70 Vortex Precedence Rev 3 6 Figure 7 3 Good Part State Graph Figure 7 2 Machine Reset State Graph ...

Страница 77: ...Chapter 7 Tool I O Remote Interface User Manual 71 Vortex Precedence Rev 3 6 Figure 7 4 Failed Part State Graph ...

Страница 78: ...Chapter 7 Tool I O Remote Interface User Manual 72 Vortex Precedence Rev 3 6 Figure 7 3 Remote Programming Ladder Logic Sample ...

Страница 79: ...Chapter 8 Troubleshooting User Manual 73 Vortex Precedence Rev 3 6 Chapter 8 Troubleshooting In this Chapter Troubleshooting Guide Fault Messages Controller and Servo Drive Alarms Contact Extol ...

Страница 80: ...he part s is loaded A part present sensor is configured but not used Check the Setup Tool screen for part present inputs that are configured but not being used Load mode is set for Vacuum and upper part half is not loaded Go to the Main screen If the Load Upper button is visible be certain to load the upper part half and press the Load Upper button before attempting to start the cycle Vacuum will ...

Страница 81: ... to reset the fault If you are using the remote interface activate the servo reset input Pin 8 RESET SERVO PRESS RESET Servo is not at its start angle Press the reset button to rotate the servo to its start angle REMOTE SPC COMMUNICATION FAULT Remote SPC box is not connected to the machine Check cables between the two devices A crossover cable is required if the devices are connected directly with...

Страница 82: ...allowable range for the axis in the positive direction positive overtravel The axis may not be moved again until the alarm condition is cleared After the alarm is cleared it is permissible to execute a move which brings the axis back toward the allowed region even though the axis is probably still outside the allowed region Any move which pulls the axis further away from the allowed region will re...

Страница 83: ...unctioning incorrectly programmed or unplugged 3301 000B Setting of Pn002 digits 3 and 4 disables torque limit and or velocity limit in velocity and or torque control modes Set Pn002 xx11 to initialize 3301 000D The servo network does not support this motion control mode 3301 0018 The command position specified an instantaneous jump too large relative to the current position Sigma 5 amplifiers giv...

Страница 84: ...ke this node available update the configuration and power cycle the controller 340A 0014 After servo network reset a new I O node was discovered This I O node is not associated with any existing I O and will not be available To make this node available update the configuration and power cycle the controller 340A 0017 One or more of the axis data or configuration parameters were inconsistent or inc...

Страница 85: ...invalid gateway invalid subnet mask or the Ethernet network is not correctly configured 340C 0303 There is no route to the Modbus TCP slave Common causes include invalid Modbus TCP slave address invalid gateway invalid subnet mask or the Ethernet network is not correctly configured 340C 0304 Unable to reach the network for the Modbus TCP slave Common causes include invalid Modbus TCP slave address...

Страница 86: ...n use 340C 2115 Invalid handle for data log 340C 2116 A user log item can only support eight inputs for each type 340C 2117 Saving the log failed 340C B114 Failed to send clear alarms command 340C B117 Failed to initialize abs encoder 340C E113 The structure pointer check sum is invalid 340C E114 The structure size does not match 4202 0003 The command speed will soon reach the allowable range for ...

Страница 87: ... not sufficient to contain the configured buffer size or the configured buffer size was not large enough to contain the configured number of records The alarm history will contain fewer records than configured 4408 0002 The alarm history was configured to use NVRAM storage and the data was found to be corrupted The alarm history has been lost NOTE this alarm also occurs if the configured size of t...

Страница 88: ...Chapter 8 Troubleshooting User Manual 82 Vortex Precedence Rev 3 6 Servo Drive Alarms ...

Страница 89: ...Chapter 8 Troubleshooting User Manual 83 Vortex Precedence Rev 3 6 ...

Страница 90: ...Chapter 8 Troubleshooting User Manual 84 Vortex Precedence Rev 3 6 ...

Страница 91: ...Chapter 8 Troubleshooting User Manual 85 Vortex Precedence Rev 3 6 Servo Drive Warnings ...

Страница 92: ...Manual 86 Vortex Precedence Rev 3 6 Contact Extol Extol Incorporated 651 Case Karsten Drive Zeeland MI 49464 USA Phone 616 748 9955 Toll Free 1 800 324 6205 Fax 616 748 0555 Web www extolinc com Technical Support Phone 1 800 324 6205 ...

Страница 93: ...Chapter 9 Care Maintenance User Manual 87 Vortex Precedence Rev 3 6 Chapter 9 Care Maintenance In this Chapter Periodic Maintenance Replacing Fuses Replacing Batteries ...

Страница 94: ...d Contact Extol to perform this service Do not attempt to disassemble the servo motor Every 5 years or 20 000 hrs Servo Drive Comprehensive inspection rebuild Contact Extol to perform this service Do not attempt to disassemble the servo drive Note The adjustable height column spindle linear rails linear bearings and gearbox G3 G5 models only do NOT require periodic lubrication All moving component...

Страница 95: ... a continuity tester 6 If the fuse is blown replace it with a fuse of the same size and type FNQ R 3 7 Replace the side panel 8 Reconnect the power cord 9 Turn on On Off switch 24 VDC Fuse The Vortex has 1 DC fuse located behind the left side panel of the machine Figure 9 3 The fuse is rated at 2 amps ABC 2 Follow the steps below to replace the fuse 1 Turn off the On Off switch 2 Unplug the machin...

Страница 96: ... 6 Install the new battery and plug it in 7 Replace the side panel Encoder Battery The Yaskawa servo drive has a 3 6V lithium battery to retain the servo encoder position when power is off A battery low indicator will appear on the main screen when the battery needs to be replaced The battery Digikey part number 439 1034 ND can be obtained directly from Digikey or from Extol Note Although this is ...

Страница 97: ...Chapter 9 Care Maintenance User Manual 91 Vortex Precedence Rev 3 6 5 Remove it from its holder 6 Install the new battery 7 Replace the side panel ...

Страница 98: ...Chapter 9 Care Maintenance User Manual 92 Vortex Precedence Rev 3 6 This page intentionally left almost blank ...

Страница 99: ...Appendices User Manual 93 Vortex Precedence Rev 3 6 Appendices Appendix A Sample Application Coffee Mug Appendix B Remote SPC Data Collection Appendix C Custom Features ...

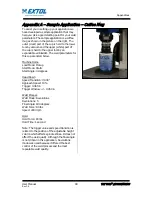
Страница 100: ...ameters for this cup are listed below Machine Home Load Mode Pickup Start Mode Static Start Angle 0 degrees Head Down Speed Transition 3 000 Approach Speed 10 Trigger 3 465 in Trigger Window 0 050 in Weld Process Weld Mode Revolutions Revolutions 5 Final Angle 180 degrees Weld Force 80 lbs Speed 2000 rpm Hold Hold Force 80 lbs Hold Time 1 second Note The trigger value and speed transition is relat...

Страница 101: ...a driver location browse to the USB Device Driver folder on the provided CD and proceed with the wizard When the drivers are installed the data station memory card will appear as a removable flash drive typically drive E in Windows Explorer Ethernet Connection Open Internet Explorer and enter the data station s IP address in the address bar ex 192 168 1 219 The data station main page will appear C...

Страница 102: ...Appendices User Manual 96 Vortex Precedence Rev 3 6 Appendix C Custom Features The following is a description of custom features unique to this Vortex ...

Страница 103: ...urtain 18 Load Mode 48 Mechanical stop 1 55 74 Messages Machine Fault 75 Model Gain 47 Orientation 50 Part Present 47 Pass Fail 30 35 36 45 53 Position Gain 46 Power 13 14 21 57 58 66 88 89 Recipe 1 4 30 45 46 48 58 Remote Interface 4 13 19 67 69 Reset 1 Revolutions 32 50 94 Revs 54 Safety 4 5 9 10 45 54 Safety trigger 1 54 58 74 SCCR 14 Servo 73 75 76 88 Servo Accel 47 Servo Decel 47 Speed Transi...

Страница 104: ...651 Case Karsten Drive Zeeland MI 49464 1 800 324 6205 www extolinc com ...

Отзывы: