66
7.2.1
Add Cardholder
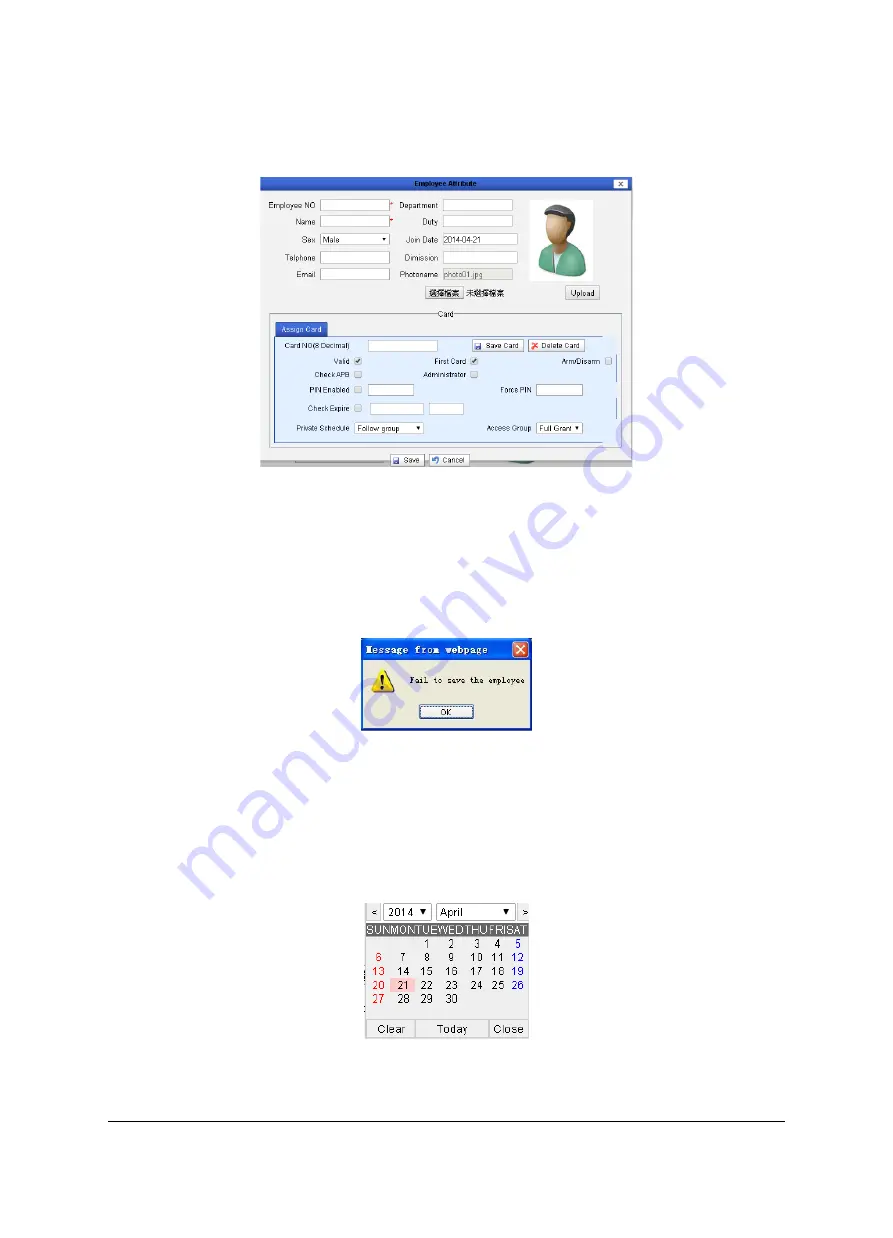
Click the “Add” button and the Cardholder Setting registration page pops up; see the figure
below:
Figure 7-8 Add Cardholder
a)
Cardholder Information Region:
The items in this region are used to set the basic
information of Cardholder.
Employee number: Any printable character. The employee number is the unique ID of
Cardholder in the system. If the employee number already exists in the system when newly
adding Cardholder, the system will display a dialog box reading, “Failed to save Cardholder
information.”
Figure 7-9 Failed to save Cardholder information
Name:
True name of Cardholder.
Gender:
The gender is male by default.
Department:
Click the department to which the new Cardholder member belongs.
Employment/Resignation date:
When clicking the input box with mouse, a time selection
box pops up, in which the employment date of Cardholder is selected; year and month are
selected in the upper part and the day is selected in the middle part.
Figure 7-10 Calendar
Photo:
Click the “Browse” button, then the selection page for uploading photo pops up.
Select photo and the click the “Upload” button.


