


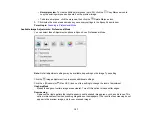


• To resize the scan area, place your cursor over the edge or corner of the marquee, then click and
drag the edges where you want them. (Hold down the
Shift
key as you resize the marquee to
retain the same width/height proportions.)
• To create additional marquees (up to 50), click the
Copy Marquee icon to copy the existing
marquee and paste it on the preview image.
• To delete a marquee, click the marquee, then click the
Delete Marquee icon.
3.
Click inside each scan area and make any necessary settings in the Epson Scan window.
Parent topic:
Available Image Adjustments - Office Mode
You can select these Image Adjustments options in Epson Scan Office Mode.
Note:
Select the
Image Option
checkbox if you need to set any of the grayed-out image adjustments.
Not all adjustment settings may be available, depending on the Image Type setting.
Unsharp Mask
Makes the edges of certain image areas clearer. Turn off this option to leave softer edges.
Descreening
Removes the ripple pattern that might appear in subtly shaded image areas, such as skin tones. This
option improves results when scanning magazines or newspapers. (The results of descreening do not
appear in the preview image, only in your scanned image.)
120
Содержание WorkForce Pro WP-4530
Страница 1: ...WorkForce Pro WP 4530 User s Guide ...
Страница 2: ......
Страница 12: ......
Страница 13: ...WorkForce Pro WP 4530 User s Guide Welcome to the WorkForce Pro WP 4530 User s Guide 13 ...
Страница 20: ...Printer Parts Inside 1 Ink cartridge slots 2 Front cover 3 Print head Parent topic Product Parts Locations 20 ...
Страница 28: ...4 Load a stack of paper printable side down in the cassette as shown 28 ...
Страница 32: ...2 Pull up the rear MP tray 3 Flip the feeder guard forward then slide the edge guides outward 32 ...
Страница 35: ...2 Pull up the rear MP tray 3 Flip the feeder guard forward then slide the edge guides outward 35 ...
Страница 50: ...Parent topic Placing Originals on the Product 50 ...
Страница 51: ...Related topics Copying Scanning Faxing 51 ...
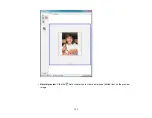
Страница 111: ... Normal preview Click the Auto Locate icon to create a marquee dotted line on the preview image 111 ...
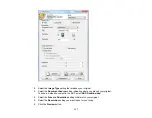
Страница 115: ...3 Adjust the scan area as necessary 115 ...
Страница 122: ...122 ...
Страница 130: ...3 Adjust the scan area as necessary 130 ...
Страница 176: ...5 Select Fax Settings for Printer You see this window 176 ...
Страница 177: ...6 Select your product 7 Select Speed Dial Group Dial List You see this window 177 ...
Страница 215: ...215 ...
Страница 220: ...220 ...
Страница 225: ...Parent topic Cleaning and Transporting Your Product Related concepts Print Head Cleaning Print Head Alignment 225 ...
Страница 240: ...3 Remove any jammed paper inside the cassette 4 Remove any paper jammed inside the paper cassette slot 240 ...
Страница 242: ...3 Carefully remove the jammed paper 4 If paper is jammed in the duplexer remove the paper as shown 242 ...
Страница 246: ...6 Lower the document cover 7 Raise the ADF input tray 8 Carefully remove the jammed pages 246 ...