


88
Grease Kit
Use the grease kit that came with your product to apply grease to the carriage rods.
Number
Part
Quantity
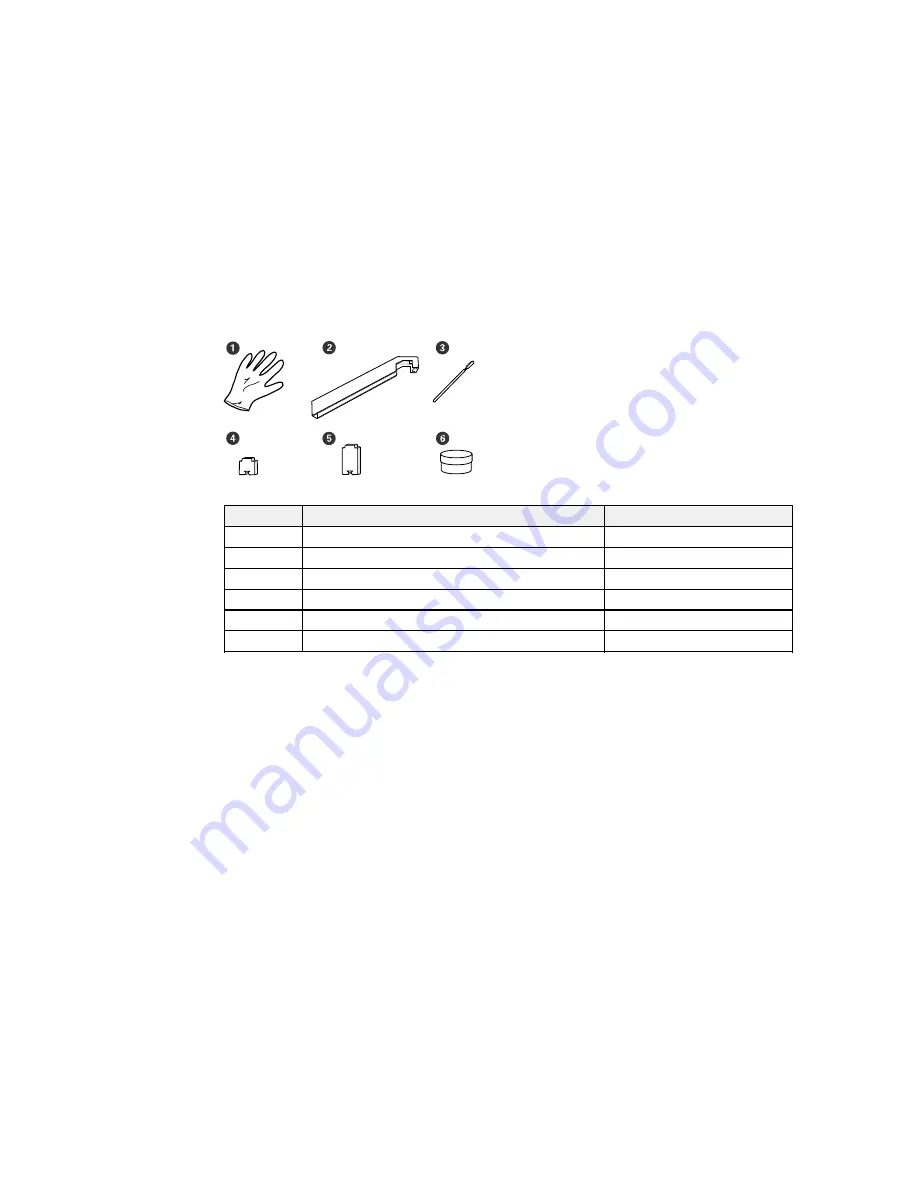
1
Gloves
16
2
Grease tool
1
3
Cleaning stick
8
4
Pad A
16
5
Pad B
16
6
Grease
2
Parent topic:
Preparing for Maintenance
Maintenance Precautions
Follow these precautions as you maintain your product:
• Remove loaded media from the product before performing any maintenance tasks.
• Touch a metal object to discharge any static electricity before performing any maintenance tasks.
• Never touch the belts, cables, circuit boards, or other parts not covered in the maintenance task steps
or you could adversely affect the print quality or damage your product.
• Use only the cleaning sticks included in the product maintenance kit to clean your product to avoid
damaging the print head.
• Do not reuse cleaning sticks.
Содержание SureColor S40600
Страница 1: ...Epson SureColor S40600 S60600 S80600 User s Guide ...
Страница 2: ......
Страница 28: ...28 Printable side in 8 On the left side of the product raise the lift lever to lift the media into position ...
Страница 30: ...30 11 Push the right roll holder into the roll media then lower the lift lever ...
Страница 32: ...32 13 Fully tighten the knob on the roll holder ...
Страница 44: ...44 2 Pull the other end of the tape straight down and attach it to the roll core using adhesive tape as shown ...
Страница 45: ...45 3 Set the Auto switch to the position 4 Lower the tension bar until it lightly touches the paper tape ...
Страница 47: ...47 2 Pull the other end of the tape straight down and attach it to the roll core using adhesive tape as shown ...
Страница 48: ...48 3 Set the Auto switch to the position 4 Lower the tension bar until it lightly touches the paper tape ...
Страница 67: ...67 1 3 6 inches 92 mm Parent topic Media Handling Related references Printer Setup Menu Settings ...
Страница 98: ...98 4 Use the flat side of the cleaning stick to clean the outside of each cap ...
Страница 100: ...100 6 If a film of ink remains after cleaning with the cleaning stick use tweezers to remove it ...
Страница 101: ...101 7 Remove any lint or dust from the inside of the caps using the tip of a cleaning stick or tweezers ...
Страница 111: ...111 8 Place the new wiper unit in the printer as shown and press it down until it clicks into place ...
Страница 116: ...116 5 Remove the left media edge plate then remove the right media edge plate in the same manner ...
Страница 117: ...117 6 Align the white line on a new media edge plate with the edge of the platen ...


