background image

are not cleared even after performing head cleaning several times. If this is the case, try washing the
tubes for the target ink.

Before you clean the ink tube, you may want to have new ink and cleaning cartridges handy (in case you
run out of ink) and a new waste ink bottle (if a message prompts you that there is not enough free space
in the current bottle).

Note:

If you start the tube washing process and do not have enough cleaning liquid in the cartridges, you

will not be able to use your printer until new cleaning cartridges are installed.

1.

Unpack the cleaning cartridges.

2.

Turn on the printer.

3.

Press the

maintenance button.

The Maintenance menu appears.

4.

Press the up or down arrow button to highlight

Tube Washing

, and press the right arrow button.

5.

Press the up or down arrow button to highlight

White Ink

, and press the right arrow button.

Note:

If you need to wash the color ink tube to help clear a clogged nozzle, select

Color Ink

.

6.

Press the up or down arrow button to highlight

Yes

, and press the

OK

button.

7.

Press the

OK

button again to start washing the tube.

8.

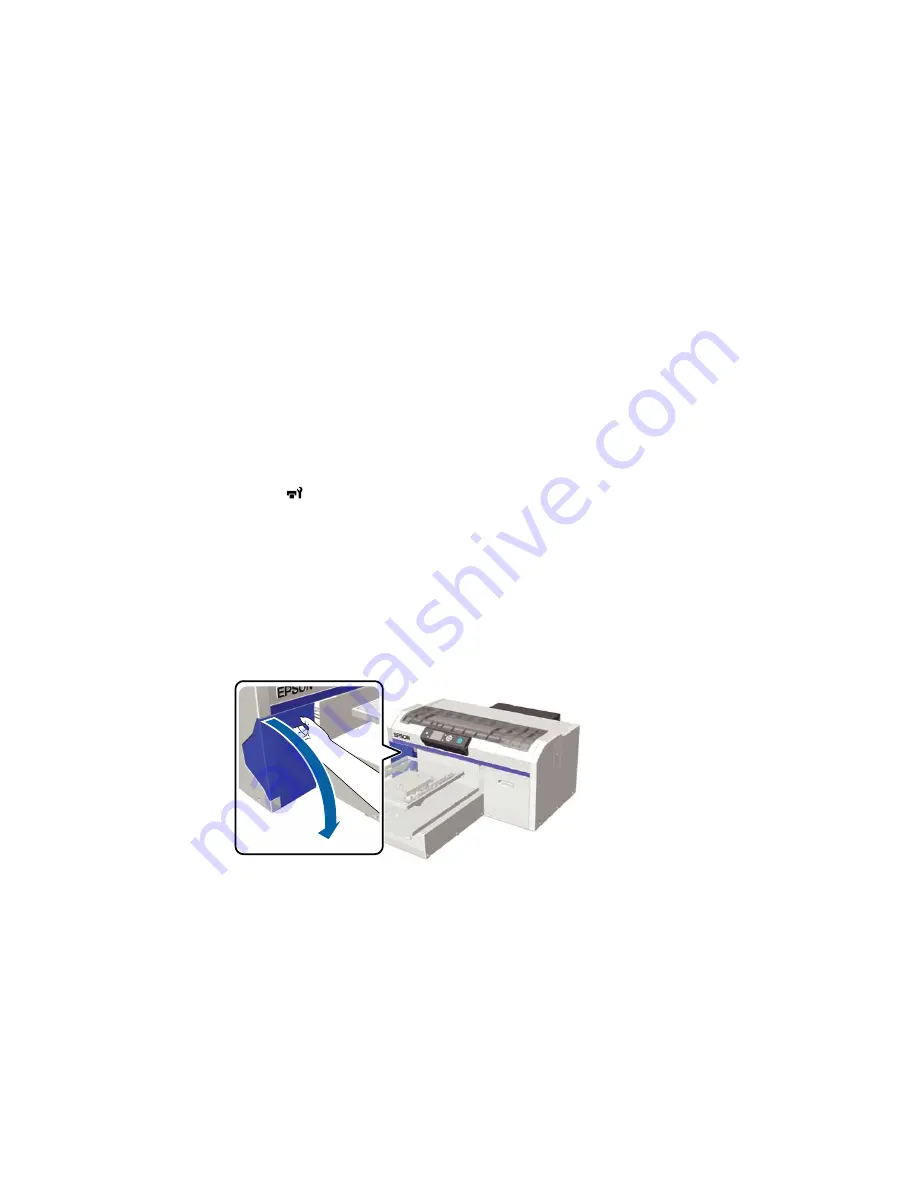
Open the left ink cartridge cover.

97

Содержание SureColor F2000 Series

Страница 1: ...Epson SureColor F2000 Series User s Guide ...

Страница 2: ......

Страница 3: ...ling Ink and Cleaning Cartridges 20 Handling White Ink White Edition 21 Handling T shirts Media 22 Basic Printing 24 Overview of the Printing Process 24 Required Equipment 25 Pre treating a T shirt 27 Pre treatment Solution Safety Precautions 27 Preparing the Pre treatment Solution 28 Diluting the Pre treatment Solution 31 Pre treatment Application Guidelines 32 Pre treating a T shirt with a Rolle...

Страница 4: ...at Tunnel 55 Printing from a USB Memory Device 57 USB Memory Device Requirements 57 Connecting and Printing from a USB Memory Device 58 Printing on Thick Material 60 Removing the Round Platen Height Indicator 60 Installing the Round Platen Height Indicator 65 Maintenance 67 Maintenance Guidelines 67 Maintenance Safety Instructions 68 Print Head Maintenance 68 Performing a Nozzle Check 69 Cleaning ...

Страница 5: ... 121 Transportation Preparation 122 Moving the Printer 122 Moving the Printer Through a Narrow Doorway 124 Setting Up the Printer After Transport 128 Using the Control Panel Menus 129 Accessing the Printer s Menus 129 USB File List Menu Settings 130 Maintenance Menu Settings 131 Printer Setup Menu Settings 133 Print Logs Menu Settings 134 Printer Status Menu Settings 135 Administrator Menu Setting...

Страница 6: ...ity Is Poor White Edition 152 Ink Stains Appear Outside the Printed Areas 153 Printer Status Sheet or Logs Print Incorrectly 153 Where to Get Help 153 Technical Specifications 155 Windows System Requirements 155 Mac System Requirements 156 Printer Specifications 157 Electrical Specifications 157 Environmental Specifications 158 Dimension Specifications 158 Ink Cartridge Specifications 158 Cleaning...

Страница 7: ...Software License Terms 166 Trademarks 173 Copyright Notice 174 A Note Concerning Responsible Use of Copyrighted Materials 174 Copyright Attribution 174 7 ...

Страница 8: ......

Страница 9: ...Epson SureColor F2000 Series User s Guide Welcome to the Epson SureColor F2000 Series User s Guide For a printable PDF copy of this guide click here 9 ...

Страница 10: ...er system automatically cleans the surface of the print head nozzles for better print quality High Resolution UltraChrome DG pigment ink optimized for textile printing for smooth gradations and high color reproducibility High density white printing using White ink and pre treatment solution developed specially for Epson pigment ink textile printers White Edition Easy to use setup and operation fea...

Страница 11: ... T724000 Printer air filter C13S092021 Large garment platen 16 inch 20 inch 40 6 50 8 cm C12C890911 Medium garment platen 14 inch 16 inch 35 5 40 6 cm C12C890912 Medium grooved garment platen 14 inch 16 inch 35 5 C12C932151 40 6 cm Small garment platen 10 inch 12 inch 25 4 30 5 cm C12C890913 Extra small garment platen 7 inch 8 inch 17 8 20 3 cm C12C932131 Sleeve platen 4 inch 4 inch 10 2 10 2 cm C...

Страница 12: ...d damage to your equipment Notes contain important information about your printer Tips contain additional printing information Parent topic Introduction to Your Printer Printer Part Locations Check the printer part illustrations to learn about the parts on your printer Printer Parts Front Top Printer Parts Inside Printer Parts Back Control Panel and LCD Screen Parent topic Introduction to Your Pri...

Страница 13: ... cartridge cover left 4 Platen 5 Moveable base 6 Parallel adjustment plate 7 Height adjustment lever 8 Fixing lever 9 Ink cartridge cover right 10 Tool storage space 11 Ink cartridges 12 Control panel Parent topic Printer Part Locations 13 ...

Страница 14: ...Printer Parts Inside 1 Encoder strip carriage scale 2 Carriage shaft 3 Flushing pad 4 Air filter 5 Print head 6 Anti drying caps 7 Suction cleaning cap 8 Fabric wiper unit 14 ...

Страница 15: ...Parent topic Printer Part Locations Printer Parts Back 1 AC inlet 2 Waste ink outlet left 3 Tube clamp 4 Waste ink bottle holder 5 Waste ink bottle 6 Waste ink tube 15 ...

Страница 16: ...t 12 Air inlet Parent topic Printer Part Locations Control Panel and LCD Screen Control Panel Buttons and Lights 1 The power light 2 The power button 3 The cancel button 4 The LCD screen 5 The moveable base button 6 Left arrow button 7 Up down arrow buttons 8 The OK button 16 ...

Страница 17: ... 12 The start light 13 The maintenance button 14 The error light LCD Screen 1 Display 2 Print job name 3 USB memory device status 4 Platen size 5 Waste ink bottle status 6 Ink cartridge status 7 Total prints current print job Parent topic Printer Part Locations 17 ...

Страница 18: ...er Waste ink must be allowed to drain freely into the waste ink bottle Cut waste ink tubes down to size to fit the installation space if necessary If an error occurs and the printer is turned off without first resolving the error the print head may not be capped on the right side which may cause the print head to dry out In this case turn on the power and wait a while until capping is performed au...

Страница 19: ...ration If you do not print for a long time the print head nozzles may become clogged If you do not use the printer for a long time make sure you check for clogged nozzles before printing If clogged nozzles are detected clean the suction cleaning cap and then clean the print head Even if the printer is not turned on ink that has accumulated in the waste ink tubes may leak out Make sure the waste in...

Страница 20: ... To ensure print quality use ink and cleaning cartridges within one year of installing them Allow ink cartridges and cleaning cartridges that have been stored at low temperatures for an extended period of time to return to room temperature over a period of four hours before use Do not touch the IC chips on the cartridges Doing so may prevent normal operation and printing Install ink and cleaning c...

Страница 21: ...he quality of the print head the printer stops printing before ink cartridges are completely expended Note The ink cartridges may contain recycled materials this does not affect printer functions or performance Parent topic Printer Usage Guidelines Related references Handling White Ink White Edition Related tasks Shaking and Replacing the Ink Cartridges Handling White Ink White Edition Follow thes...

Страница 22: ...White Edition Shaking and Replacing the Ink Cartridges Handling T shirts Media Follow these guidelines as you handle and store printed T shirts Avoid storing T shirts in direct sunlight or in locations that are subject to excessive heat or humidity If T shirts are stored in a hot place after printing the printed surface may soften and become sticky Do not dry clean printed T shirts Turn printed T ...

Страница 23: ...is applied to a white or light colored T shirt the treated side may turn yellow Print soon after applying the pre treatment solution and wash in water Avoid direct sunlight if you store the T shirt without printing For light colored T shirts let the pre treatment solution dry before heat pressing otherwise staining may occur Parent topic Printer Usage Guidelines 23 ...

Страница 24: ...epare the equipment you need for printing 2 Pre treating the T shirt When printing with White ink White Edition apply pre treatment solution to the T shirt before printing and make sure the pre treatment solution is completely dry before printing If the T shirt is creased use a heat press to smooth it 3 Preparing the Printer Turn on the printer and make sure it is functioning properly 4 Creating Y...

Страница 25: ...the pre treatment solution and ink Your heat press needs to be larger than your platen and able to sustain a temperature of 338 F 170 C or more for 90 seconds Check the accuracy of your heat press temperature with a probe temperatures exceeding 356 F may result in dull colors For best results use a heat press with a foam sheet or mat to allow the steam to escape Heat tunnel commercially available ...

Страница 26: ...ed to apply the pre treatment solution to the T shirt The tray is used to allow the pre treatment solution to soak into the roller Choose a paint roller made of short polyester fiber with excellent liquid absorption The handle of the roller should be made from aluminum to prevent rusting When using a paint roller make sure to apply the pre treatment solution evenly or the whiteness may not be as b...

Страница 27: ...uth immediately take the following actions If you get pre treatment solution on your skin immediately wash it off using soap and water Consult a physician if your skin is irritated or discolored If pre treatment solution gets in your eyes rinse immediately with water Failure to observe this precaution could result in bloodshot eyes or mild inflammation If problems persist consult a physician If pr...

Страница 28: ...aste ink Caution Pre treatment solution is classified as industrial waste and must be disposed of by an industrial waste disposal company according to local laws and regulations When handing over the pre treatment solution to an industrial waste disposal company make sure you include these safety precautions Parent topic Pre treating a T shirt Preparing the Pre treatment Solution Prepare the pre t...

Страница 29: ...ction out of the hole in the cardboard Note Make sure you pull the cap section out of the hole in the cardboard If the cap is opened without being pulled out the pre treatment solution may spill out 3 Remove the cap 29 ...

Страница 30: ...4 Remove the tap from the bag and turn the tap s handle section until the hole is visible as shown Note If you cannot see the hole or if the tap is damaged contact Epson 5 Attach the tap 30 ...

Страница 31: ... T shirt make sure you dilute it correctly with distilled or purified water as described here Caution If you do not dilute the pre treatment solution it leaves noticeable traces on the T shirt or the printed surface cracks after washing If the pre treatment solution is too weak White ink does not adhere to the fabric and the desired whiteness cannot be achieved When fixing ink with a heat press Ga...

Страница 32: ...atment solution to the entire T shirt make sure to test it on a non visible area first Apply the diluted pre treatment solution to the T shirt with a roller or use the spray method according to these guidelines Fixing method Amount of diluted solution to apply Heat press Apply 0 0054 to 0 0073 ounce per square inch 0 16 to 0 21 g per square inch Heat tunnel Apply 0 0054 ounce per square inch 0 16 ...

Страница 33: ...n this aligns the fabric fibers to the direction of the print head movement 5 Fix the pre treatment solution with a heat press if necessary Note The T shirt fibers must be pressed flat to produce even whiteness Even if you use a heat tunnel to fix the ink use a heat press to fix the pre treatment solution before printing Parent topic Pre treating a T shirt Related references Fixing the Pre treatme...

Страница 34: ...the Pre treatment Solution Heat Press Related tasks Diluting the Pre treatment Solution Fixing the Pre treatment Solution Heat Press If you are using a heat tunnel to fix the ink you must use a heat press before printing to remove creases from the T shirt and to fix the pre treatment solution Always place a heat resistant release sheet such as silicon paper between the T shirt and the heat press N...

Страница 35: ...y using water to wash them off Application area size Temperature Time Pressure Letter A4 and smaller 338 F 170 C 45 seconds 6 Psi Larger than letter A4 45 90 seconds Note Optimum conditions may vary depending on the type of heat press used make sure to test in advance to determine the correct conditions for your heat press Parent topic Pre treating a T shirt Preparing Your Printer Before transmitt...

Страница 36: ...Area Parent topic Basic Printing Data Creation and Transmission Guidelines For best results select sRGB colors when creating data to be printed on a T shirt sRGB colors are closer to the actual print results You can print in these formats from Garment Creator TIFF JPEG PNG BMP You can transmit data only when the printer is not printing While the printer is receiving data only these operations are ...

Страница 37: ...8 mm Medium medium 14 16 inch 356 406 mm grooved Small 10 12 inch 254 305 mm Extra small 7 8 inch 178 203 mm Sleeve 4 4 inch 102 102 mm Inside the platen frame you cannot print on the areas shown in gray Sleeve platen 1 0 47 inch 12 mm 2 Platen frame 3 Top section 37 ...

Страница 38: ...Platen frame 3 Top section Parent topic Creating Your T shirt Design Loading the T shirt Refer to these sections to load your T shirt into the printer Replacing the Platen Loading a T shirt on the Platen Adjusting the Height of the Platen 38 ...

Страница 39: ...g on the size of the T shirt Note There are five platen sizes extra small small medium large and sleeve The medium size platen standard is supplied with the printer 1 If the platen is not in the forward position press the moveable base button to move the platen forward 2 Hold the left and right sides of the platen and lift it up 39 ...

Страница 40: ...ith a different size Parent topic Loading the T shirt Related concepts Print Head Alignment Loading a T shirt on the Platen Before printing carefully load a T shirt on the platen Note For information about loading a sleeve platen see the manual supplied with the sleeve platen 1 If the platen is not in the forward position press the moveable base button to move the platen forward 40 ...

Страница 41: ...2 Remove the platen frame 3 Load the T shirt so that the shoulders are facing the front of the printer as shown 41 ...

Страница 42: ...4 Smooth out the print surface so that it is flat 42 ...

Страница 43: ... the T shirt if you have not applied pre treatment solution If not removed lint and fibers may stick to the print head and stain other areas of the print Remove any lint using sticky tape or a lint roller and press the fibers flat using a hard roller 43 ...

Страница 44: ...the T shirt outside of the frame to remove any slack Note The printer detects the highest part of the garment surface and adjusts the height accordingly If there are any wrinkles creases or slack near the inside edge of the frame a platen height error 44 ...

Страница 45: ...ch the T shirt so much that the printed image will be distorted 8 Tuck the T shirt in around the frame so that it does not drape over the movable base 9 Reposition the platen frame a final time to make sure the garment is securely held down but not stretched 45 ...

Страница 46: ...e of printing If this happens try placing the T shirt over the platen as shown If the sensor is still triggered try the following 1 Check that the platen height is set to position 3 for a standard T shirt 2 Remove the frame and smooth out the creases and slack 3 Reduce the width of the White ink in the printer s Garment Creator software or the RIP software so that the white under base print does n...

Страница 47: ...en height If the printer displays a Ready message at position number 2 select position number 3 as the optimum platen height Position number LCD message P Platen Height Error 1 Platen Height Error 2 Ready 3 Ready optimum platen height Note The positions above assume that the printed surface of the garment is the highest surface on the platen Seams collars zippers pockets and other raised areas wil...

Страница 48: ...2 Loosen the fixing lever beneath the platen 3 Move the height adjustment lever to adjust the height of the platen to one of these starting positions Standard T shirt 3 48 ...

Страница 49: ... to 8 Note If you remove the round part of the base to print on thick fabrics the height adjustment position numbers are no longer visible 4 To select a different adjustment height move the height adjustment lever to the desired position 49 ...

Страница 50: ... the LCD screen and do one of the following If it is not displayed repeat steps 1 through 6 and move the height adjustment lever one step to the left to raise the platen Continue to raise the platen until the error is displayed If it is displayed on the LCD screen repeat steps 1 through 6 and move the height adjustment lever one step to the right to lower the platen Parent topic Loading the T shir...

Страница 51: ...e right and adjust it to the preferred position 2 When you reach the desired position release the lever Parent topic Loading the T shirt Starting and Cancelling Printing Refer to these sections to start or cancel your print job 51 ...

Страница 52: ...lling a Print Job You can cancel a print job or cancel data that is being received by the printer using the printer s control panel Note You cannot cancel printing from the Garment Creator software once the computer has finished sending data to the printer See the Garment Creator online help for more details 1 Press the cancel button on the printer s control panel 2 Press the up or down arrow butt...

Страница 53: ... ink Removing a Printed T shirt Fixing the Ink Parent topic Basic Printing Removing a Printed T shirt After you print an image on a T shirt remove it from the platen frame Because the ink has not yet been fixed to the T shirt do not to touch the printed surface when you handle the T shirt 1 Remove the platen frame 53 ...

Страница 54: ...eat press or a heat tunnel If the ink is not sufficiently fixed colors may come out in the wash or when rubbed Note If you have applied pre treatment solution make sure to wash the T shirt before wearing it Fixing conditions differ between the heat press and the heat tunnel As the optimum conditions vary depending on the type of heat press or heat tunnel used and the amount of ink use the values i...

Страница 55: ...f the pre treatment solution is dry Parent topic Fixing the Ink Fixing Conditions Heat Tunnel Optimum conditions vary depending on the heat tunnel Test and check the results in advance to determine the correct temperature and duration Note The temperature in the tables here refer to the temperature of the fixing surface of the T shirt not the internal temperature of the heat tunnel If the surface ...

Страница 56: ...Parent topic Fixing the Ink 56 ...

Страница 57: ...irements Make sure your USB memory device meets these requirements Note Connections that use an extension cable a USB hub or a card reader cannot be guaranteed FAT device compatible with Windows Format type FAT 32 No security functions such as encryption or passwords Memory capacity Up to 128GB Partitions 1 Requirements for data Data name Up to 255 single byte characters Data size Up to 4GB Number...

Страница 58: ...e List is highlighted and press the right arrow button 5 Confirm that Select Print File is highlighted and press the right arrow button 6 Press the up or down arrow button to highlight the data you want to print and press OK 7 Press the up or down arrow button to set the number of copies and press OK 8 Load the T shirt on the platen and press the start button Note If you press the maintenance butt...

Страница 59: ...rinting the current data Note To delete data from a USB memory device select Delete Print File in step 5 above and press the up or down arrow button to select the data you want to delete Follow the instructions on the LCD screen to continue Parent topic Printing from a USB Memory Device Related tasks Cancelling a Print Job Related topics Loading the T shirt 59 ...

Страница 60: ...the round platen height indicator when using a sleeve platen Removing the Round Platen Height Indicator Installing the Round Platen Height Indicator Removing the Round Platen Height Indicator Lower the height of the printing surface by removing the round platen height indicator attached beneath the height adjustment lever 1 If the platen is not in the forward position press the moveable base butto...

Страница 61: ...4 Loosen the fixing lever 5 Remove the screw that secures the parallel adjustment plate Keep the removed screw in a safe place 61 ...

Страница 62: ...arallel adjustment plate Note Be careful not to drop the parallel adjustment plate iIt is a precision component 7 Remove the three screws inside the height adjustment lever Keep the removed screws in a safe place 62 ...

Страница 63: ...und platen height indicator attached beneath the height adjustment lever Note After removing the round platen height indicator the current height position is not displayed When loading media follow the height adjustment procedure to adjust the height 63 ...

Страница 64: ...10 Attach the height adjustment lever Do not attach the screws you removed in step 7 11 Attach the parallel adjustment plate Do not attach the screw removed in step 5 64 ...

Страница 65: ... holes in the moveable base and place the platen on the printer Parent topic Printing on Thick Material Installing the Round Platen Height Indicator To install the round platen height indicator follow the steps for removing it in reverse order making sure to secure it with the screws that you removed 65 ...

Страница 66: ...protrusion on the round section with the hole as shown If you install it in an incorrect direction the height adjustment lever does not move Parent topic Printing on Thick Material Related tasks Removing the Round Platen Height Indicator 66 ...

Страница 67: ...g Around the Print Head Cleaning the Platen Path Storing the Printer Cleaning the Printer Maintenance Guidelines To maintain optimum print quality you need to periodically perform various maintenance tasks and clean and replace parts Before cleaning the suction cap replacing the head cleaning set disposing of waste ink cleaning the encoder strip carriage scale cleaning around the print head cleani...

Страница 68: ...function or decline in print quality Always use new cleaning sticks to avoid getting the printer parts dirty Do not touch the tip of the cleaning stick with your hand Oils on your hand may compromise cleaning ability Do not use water or organic solvents such as alcohol on the suction cap or the wiper unit If ink is mixed with water or alcohol it may solidify Do not wipe the suction cap or the anti...

Страница 69: ...ing or gaps in the printed result This cleans the surface of the print head to improve the print quality Performing a Nozzle Check Cleaning the Print Head Parent topic Maintenance Performing a Nozzle Check To maintain optimum print quality perform a nozzle check before printing 1 If the platen is not in the forward position press the moveable base button to move it forward 2 Make sure that the M s...

Страница 70: ...trol panel The Maintenance menu appears 6 Press the up or down arrow button to highlight Nozzle Check and press the right arrow button 7 Press the OK button twice The nozzle check pattern prints directly onto the platen 8 Check the printed pattern If there are no gaps in the pattern the nozzles are clean 70 ...

Страница 71: ...ending on the cleaning method selected You can select from three levels of head cleaning Use light or medium level for normal cleaning If you cannot clear the clogged nozzles after cleaning with the light or medium level several times check the condition of the suction cap and if necessary clean it before using the heavy cleaning level Note After the initial ink charging the printer cleans the pri...

Страница 72: ...ad Maintenance Related tasks Performing a Nozzle Check Print Head Alignment A gap between the print head and the T shirt may cause ink misalignment that produces grainy or blurry printouts This occurs due to the environmental temperature and humidity inertial force of the print head movements direction of the print head movement and thickness and texture of the media Ink misalignment can also occu...

Страница 73: ...check pattern is printed Note The check pattern is printed at the same size as the top surface of the parallel adjustment plate 9 Look at the printed check pattern and choose the pattern number with the least amount of white space between the lines For example in the image here 5 is the best pattern 10 When C is displayed on the control panel press the up or down arrow button to select the best pa...

Страница 74: ...iscolored If cleaning solution gets in your eyes rinse immediately with water Failure to observe this precaution could result in bloodshot eyes or mild inflammation If problems persist consult a physician If cleaning solution gets in your mouth consult a physician immediately If cleaning solution is swallowed do not induce vomiting and consult a physician immediately If vomiting is induced fluid m...

Страница 75: ...stick or cleaning cloth in the ink cleaning solution and let it soak in Make sure that the solution does not drip from the cleaning stick or cleaning cloth when you remove it from the cup 4 Clean the suction cap and encoder strip carriage scale as necessary Parent topic Maintenance Related tasks Cleaning the Suction Cap 75 ...

Страница 76: ...ire waste ink bottle do not pour waste ink into another container Never remove the waste ink bottle during printing print head cleaning ink tube washing or replacement of the White ink Waste ink may leak The printer calculates the amount of waste ink in the waste ink bottle and displays a warning message when it is close to the limit If the waste ink bottle fills up during printing replace it with...

Страница 77: ...strial waste disposal company make sure you include the Safety Data Sheet found on Epson s support website Parent topic Disposing of Used Consumables and Optional Parts Related tasks Replacing the Waste Ink Bottle Replacing the Waste Ink Bottle When you see the Prepare empty waste ink bottle message on the printer s LCD screen you need to replace the waste ink bottle Caution When replacing the was...

Страница 78: ...2 Remove the waste ink tube from the used waste ink bottle and insert it into the new waste ink bottle Be careful not to spill any ink remaining in the tube 78 ...

Страница 79: ...3 Place the inner and outer caps you removed from the new waste ink bottle on the used waste ink bottle 79 ...

Страница 80: ...le If the waste ink tube comes out of the bottle waste ink will spill out 5 Press the OK button 6 Press the OK button to clear the waste ink counter Note If you replaced the waste ink bottle before the replacement message appeared on the control panel press the maintenance button and select Waste Ink Counter to clear the waste ink counter Parent topic Disposing of Used Consumables and Optional Par...

Страница 81: ...continue to use the printer without cleaning the suction cap the ink nozzles may clog and print quality may decline 1 Turn on the printer 2 Press the maintenance button The Maintenance menu appears 3 Press the up or down arrow button to select Head Cap Cleaning and press the right arrow button 4 Press the up or down arrow button to select Yes and press the OK button The platen and print head move ...

Страница 82: ... cap remove it with the supplied plastic tweezers Caution Use only the supplied plastic tweezers Be careful not to damage the suction cap If the suction cap is damaged air may leak and the print head may become dry or difficult to clean 82 ...

Страница 83: ...ke sure ink cleaner does not drip onto the anti drying caps to the right of the suction cap If any cleaner does drip wipe it with a dry cleaning stick If cleaner is left on the anti drying caps the print head nozzles could become clogged 8 Wipe the outside of the suction cap with a large cleaning stick 83 ...

Страница 84: ...9 Wipe the top edge of the suction cap with a large cleaning stick 84 ...

Страница 85: ...ink from the cap 11 Close the printer cover 12 Press the OK button The print head returns to its normal position and the Settings menu closes 13 Perform a nozzle check Parent topic Maintenance Related tasks Performing a Nozzle Check 85 ...

Страница 86: ...g Set and press the right arrow button 4 Press the right arrow button again 5 Press the up or down arrow button to select Yes and press the OK button The platen and print head move to the maintenance position Note Never move the print head or platen manually otherwise a malfunction may occur 6 Replace the parts of the head cleaning set in the following order Wiper unit Anti drying caps Flushing pa...

Страница 87: ...1 Open the printer cover 2 Unpack the new wiper unit and retain the packaging for disposing of the used wiper unit 3 Put on the gloves supplied with the head cleaning set 87 ...

Страница 88: ...4 Place your fingers into the groove at the back of the wiper unit and raise it slightly as shown 5 Grasp the wiper unit as shown and lift it out of the printer 88 ...

Страница 89: ...and dispose of it according to your local laws and regulations Caution The wiper unit is classified as industrial waste When handing it over to the industrial waste disposal company make sure you include the safety data sheet 7 Insert the new wiper unit into the printer as shown 89 ...

Страница 90: ...down on the wiper unit until you hear it click into place 9 Unpack the new anti drying cap and retain the packaging for disposing of the used anti drying cap 10 Remove the cover from the new anti drying cap 90 ...

Страница 91: ...anti drying cap from the printer press the lever toward you as shown here and lift out the anti drying cap 12 Place the cover on the old anti drying cap and put it in the bag you retained from the new anti drying cap 91 ...

Страница 92: ...t Yes and press the OK button 17 Press the OK button again to move the print head to the flushing pad replacement position Parent topic Replacing the Head Cleaning Set Related tasks Replacing the Flushing Pad Replacing the Flushing Pad Replace the flushing pad after replacing the wiper unit and anti drying caps included in the head cleaning set Note The flushing pad wiper unit and anti drying caps...

Страница 93: ...1 Open the printer cover 2 Unpack the new flushing pad 93 ...

Страница 94: ...3 Gently lift up the flushing pad using its tab Caution Lift the flushing pad carefully as ink could fly out if it is raised with too much force 94 ...

Страница 95: ...t an angle and wait until the waste ink stops dripping into the receptacle beneath it If waste ink drips into the printer clean it up immediately 5 Place the used flushing pad into the bag that contained the new flushing pad 95 ...

Страница 96: ...ed tasks Replacing the Wiper Unit and Anti drying Caps Washing the White Ink Tubes White Edition The printer s White ink tubes can build up sediment causing the whiteness to decline or become uneven if you continue printing with white ink For best results wash the white ink tube periodically A message appears on the control panel when the White ink tube needs washing Note Make sure to clean the su...

Страница 97: ...es you will not be able to use your printer until new cleaning cartridges are installed 1 Unpack the cleaning cartridges 2 Turn on the printer 3 Press the maintenance button The Maintenance menu appears 4 Press the up or down arrow button to highlight Tube Washing and press the right arrow button 5 Press the up or down arrow button to highlight White Ink and press the right arrow button Note If yo...

Страница 98: ... your finger in the indentation on top of the ink cartridge and pull it straight out Note Removed ink cartridges may have ink around the ink supply port so be careful not to get ink on the surrounding area 98 ...

Страница 99: ...r and slide it all the way into the slot Note Do not touch the IC chip on the top of the cartridge or the cartridge may not be recognized or the printer may not print properly 11 Close the ink cartridge cover 12 Press the OK button twice to start charging the cleaning solution 99 ...

Страница 100: ... In both cases you need to remove the ink cartridges from the printer To maintain print quality you must do the following Shake the White ink cartridges at the start of every working day Shake the color ink cartridges at least once a month If an ink cartridge runs out during printing you can continue printing after replacing the ink cartridge However the tone of the print results may differ depend...

Страница 101: ...2 Open the cartridge cover 101 ...

Страница 102: ... cartridges may have ink around the ink supply port so be careful not to get ink on the surrounding area 4 Do one of the following Shake the cartridge as shown below place it back in the printer repeat for any other cartridges and close the ink cover Replace the cartridge as described starting with step 6 102 ...

Страница 103: ... cartridge for about 15 seconds then flip the cartridge over as shown and repeat Caution Do not touch the IC chip on the top of the cartridge otherwise the cartridge may not be recognized or the printer may not print properly 103 ...

Страница 104: ...color of the ink cartridge matches with the color of the label on the printer and that the cartridge corresponds to your printer s ink configuration White Edition or Color Edition 7 If you need to replace another ink cartridge repeat these steps Note Make sure to install ink cartridges into all the slots or the printer cannot print 104 ...

Страница 105: ...ic Maintenance Cleaning the Encoder Strip Carriage Scale and Replacing the Air Filter You see a message on the printer control panel when it is time to clean the encoder strip carriage scale and replace the air filter 1 Turn off the printer 105 ...

Страница 106: ...2 Open the printer cover 3 Let the ink cleaning solution soak into the cleaning cloth supplied with the new air filter 4 Hold down the encoder strip carriage scale on the left side as shown 106 ...

Страница 107: ...leaning cloth in small motions to the right and across the length of the encoder strip carriage scale You do not need to clean the sections covered by the print head Caution Make sure that ink cleaning solution does not drip into the printer If any cleaning solution does drip wipe it with a dry cleaning cloth 107 ...

Страница 108: ...using the printer to operate incorrectly 6 Use a dry cleaning cloth to wipe away any ink cleaning solution or dust remaining on the encoder strip carriage scale 7 Unpack the new air filter and retain the packaging for disposing of the used air filter Note If you need to clean up any ink inside the printer use only the cleaning cloth supplied with the air filter 108 ...

Страница 109: ...8 Grasp the tab on the air filter and lift it up to remove it 109 ...

Страница 110: ... the used air filter into the bag you retained from the new air filter 10 Install the new air filter into the printer as shown and press it down until you hear it click into place Parent topic Maintenance 110 ...

Страница 111: ...on the printer 3 Press the maintenance button The Maintenance menu appears 4 Press the up or down arrow button to select Cleaning around head and press the right arrow button 5 Press the up or down arrow button to select Yes and press the OK button The platen and print head move to the maintenance position Caution Do not move the print head or the platen manually A malfunction may occur 6 Open the...

Страница 112: ...7 After the print head has moved to the maintenance position place a metal or plastic tray or paper under the print head to prevent ink from dripping onto the printer 112 ...

Страница 113: ...d clean around the nozzle surface with the cleaning stick Caution Do not touch the nozzle surface or the parts on the left side of the nozzles with the cleaning stick A malfunction may occur 9 Wipe the edges at the front and rear of the nozzle surface 113 ...

Страница 114: ...he print head returns to its normal position and the Settings menu closes 14 Perform a nozzle check Parent topic Maintenance Cleaning the Platen Path If you have problems printing normally even after performing a head cleaning clean the platen path to remove any lint or fibers that have accumulated 1 If the platen is not in the forward position press the moveable base button to move it forward 2 T...

Страница 115: ...3 Open the printer cover 4 Wipe the border of the metal on the left of the wiper unit using a soft clean cloth dampened with water and wrung tight 115 ...

Страница 116: ...Note Do not apply force to the gears shown below when cleaning A malfunction may occur 116 ...

Страница 117: ...ter for an extended period of time with the power off you must properly prepare it for storage Regardless of which ink configuration White Edition or Color Edition you are using you must change the ink cartridges to cleaning cartridges if the planned period of non operation is one month or more Caution You must change the ink cartridges to cleaning cartridges before storing the printer or it may b...

Страница 118: ...ing cartridges When you finish replacing the cleaning cartridges a message appears on the control panel telling you to replace the waste ink bottle 6 Dispose of the waste ink 7 Turn off the printer for storage 8 When you turn on the printer after the storage period follow the instructions on the control panel to install the ink cartridges Parent topic Maintenance Cleaning the Printer To keep the p...

Страница 119: ...st or dirt from the platen If necessary clean the platen using a soft clean cloth dampened with water and a small amount of detergent Wipe off excess moisture with a dry soft cloth 5 Remove any dust or dirt from the printer cover in the same manner 119 ...

Страница 120: ...mist buildup inside your printer clean it regularly using a small amount of cleaning solution on a lint free cloth Gently clean the flat surfaces print head cover and inside the printer cover Parent topic Maintenance 120 ...

Страница 121: ...ozzles may clog or ink may leak Do not tilt the printer stand it on its side or turn it upside down or ink may leak Do not attempt to carry the printer on your own The printer should be packed and moved by three people When moving the printer do not tilt it more than 10 When lifting the printer touch only the necessary areas and grip it where indicated by the gray stickers as shown Transportation ...

Страница 122: ...s that came with the printer Parent topic Moving or Transporting the Printer Moving the Printer You can move the printer across the room or to a different room on the same floor level as described here Note Wear the protective gloves included in the maintenance kit to prevent your hands from being soiled by waste ink 1 Make sure the printer is turned off 2 Carefully remove the waste ink tube from ...

Страница 123: ...k tube from the tube clamp 5 Press and hold the edge of the waste ink outlet and pull out the left and right waste ink tubes Note Be careful when removing the waste ink tubes waste ink may spill from the outlet or tube 123 ...

Страница 124: ...inter Related tasks Setting Up the Printer After Transport Moving the Printer Through a Narrow Doorway You can move the printer through a doorway that is less than 39 inches 99 cm wide by preparing it as described here If the printer is new leave the packing material in place as you move it If the printer has already been set up follow the steps below before tilting it or moving it 124 ...

Страница 125: ... 2 cm 1 Platen 2 75 angle Place the lower chassis frame edge on a padded furniture dolly move it through the doorway and return it to the normal carrying position Caution Do not set the printer flat on its end cover Allow the edge of the lower chassis frame to take the full weight of the printer 1 Turn off the printer 2 Remove all cables 3 Leave the ink cartridges installed 125 ...

Страница 126: ...e ink tube from the waste ink bottle Make sure not to spill any ink 7 Remove the waste ink bottle 8 Locate the waste ink outlet plugs that came with the printer 9 Insert the waste ink outlet plugs into the rear connectors Make sure not to spill any ink 10 Remove the waste ink tube from the tube clamp 126 ...

Страница 127: ...e waste ink tubes waste ink may spill from the outlet or tube 12 Insert the waste ink outlet plugs 13 Remove the flushing pad and clean any ink underneath it 14 Plug the drain outlet with a lint free cloth 15 Tilt the printer and move it through a narrow doorway as described above Parent topic Moving or Transporting the Printer 127 ...

Страница 128: ...hat the location is suitable for installation 2 Install the waste ink tube and the waste ink bottle 3 Connect the power cable to an electrical outlet and turn on the printer 4 Perform a nozzle check and confirm that there are no clogged nozzles 5 Align the print head and check the print quality Parent topic Moving or Transporting the Printer Related tasks Performing a Nozzle Check Aligning the Pri...

Страница 129: ...ttings Printer Status Menu Settings Administrator Menu Settings Maintenance Mode Menu Settings Accessing the Printer s Menus You can use the printer menus to adjust the settings that control how your printer works 1 Press the right arrow button on the control panel You see the menus on the LCD screen 2 Press the up or down arrow button to scroll through the menus Note Press the left arrow button t...

Страница 130: ... do the following 1 Hold down the cancel button then hold down the power button until the power light comes on 2 Release just the power button 3 When you see the Maintenance Mode menu on the LCD screen release the cancel button 4 Follow the steps above to navigate the Maintenance Mode menus Parent topic Using the Control Panel Menus USB File List Menu Settings Settings on the USB File List menu le...

Страница 131: ...elete Print File List of print files in this Lets you select from a list of the print format files saved on the connected USB memory device so you can delete the Epson_repeat_print prn print file Caution Deleting the print file will remove that data permanently from the USB memory device Make sure your data is saved in another location if you wish to keep it Parent topic Using the Control Panel Me...

Страница 132: ...printouts Execute Heavy run this level of cleaning if the light and medium levels of cleaning still left faint or missing ink in your printouts Tube Washing White Ink White Edition Select to run the tube washing utility to remove accumulated sediment in the Color Ink selected ink tube Head Cleaning Set Yes Select to move the platen and print head to the maintenance position No before replacing the...

Страница 133: ...g the Ink Cartridges Replacing the Waste Ink Bottle Replacing the Head Cleaning Set Cleaning the Suction Cap Printer Setup Menu Settings Settings on the Printer Setup menu let you run print quality adjustment utilities Caution Follow the instructions in the topic links below the table to use these menu settings correctly Setting Options Description Head Alignment Select to run the head alignment u...

Страница 134: ...pear or a smaller number if faint lines appear Power On Cleaning White Ink Available only in White Ink mode On default Select to set up automatic white ink cleaning Before Printing On select to clean automatically Off whenever the printer power is turned on and the printer initializes Before Printing select to clean automatically whenever the printer is turned on but only before printing for the f...

Страница 135: ...the job log sheet Total Prints Number of pages Displays the total number of prints up to 6 figures Parent topic Using the Control Panel Menus Printer Status Menu Settings Settings on the Printer Status menu let you display or print information about your printer s current status Note This is a simple tool for estimating ink consumption for a given print job Epson does not warrant accuracy Actual i...

Страница 136: ...irmware Version Firmware number Displays the printer firmware version number Print Status Sheet Print Select to print a list of the currently selected print settings selected in these menus Parent topic Using the Control Panel Menus Administrator Menu Settings Settings on the Administrator menu let you set basic printer administration settings Caution Before printing a network status sheet using t...

Страница 137: ...inting the job log and printer status sheets Language Select to set the language used on the printer control panel screen Unit Length Select to set the unit of length used on the control panel screen m for meters or ft in for feet inches and when printing patterns Reset All Settings Yes Select Yes to return all control panel settings to their default values except No for Date Time Language and Mai...

Страница 138: ...no print jobs and is performing no control panel or other commands In sleep mode the control panel screen internal motors and other parts turn off to consume less power To wake the printer from sleep mode press a button on the control panel and resume other operations within 30 seconds such as sending a print job Reset All Settings Yes Select Yes to return all control panel settings to their defau...

Страница 139: ...persists insert a new ink cartridge You cannot change the ink configuration White Edition to Color Edition or Ink Cartridge Error vice versa after the ink cartridges have been installed Make sure the Ink cannot be detected correct cartridges are installed Insert again or replace Condensation may have occurred in the ink cartridge Remove the ink cartridge cartridge leave it for four hours or more a...

Страница 140: ... not be supported FAT32 Check the light and make sure that the USB memory device is not being accessed before removing it from the printer USB Memory Error One of the following conditions may have occurred Failed to write to USB The USB memory device is damaged memory The USB memory device was removed while the printer was writing to it There is not enough free space on the memory device or the nu...

Страница 141: ... the latest firmware and are running the latest version of Garment Creator software Information 10 minutes or more has passed since you started cleaning the cap or replacing the head cleaning set If the print head is out of position for more Some time has passed than 10 minutes the nozzles could clog since operation began Finish task quickly Finish cap cleaning or head cleaning set replacement as ...

Страница 142: ...for service has occurred the printer automatically stops printing the code and call for Turn off the printer disconnect the power cable from both the outlet and the service printer and then reconnect them Turn the printer on and off several times If the same call for service is displayed on the LCD screen contact Epson for support and provide them with the service code shown on the LCD screen Stat...

Страница 143: ...red Check the message on the screen and clear the error A cleaning cartridge is installed The height of the indicator corresponds to the amount of cleaning solution remaining in the cartridge WH CL White Cleaning Y Yellow M Magenta C Cyan BK Black Parent topic Solving Problems Related references Where to Get Help Related tasks Shaking and Replacing the Ink Cartridges Replacing the Waste Ink Bottle...

Страница 144: ...ermittently the printer may be in Sleep Mode Try these solutions Press any of the buttons on the control panel to reactivate the display Then perform a hardware operation such as opening the printer cover or sending a job to the printer You can adjust the delay time before the printer enters sleep mode in the Maintenance Mode menu Parent topic Solving Printer Problems Solving Printing Problems Che...

Страница 145: ...e USB memory device to speed up the printing process If you connected your printer to a USB hub make sure it is a first tier hub If it still does not print connect your printer directly to your computer instead of the hub Make sure the USB hub is recognized correctly on the computer Disconnect all USB hubs from the computer and connect the printer directly to the computer s USB port Make sure the ...

Страница 146: ...er from another computer on the network Parent topic Solving Printing Problems Print Head Moves But Nothing Prints If the print head is moving and nothing prints try these solutions Print a nozzle check pattern If the pattern does not print correctly clean the print head again If the printer has not been used for a long time the nozzles may be clogged Clean the suction cap and perform a medium lev...

Страница 147: ... here Check that the pre treatment solution is completely dry before reloading the T shirt on the platen Parent topic Solving Printing Problems Related tasks Adjusting the Height of the Platen Message Is Displayed After Cleaning the Encoder Strip Carriage Scale If a cleaning message is displayed on the LCD screen after you have cleaned the encoder strip carriage scale make sure that no dust or ink...

Страница 148: ...rinter control panel Select USB File List from the Settings menu and save the data or transmit data from a computer to the USB memory device connected to the printer Parent topic Solving Printing Problems Red Light Shines Inside the Printer The red light always shines inside the printer This is normal Parent topic Solving Printing Problems Forgot the Network Password If you forgot the password you...

Страница 149: ...alled If so the rows printed with the cleaning solution are difficult to see If you are printing the nozzle check pattern on paper in White ink mode the rows printed with white ink are difficult to see Try printing directly on the platen to confirm the nozzle check pattern using White ink Parent topic Solving Print Quality Problems Related tasks Cleaning the Print Head Cleaning the Suction Cap Was...

Страница 150: ...lor cartridges once a month Compare the print result with the image on your computer screen Since monitors and printers produce colors differently printed colors and screen colors do not always look the same Make sure that the printer cover is closed during printing Check the ink levels on the LCD screen Replace any cartridges that are low on ink Adjust the print quality settings in the Garment Cr...

Страница 151: ... Aligning the Print Head Grainy or Unclear Printout If your printouts are grainy or unclear try these solutions Clean the suction cap Run a nozzle check to see if any of the print head nozzles are clogged Then clean the print head if necessary Align the print head Clean the surface of the T shirt Remove any lint with sticky tape or a lint roller and press the fibers flat with a hard roller when yo...

Страница 152: ...Make sure to dry the shirt completely after pre treatment If the shirt is left for an extended period dry it for several seconds in the heat press before printing Check the temperature and pressure of the heat press The temperature of the heat press decreases when you press a T shirt that has had pre treatment solution applied When pressing several T shirts in succession check that the temperature...

Страница 153: ...an smudge Parent topic Solving Print Quality Problems Related tasks Cleaning Around the Print Head Cleaning the Platen Path Printer Status Sheet or Logs Print Incorrectly If the printer status sheet and log are printed beyond the edges of your paper make sure you are printing with a medium size standard platen Parent topic Solving Print Quality Problems Where to Get Help If you need to contact Eps...

Страница 154: ...ime Monday through Friday Canada 905 709 3481 6 AM to 6 PM Pacific Time Monday through Friday Days and hours of support are subject to change without notice Toll or long distance charges may apply Purchase Supplies and Accessories You can purchase genuine Epson ink and paper at epson com ink3 U S sales or epson ca Canadian sales You can also purchase supplies from an Epson authorized reseller To f...

Страница 155: ...ations Environmental Specifications Dimension Specifications Ink Cartridge Specifications Cleaning Cartridge Specifications Pre treatment Solution Specifications Ink Cleaner Solution Specifications Safety and Approvals Specifications Windows System Requirements To use your product and its software your computer should meet these requirements Microsoft Windows OS Windows XP Windows Vista Windows 7 ...

Страница 156: ...OS X version OS X 10 6 8 10 7 x 10 8 x 10 9 x 10 10 x CPU OS X 10 6 8 or 10 7 x Core 2 Duo 2 0 GHz or better OS X 10 8 x or higher Core i5 2 0 GHz or better Memory OS X 10 6 8 or 10 7 x 1GB or more OS X 10 8 x or higher 2GB or more Hard disk space 32GB or more available Interface Two High Speed USB ports compatible with USB 2 0 Specification Rear port for computer connection Front port for externa...

Страница 157: ...maximum Control code ESC P raster undisclosed command Platen feed method Conveyor belt Built in memory Main memory 512MB Network 128MB Parent topic Technical Specifications Electrical Specifications Rated voltage AC 100 to 240 V Rated frequency range 50 60 Hz Rated current 0 7 to 0 4 A Power consumption Printing 52 W approximately Sleep mode 10 W approximately Power off mode 0 5 W or less Parent t...

Страница 158: ... Humidity Operating 20 to 80 RH non condensing Storage 5 to 85 RH Parent topic Technical Specifications Dimension Specifications Height Stored 19 3 inches 490 mm Width Stored 38 8 inches 985 mm Depth Stored 56 1 inches 1425 mm Weight 180 8 lb 82 kg with supplied platen installed not including ink cartridges or waste ink tubes Parent topic Technical Specifications Ink Cartridge Specifications Note ...

Страница 159: ...t 104 F 40 C Transporting in package 4 to 140 F 20 to 60 C within 4 days at 4 F 20 C 1 month at 104 F 40 C and 72 hours at 140 F 60 C Parent topic Technical Specifications Cleaning Cartridge Specifications Expiration date See the date printed on the package at normal temperature Temperature Operating 50 to 95 F 10 to 35 C Storage in package and after installation in printer 4 to 104 F 20 to 40 C w...

Страница 160: ...10 to 35 C Storage in package 4 to 104 F 20 to 40 C within 4 days at 4 F 20 C and 1 month at 104 F 40 C Transporting in package 4 to 140 F 20 to 60 C within 4 days at 4 F 20 C 1 month at 104 F 40 C and 72 hours at 140 F 60 C Capacity 5 28 gal 20 l Dimensions 11 8 inches 300 mm 11 8 inches 300 mm 11 8 inches 300 mm Parent topic Technical Specifications Ink Cleaner Solution Specifications Expiration...

Страница 161: ... F 60 C Capacity 5 oz 150 ml Parent topic Technical Specifications Safety and Approvals Specifications United States Safety UL60950 1 EMC FCC part 15 Subpart B class A Canada Safety CAN CSA C22 2 No 60950 1 EMC CAN CSA CEI IEC CISPR 22 Class A Caution This is a class A product In a domestic environment this product may cause radio interference in which case the user may be required to take adequat...

Страница 162: ...the power cord that comes with the product Use of another cord may cause fires or shock Do not use the cord with any other equipment Place the product near a wall outlet where the plug can be easily unplugged Connect your product to a properly grounded power outlet Avoid plugging the product into an outlet on the same circuit as a photo copier heat press or air control system that regularly switch...

Страница 163: ...agnetic interference such as loudspeakers or the base units of cordless telephones When connecting the product to a computer or other device with a cable ensure the correct orientation of the connectors Each connector has only one correct orientation Inserting a connector in the wrong orientation may damage both devices connected by the cable Do not touch the encoder strip carriage scale Do not pu...

Страница 164: ...ot put your hand inside the product or touch any cartridges during printing Install a new ink cartridge immediately after removing an expended one Leaving cartridges uninstalled can dry out the print head and may prevent the product from printing Install ink cartridges in all the ink cartridge slots You cannot print if any of the slots are empty Dried ink on the supply port may cause ink leaks whe...

Страница 165: ...y cause harmful interference to radio communications Operation of this equipment in a residential area is likely to cause harmful interference in which case the user will be required to correct the interference at his own expense This device complies with Part 15 of the FCC Rules Operation is subject to the following two conditions 1 this device may not cause harmful interference and 2 this device...

Страница 166: ...http www opensource apple com apsl APPLE PUBLIC SOURCE LICENSE Version 2 0 August 6 2003 1 General Definitions This License applies to any program or other work which Apple Computer Inc Apple makes publicly available and which contains a notice placed by Apple identifying such program or work as Original Code and stating that it is subject to the terms of this Apple Public Source License version 2...

Страница 167: ... that is suitable for making modifications to it including all modules it contains plus any associated interface definition files scripts used to control compilation and installation of an executable object code 1 9 You or Your means an individual or a legal entity exercising rights under this License For legal entities You or Your includes any entity which controls is controlled by or is under co...

Страница 168: ...nal Code and or Modifications in object code executable form only You must include a prominent notice in the code itself as well as in related documentation stating that Source Code of the Covered Code is available under the terms of this License with information on how and where to obtain such Source Code 2 4 Third Party Rights You expressly acknowledge and agree that although Apple and each Cont...

Страница 169: ...ntinue to use it under the terms of that version You may also choose to use such Original Code under the terms of any subsequent version of this License published by Apple No one other than Apple has the right to modify the terms applicable to Covered Code created under this License 8 NO WARRANTY OR SUPPORT The Covered Code may contain in whole or in part pre release untested or not fully tested w...

Страница 170: ... the Original Code or to endorse or promote products derived from the Original Code other than as expressly permitted by and in strict compliance at all times with Apple s third party trademark usage guidelines which are posted at http www apple com legal guidelinesfor3rdparties html 11 Ownership Subject to the licenses granted under this License each Contributor retains all rights title and inter...

Страница 171: ... 13 3 Independent Development Nothing in this License will impair Apple s right to acquire license develop have others develop for it market and or distribute technology or products that perform the same or similar functions as or otherwise compete with Modifications Larger Works technology or products that You may develop produce market or distribute 13 4 Waiver Construction Failure by Apple or a...

Страница 172: ...is file The Original Code and all software distributed under the License are distributed on an AS IS basis WITHOUT WARRANTY OF ANY KIND EITHER EXPRESS OR IMPLIED AND APPLE HEREBY DISCLAIMS ALL SUCH WARRANTIES INCLUDING WITHOUT LIMITATION ANY WARRANTIES OF MERCHANTABILITY FITNESS FOR A PARTICULAR PURPOSE QUIET ENJOYMENT OR NON INFRINGEMENT Please see the License for the specific language governing ...

Страница 173: ...such and must not be misrepresented as being the original source or if binaries compiled from the original source Such altered versions also must not be misrepresented as being Info ZIP releases including but not limited to labeling of the altered versions with the names Info ZIP or any variation thereof including but not limited to different capitalizations Pocket UnZip WiZ or MacZip without the ...

Страница 174: ...orporation shall not be liable for any damages or problems arising from the use of any options or any consumable products other than those designated as Original Epson Products or Epson Approved Products by Seiko Epson Corporation Seiko Epson Corporation shall not be held liable for any damage resulting from electromagnetic interference that occurs from the use of any interface cables other than t...

Страница 175: ...CPD 40257R1 Parent topic Copyright Notice 175 ...

Отзывы: