background image

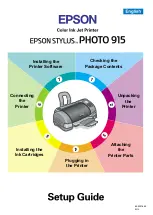
Connecting the Printer

Your printer connects to your computer via the USB interface. 
Depending upon your geographic location, you may need to obtain the 
appropriate cable. See “Options and Consumable Products” in the Daily 
Use
 guide for details.

Note:
In order to connect your PC via the USB interface, your computer must be a 
Windows Me, Windows 98, Windows XP or Windows 2000 pre-installed 
model that comes with a USB port, or Windows Me upgraded from a 
Windows 98 pre-installed model.

To connect the printer to a USB port, you will need a standard, shielded 
USB cable. Follow these steps:

Note:

For best results, you should connect the printer directly to the computer’s 
USB port. If you must use multiple USB hubs, we recommend that you 
connect the printer to the first-tier hub.

If your computer has more than one USB port, you may plug the cable in 
wherever is convenient.

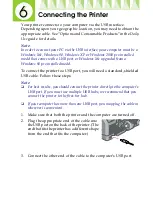
1. Make sure that both the printer and the computer are turned off.
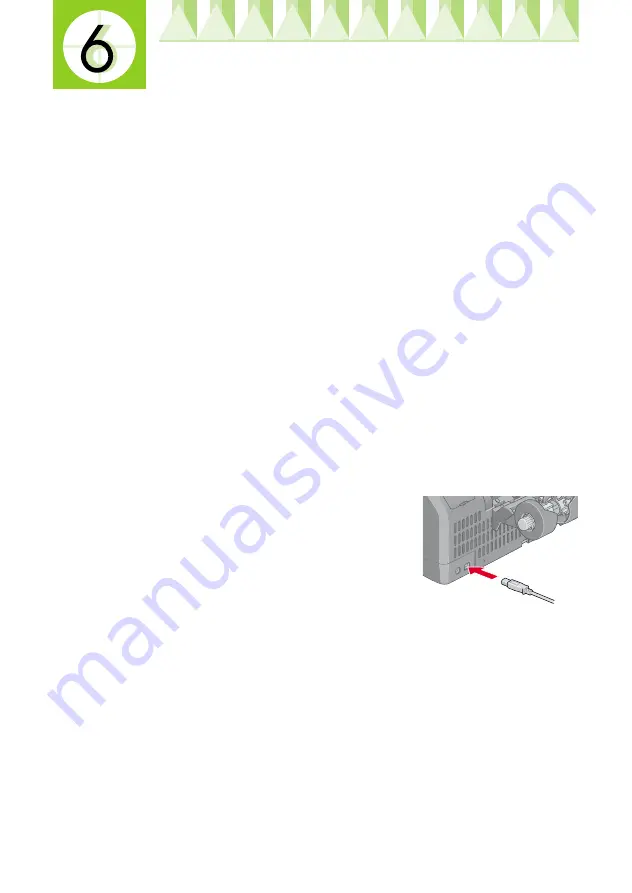
2. Plug the appropriate end of the cable into 

the USB port on the back of the printer. (The 
end that fits the printer has a different shape 
from the end that fits the computer.)

3. Connect the other end of the cable to the computer’s USB port.

Содержание STYLUS PHOTO 915

Страница 1: ...nstalling the Printer Software Checking the Package Contents Unpacking the Printer Attaching the Printer Parts Plugging in the Printer Installing the Ink Cartridges Connecting the Printer 4032216 00 EUL ...

Страница 2: ... ROM The package contents may vary in certain locations The ink cartridges packaged with your printer are partly used during initial setup In order to produce high quality printouts the print head in your printer will be fully charged with ink This one off process consumes a quantity of ink and subsequent cartridge sets will last for their full rated life black color ink cartridges power cord Thep...

Страница 3: ...the protective material as shown in figure A before setting up your printer Store the protective materials in case you want to ship the printer in the future c Caution Do not touch or remove the white cable shown in figure B Doing so can adversely affect the printer operation Attaching the Printer Parts Insert the paper support into the slots at the rear of the printer B A ...

Страница 4: ...below to plug in your printer 1 Make sure that the printer is turned off It is off when the P power button protrudes slightly from the surface of the control panel 2 Check the label on the back of the printer to make sure the voltage required by the printer matches that of the electrical outlet you will be plugging it into Also make sure that you have the correct power cable for your power source ...

Страница 5: ...alling the ink cartridges note the following w Warning The ink cartridges are self contained units Under ordinary use ink will not leak from a cartridge If ink does get on your hands however wash them thoroughly with soap and water If ink gets into your eyes flush them immediately with water Note Do not open the ink cartridge packages until just before you install them or the ink may dry up Follow...

Страница 6: ...usable Do not remove the tape seals from the bottom of the cartridges or ink will leak out Do not touch the green IC chip on the side of the cartridge Doing so may prevent normal operation and printing Do not remove the green IC chip from the side of the cartridge If you install an ink cartridge without a chip the printer may be damaged 4 Align the tabs on each ink cartridge so that they rest on t...

Страница 7: ...m is charged the print head will return to the home far right position and the Processing light will come on c Caution Never turn off the printer while the processing light is flashing and the Select Photo display is rotating 7 Close the printer cover Checking the printer Before printing your first page you need to make sure that the printer is working correctly by loading paper then printing a no...

Страница 8: ... in the illustration and press the P power button in the illustration to turn on the printer Release only the power button and when the printer starts the nozzle check release the b maintenance button Below are sample printouts If the nozzle check page does not print satisfactorily for example if any segment of the printed lines is missing then you should clean the print head as explained below If...

Страница 9: ...ssing light will start flash Print head cleaning takes about thirty seconds to complete c Caution Never turn off the printer while the Processing light is flashing Doing so may damage the printer 3 When the Processing light stops flashing print a nozzle check pattern to confirm that the head is clean and to reset the cleaning cycle If print quality hasn t improved after repeating the nozzle checki...

Страница 10: ...To connect the printer to a USB port you will need a standard shielded USB cable Follow these steps Note For best results you should connect the printer directly to the computer s USB port If you must use multiple USB hubs we recommend that you connect the printer to the first tier hub If your computer has more than one USB port you may plug the cable in wherever is convenient 1 Make sure that bot...

Страница 11: ...ed in this guide System Requirements for online Reference Guide Refer to the appropriate section System Microsoft Windows Millennium Edition 98 XP 2000 or Mac OS 8 5 1 8 6 9 x Mac OS X 10 1 2 or later CPU Pentium 150 MHz processor for Windows Me Pentium processor for Windows 98 Pentium 233 MHz processor for Windows XP Pentium 133 MHz processor for Windows 2000 Pentium 300 MHz processor or higher r...

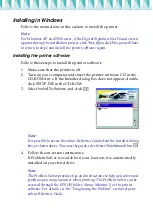
Страница 12: ...f the Installer dialog box does not appear double click SETUP EXE in the CD ROM 3 Select Install Software and click Note It is possible to access the online Reference Guide from the Installer dialog box as shown above To access the guide select User Guides and then 4 Follow the on screen instructions If Problem Solver is available in your location it is automatically installed on your hard drive N...

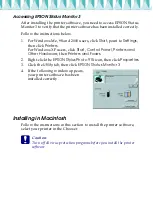
Страница 13: ...ers click Start Control Panel Printers and Other Hardware then Printers and Faxes 2 Right click the EPSON Stylus Photo 915 icon then click Properties 3 Click the Utility tab then click EPSON Status Monitor 3 4 If the following window appears your printer software has been installed correctly Installing in Macintosh Follow the instructions in this section to install the printer software select your...

Страница 14: ...or s name and password click OK Note For Mac OS 8 5 1 8 6 and 9 x users it is possible to access the online Reference Guide from the printer software CD ROM To access the guide double click the EPSON icon select User Guides and then click To access the online Reference Guide on Mac OS X double click English User Guides REF_G INDEX HTM in the EPSON folder For Mac OS 8 5 1 8 6 and 9 x users it is po...

Страница 15: ...the external storage driver Selecting your printer in the Chooser After you have installed printer software you need to select your printer For Mac OS 8 5 1 8 6 and 9 x users 1 Turn on the printer by pressing the P power button 2 Choose Chooser from the Apple menu Thenselectthe icon foryour printer and the port that your printer is connencted to 3 Close the Chooser For Mac OS X users Follow the in...

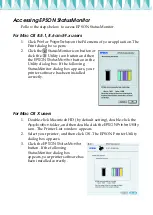
Страница 16: ...Utility dialog box If the following StatusMonitor dialog box appears your printer software has been installed correctly For Mac OS X users 1 Double click Macintosh HD by default setting double click the Application folder and then double click the EPSON Printer Utility icon The Printer List window appears 2 Select your printer and then click OK The EPSON Printer Utility dailog box appears 3 Click ...

Отзывы: