Installing the Software for Windows 95
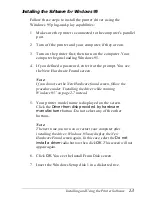
Follow these steps to install the printer driver using the
Windows 95 plug-and-play capabilities:
1. Make sure the printer is connected to the computer’s parallel
port.
2. Turn off the printer and your computer, if they are on.
3. Turn on the printer first; then turn on the computer. Your
computer begins loading Windows 95.
4. If you defined a password, enter it at the prompt. You see
the New Hardware Found screen.
Note:
If you do not see the New Hardware found screen, follow the
procedure under “Installing the driver while running
Windows 95” on page 2-7 instead.
5. Your printer model name is displayed on the screen.
Click the
Driver from disk provided by hardware
manufacturer
button. Do not select any of the other
buttons.
Note:
The next time you turn on or restart your computer after
installing the driver, Windows 95 may display the New
Hardware Found screen again. In this case, select the
Do not
install a driver
radio button; then click
OK
. This screen will not
appear again.
6. Click
OK
. You see the Install From Disk screen.
7. Insert the Windows Setup disk 1 in a diskette drive.
Installing and Using the Printer Software
2-5
Содержание Stylus Color 200
Страница 118: ...PC850 Multilingual PC860 Portuguese PC861 Icelandic PC863 Canadian French B 4 Commands and Character Tables ...
Страница 119: ...PC865 Nordic Abicomp BRASCII Commands and Character Tables B 5 ...
Страница 120: ...Italic No characters are available for hex code 15 in the italic character table B 6 Commands and Character Tables ...


