


200
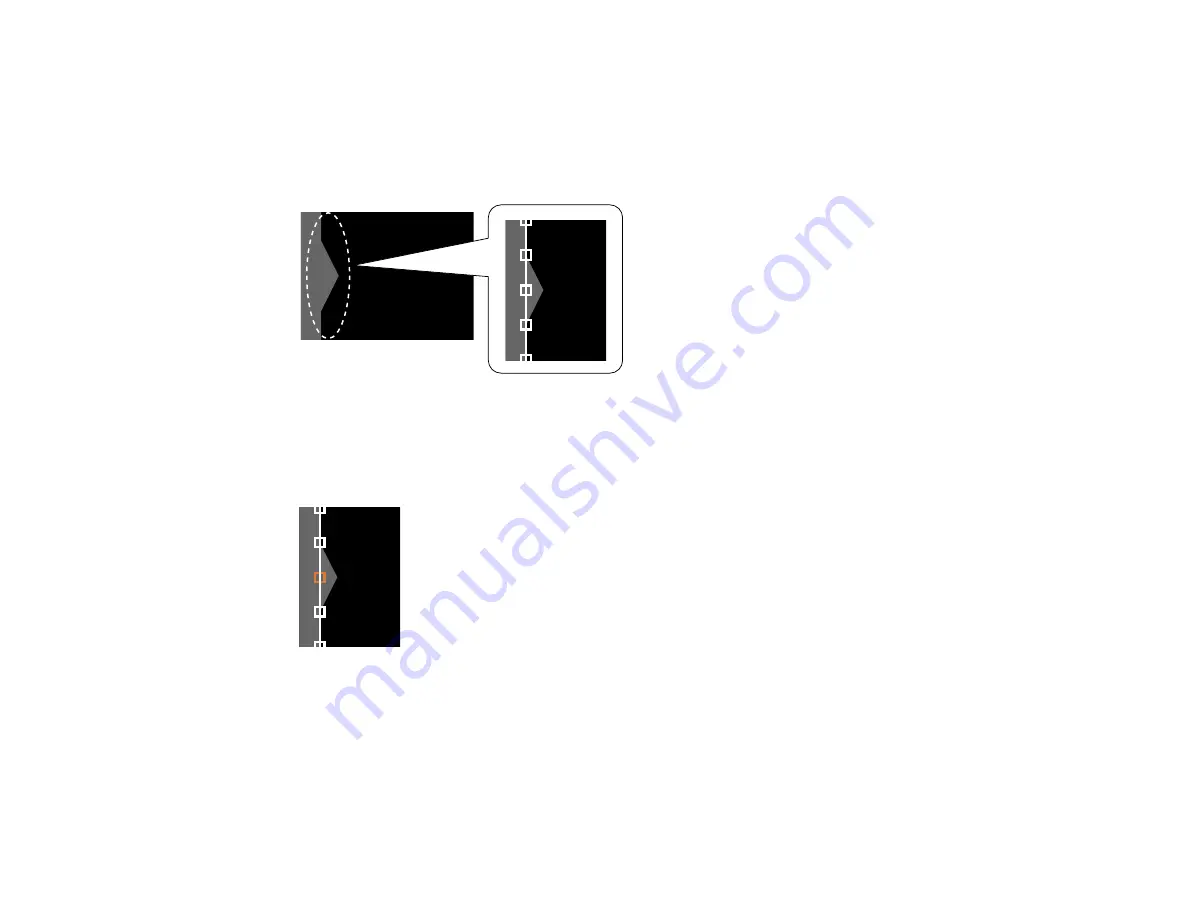
You see a screen with boundary lines indicating areas that are overlapping. The boundary lines are
based on the
Top Edge
,
Bottom Edge
,
Right Edge
, and
Left Edge
settings you selected for the
Edge Blending
setting.
13. Use the arrow buttons to select a boundary line and press
Enter
.
You see a screen like this displaying the points you can use to set the adjustment range:
14. Use the arrow buttons to adjust the boundary line position and press the
Enter
button.
15. Use the arrow buttons to select an adjustment point and press the
Enter
button.
The selected point turns orange.
Содержание Pro L1060U
Страница 1: ...Pro L1060U L1060UNL L1060W L1060WNL L1070U L1070UNL L1070W L1070WNL L1075U L1075UNL User s Guide ...
Страница 2: ......
Страница 10: ...10 A Note Concerning Responsible Use of Copyrighted Materials 315 Copyright Attribution 315 ...
Страница 29: ...29 Rear Front ceiling Rear ceiling ...
Страница 49: ...49 3 Pull the lens cover off of the projector 4 Remove the stopper if necessary ...
Страница 252: ...252 Parent topic Adjusting the Menu Settings Related tasks Running Light Source Calibration ...
Страница 261: ...261 4 Place the new air filter in the projector as shown 5 Replace the air filter cover and tighten the screws as shown ...


