


Maintenance 7. Arm #3
112
LS20 Rev.4
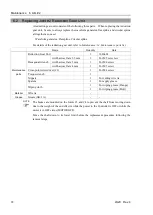
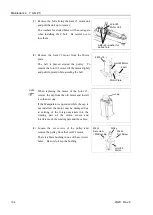
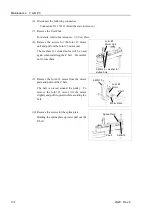
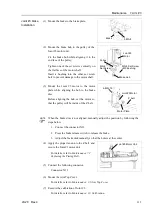
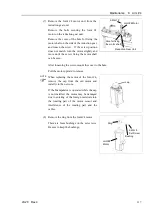
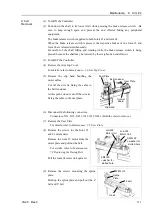
(7) Remove the bolts fixing the Joint #3 motor unit.
The washers for slotted holes will be used again
when installing the Z belt. Be careful not to
lose them.
Joint #3
Motor Unit
3-M5×20
+
washer for
slotted hole
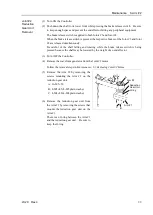
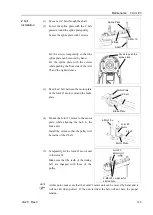
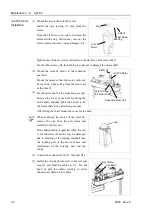
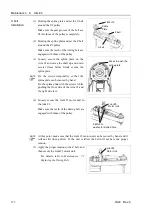
(8) Remove the Joint #3 motor from the motor
plate.
The belt is placed around the pulley. To
remove the Joint #3 motor, tilt the motor slightly
and pull it upward while avoiding the belt.
Joint #3 Motor
Motor Plate
4-M5×15
Z belt
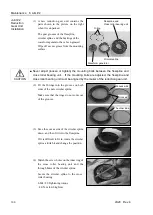
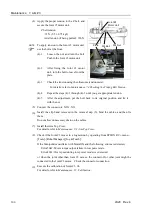
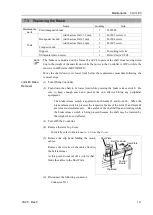
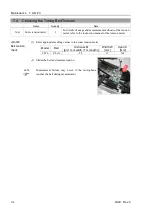
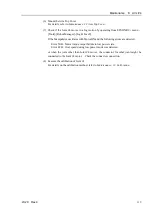
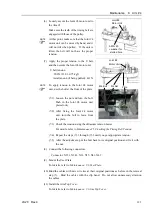
(9) Remove the brake from the brake plate.
Brake
3-M3×8
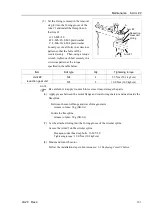
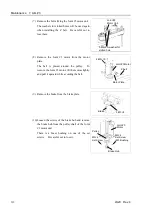
(10) Loosen the screws of the brake hub and remove
the brake hub from the pulley shaft of the Joint
#3 motor unit.
There is a brass bushing on one of the set
screws. Be careful not to lose it.
Joint #3
Motor
M3×4
Set Screw
+M3 Bushing
Pulley
Brake Hub
M3×4
Set Screw
Содержание LS20
Страница 1: ...Rev 4 EM179R3533F SCARA ROBOT LS20 series MANIPULATOR MANUAL ...
Страница 2: ...MANIPULATOR MANUAL LS20 series Rev 4 ...
Страница 8: ...vi LS20 Rev 4 ...
Страница 12: ...TABLE OF CONTENTS x LS20 Rev 4 ...
Страница 14: ......
Страница 29: ...Setup Operation 2 Specifications LS20 Rev 4 17 LS20 804S Standard Model ...
Страница 31: ...Setup Operation 2 Specifications LS20 Rev 4 19 LS20 804C Cleanroom Model ...
Страница 33: ...Setup Operation 2 Specifications LS20 Rev 4 21 LS20 A04S Standard Model ...
Страница 35: ...Setup Operation 2 Specifications LS20 Rev 4 23 LS20 A04C Cleanroom Model ...
Страница 71: ...Maintenance This volume contains maintenance procedures with safety precautions for LS20 series Manipulators ...
Страница 72: ......
Страница 92: ...Maintenance 4 Cable 80 LS20 Rev 4 4 2 Wiring Diagrams 4 2 1 Signal Cable ...
Страница 176: ...Maintenance 14 Maintenance Parts List 164 LS20 Rev 4 ...