


8.
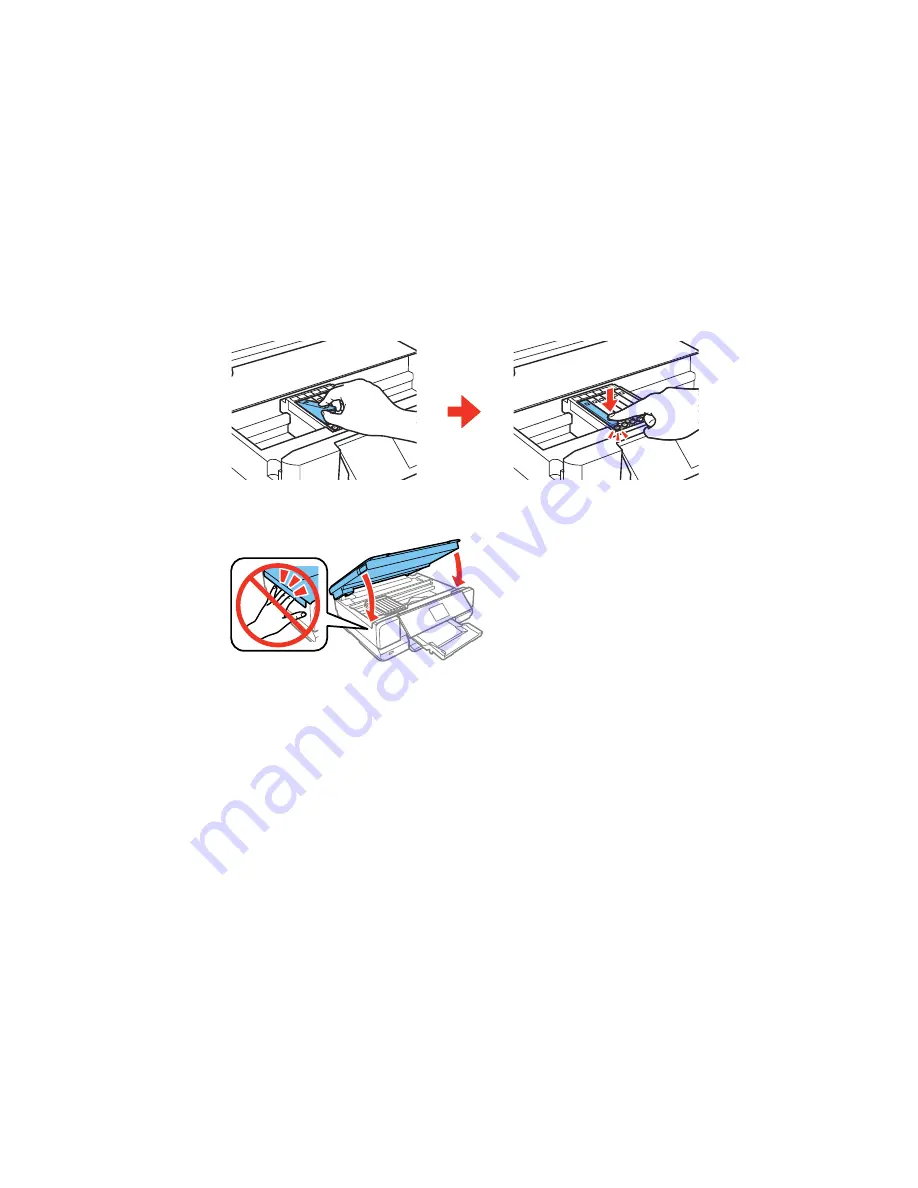
Insert the ink cartridge head first into the ink cartridge holder. Then press the bottom of the ink
cartridge down until it clicks into place.
9.
Once you replace all the cartridges that need replacing, close the scanner unit.
The product starts charging the ink. This takes a few minutes. When you see a completion message
on the LCD screen, ink replacement is complete.
Note:
Do not turn off the product while it is charging or you will waste ink. If you see an error screen
telling you an ink cartridge is installed incorrectly, lift up the scanner unit and press the ink cartridge
down until it clicks into place. When you're finished, close the scanner unit.
If you remove a low or expended ink cartridge, you cannot re-install and use the cartridge.
Caution:
If you remove an ink cartridge for later use, recap the ink cartridge using the cap that came
with it to prevent the ink from drying out and to protect the surrounding area from getting smeared by ink.
Store the ink cartridge in the same environment as the product. Do not leave the product with the ink
246
Содержание Expression Photo XP-960
Страница 1: ...XP 960 User s Guide ...
Страница 2: ......
Страница 13: ...XP 960 User s Guide Welcome to the XP 960 User s Guide For a printable PDF copy of this guide click here 13 ...
Страница 58: ...2 Flip open the rear paper feed slot cover 3 Fully extend the paper support and tilt it back as shown 58 ...
Страница 100: ...You see the maintenance options 4 Click the Extended Settings button 100 ...
Страница 133: ...You see this window 133 ...
Страница 150: ...You see this window 150 ...
Страница 204: ...2 Press the left or right arrow button and then select Setup 3 Scroll down and select External Device Setup 204 ...
Страница 213: ...Related topics Loading Paper 213 ...


