Confidential
Confidential
Dis
Dis
a
a
s
s
s
s
e
e
m
m
b
b
l
l
y
y
/
/
Re
Re
a
a
s
s
s
s
e
e
m
m
b
b
l
l
y
y
Co
Co
m
m
m
m
o
o
n c
n c
a
a
u
u
t
t
io
io
n
n
s
s
w
w
h
h
e
e
n d
n d
is
is
a
a
s
s
s
s
e
e
m
m
b
b
l
l
in
in
g/
g/
re
re
a
a
s
s
s
s
e
e
m
m
b
b
l
l
in
in
g t
g t
h
h
e
e
Pro
Pro
d
d
u
u
c
c
t
t
3
3
5
5
p
g
p
g
M
Mo
otto
orrss
T
Taak
ke
e ccaarre
e n
no
ot
t tto
o d
daam
maag
ge
e tth
heem
m..
---
---
Se
Sen
nso
sorrss
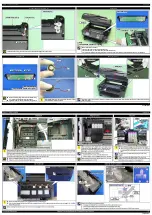
1.
1. Ta
Take
ke ccaare
re n
no
ot
t to
to to
tou
ucch
h th
the
e d
det
eteeccto
tor
r sseect
ctio
ion
ns.
s.
2.
2. As for th
As for the encod
e encoder Sensor
er Sensor used with
used with a circular
a circular scale, the
scale, the photo sen
photo sensor
sor
section should be set over the encoded area of the circular scale.
section should be set over the encoded area of the circular scale.
3.
3. Take care
Take care not to g
not to get injured
et injured by the
by the sharp en
sharp ends of th
ds of the board
e board terminal o
terminal on
n
the back of the circuit boards when handling the sensors or the
the back of the circuit boards when handling the sensors or the
periphera
peripheral parts.
l parts.
S
Sccaalleess
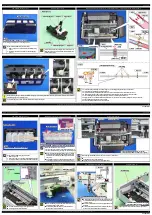
1
1.. T
Taak
ke
e ccaarre
e n
no
ot
t tto
o tto
ou
ucch
h tth
he
e een
ncco
od
deed
d aarreeaa..
2.
2. Install it
Install it with the
with the black tr
black triangular
iangular section
section up. (CR
up. (CR Scale o
Scale only)
nly)
3.
3. Wipe o
Wipe off alc
ff alcoho
ohol befo
l before inst
re installin
alling. (CR Sc
g. (CR Scale on
ale only)
ly)
4.
4. Confirm
Confirm that the
that they do
y do not tou
not touch the
ch the photo s
photo sensors
ensors after in
after installation.
stallation.
Waste ink
Waste ink
pads
pads
1.
1. Take car
Take care not to
e not to stain you
stain your hands
r hands with the
with the waste ink
waste ink soaked
soaked in the in
in the ink
k
pads. If ink
pads. If ink comes int
comes into contact wi
o contact with your ha
th your hands, wash
nds, wash it off with wate
it off with waterr
immediately.
immediately.
2.
2. Take car
Take care not to
e not to stain the
stain the printer's pa
printer's parts with th
rts with the waste
e waste ink soak
ink soaked in th
ed in thee
ink pads. If ink comes into contact with the parts, wash it off.
ink pads. If ink comes into contact with the parts, wash it off.
(Especially, pay attention to Paper Guide Front/Lower Porous Pad)
(Especially, pay attention to Paper Guide Front/Lower Porous Pad)
3.
3.
2.
2.
4.
4.
2.
2.
2.
2.
E
E
p
p
s
s
o
o
n
n
E
E
T
T
-
-
4
4
5
5
5
5
0
0
,
,
L
L
6
6
5
5
5
5
/
/
6
6
5
5
6
6
R
R
e
e
v
v
i
i
s
s
i
i
o
o
n
n
B
B
FF
FFCs
Cs
1
1.. B
Be s
e su
ure
re to
to in
inse
sert
rt th
them
em to
to th
theeir
ir cco
on
nn
nec
ecto
torrs o
s on t
n th
he b
e bo
oaard
rds a
s as f
s faar a
r as t
s th
heey
y
will go without any loose connection such as a half-way or slant
will go without any loose connection such as a half-way or slant
connection.
connection.
2.
2. Rout
Route the
e them alo
m along th
ng their r
eir routi
outing p
ng paths
aths..
3.
3. If the do
If the double-side
uble-sided tape
d tape that secu
that secures the FF
res the FFCs is not
Cs is not strong e
strong enough
nough to
to
secure them, make sure to replace the tape and secure the FFCs firmly.
secure them, make sure to replace the tape and secure the FFCs firmly.
---
---
G
Geeaars
rs
Wh
Wheen
n in
inssta
tall
llin
ing
g g
geeaars
rs,
, p
paay
y at
atte
ten
nttio
ion
n to
to th
the
e ffo
oll
llo
ow
win
ing
g::
•• The ge
The gear sectio
ar section shou
n should not
ld not be da
be damaged.
maged.
•• No fo
No foreig
reign mat
n materia
erial is att
l is attache
ached.
d.
•• No grease
No grease is attached
is attached on any pa
on any parts other th
rts other than those sp
an those specified.
ecified.
---
---
PF r
PF rol
olle
lers
rs
Do n
Do not t
ot tou
ouch r
ch rol
olle
lers f
rs for p
or pap
aper f
er fee
eedi
ding w
ng whe
hen ha
n hand
ndli
ling t
ng the
hem.
m.
One Time
One Time
parts
parts
After removing One Time parts specified in this manual, do not reuse
After removing One Time parts specified in this manual, do not reuse
them, but be sure to replace them with new ones.
them, but be sure to replace them with new ones.
One Time icon:
One Time icon:
ADF/Scanner
ADF/Scanner
Unit
Unit
When disassembling/reassembling the ADF/Scanner Unit, make sure to
When disassembling/reassembling the ADF/Scanner Unit, make sure to
do the work with the unit open to prevent damage to the Hinges.
do the work with the unit open to prevent damage to the Hinges.
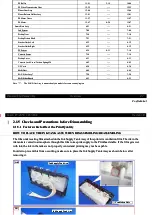
Holder Cam
Holder Cam
Assy
Assy
Install the assy while aligning the protrusion on the D/E Lever with the
Install the assy while aligning the protrusion on the D/E Lever with the
groove on the cam of the Holder Cam Assy.
groove on the cam of the Holder Cam Assy.
I
I
t
t
e
e
m
m
C
C
o
o
n
n
t
t
e
e
n
n
t
t
P
P
h
h
o
o
t
t
o
o
/
/
I
I
l
l
l
l
u
u
s
s
t
t
r
r
a
a
t
t
i
i
o
o
n
n
Holder Cam Assy
Holder Cam Assy
D/E Lever
D/E Lever
P
Prro
ottrru
ussiio
on
n
G
Grro
oo
ov
vee
Содержание ET-4550
Страница 9: ...Confidential Confidential CHAPTER CHAPTER 1 1 TROUBLESHOOTING TROUBLESHOOTING ...
Страница 39: ......
Страница 46: ...Confidential Confidential Confidential Confidential CHAPTER CHAPTER 3 3 ADJUSTMENT ADJUSTMENT ...
Страница 48: ......

