Confidential
Confidential
Adjus
Adjus
t
t
m
m
e
e
nt
nt
D
D
e
e
t
t
a
a
ils
ils
o
o
f Ad
f Ad
just
just
m
m
e
e
nt
nt
s
s
64
64
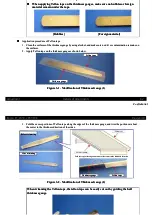
Figur
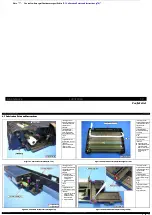
Figure 3-3.
e 3-3. Posit
Position of th
ion of the Thick
e Thickness G
ness Gauge
auge
3.
3. Move the C
Move the CR Unit to the r
R Unit to the right and t
ight and to the left to m
o the left to make sure th
ake sure that the CR Un
at the CR Unit does not to
it does not touch the ga
uch the gauges. If i
uges. If itt
touches a gauge, the PG is narrower than the standard. In such a case, reassemble or replace the Printer
touches a gauge, the PG is narrower than the standard. In such a case, reassemble or replace the Printer
Mechanism.
Mechanism.
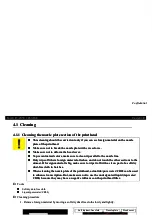
4.
4. Move the C
Move the CR Unit back i
R Unit back in the midd
n the middle of the pr
le of the printer a
inter and place th
nd place the 1.76 mm th
e 1.76 mm thickne
ickness gauge
ss gauges protec
s protected with
ted with
Teflon tape on the same points as in Step 2.
Teflon tape on the same points as in Step 2.
5.
5. Move th
Move the CR Unit to
e CR Unit to the righ
the right and to the l
t and to the left to ma
eft to make sure th
ke sure that the CR Un
at the CR Unit touch
it touches the gau
es the gauges. If i
ges. If it does not
t does not
touch any gauge, the PG is wider than the standard. In such a case, reassemble or replace the Printer
touch any gauge, the PG is wider than the standard. In such a case, reassemble or replace the Printer
Mechanism.
Mechanism.
CHAPTER
CHAPTER
4
4
MAINTENANCE
MAINTENANCE
Содержание ET-4550
Страница 9: ...Confidential Confidential CHAPTER CHAPTER 1 1 TROUBLESHOOTING TROUBLESHOOTING ...
Страница 39: ......
Страница 46: ...Confidential Confidential Confidential Confidential CHAPTER CHAPTER 3 3 ADJUSTMENT ADJUSTMENT ...
Страница 48: ......

