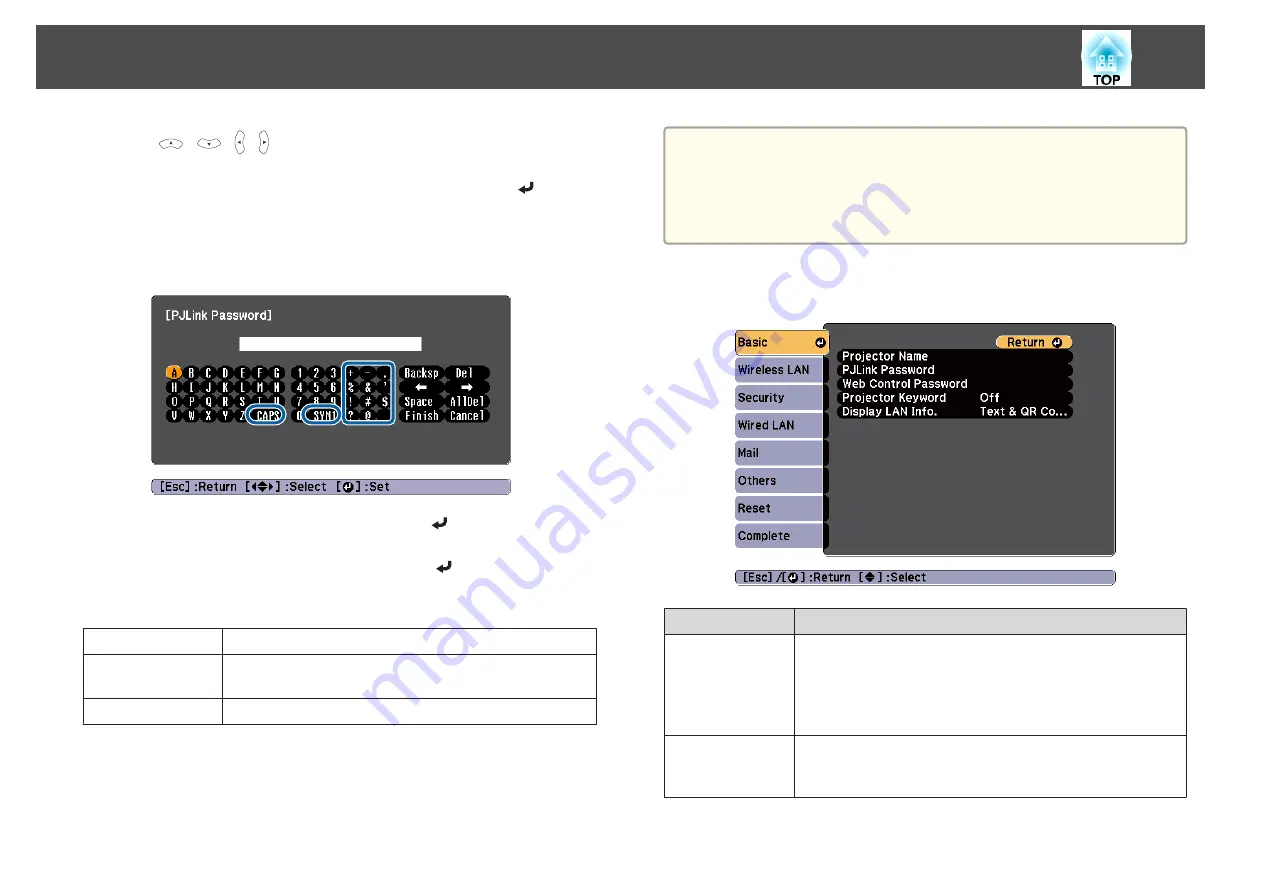
Press the [
][
][ ][ ] buttons on the remote control or the [
w
][
v
]
[
a
][
b
] buttons (or the [Wide][Tele]) on the control panel. Use the buttons
to move the cursor to the desired key, and then press the [
] button.
Enter figures by holding down the [Num] button on the remote control,
and pressing the numeric buttons. After inputting, press
Finish
on the
keyboard to confirm your input. Press
Cancel
on the keyboard to cancel
your input.
•
Each time the
CAPS
key is selected and the [
] button is pressed, it
sets and changes between upper case and lower case letters.
•
Each time the
SYM1/2
key is selected and the [
] button is pressed, it
sets and changes the symbol keys for the section enclosed by the frame.
The following text can be entered.
Numbers
0123456789
Alphabet
ABCDEFGHIJKLMNOPQRSTUVWXYZ
abcdefghijklmnopqrstuvwxyz
Symbols
! # $ % & ' ( ) + - . / < = > ? @ ^ _ ` { | } ~
a
•
Except for the
SSID
, colons and spaces cannot be entered on the
Network menu.
•
Some symbols ("
*
, ; [ \ ]) cannot be entered using the software
keyboard. Use your Web browser to enter the text.
s
"Changing Settings Using a Web Browser (Web Control)"
Basic menu
Submenu
Function
Projector Name
Displays the projector name used to identify the projector when
connected to a network.
When editing, you can enter up to 16 single-byte alphanumeric
characters. The following characters cannot be used: "
*
+ , / ; < =
> ?[ \ ] ` |
PJLink Password
(Except for EB-S29/
EB-S27)
Set a password to use when you access the projector using
compatible PJLink software. You can enter up to 32 single-byte
alphanumeric characters.
List of Functions
110
Содержание EB-940H
Страница 1: ...User s Guide ...
Страница 7: ...Introduction This chapter explains the projector s features and the part names ...
Страница 22: ...Remote control operating range Part Names and Functions 22 ...
Страница 23: ...Preparing the Projector This chapter explains how to install the projector and connect projection sources ...
Страница 27: ...For EB 940H 50 80 100 150 Installing the Projector 27 ...
Страница 35: ...a To prevent malfunctions use a category 5 or higher shielded LAN cable Connecting Equipment 35 ...
Страница 38: ...Basic Usage This chapter explains how to project and adjust images ...
Страница 58: ...Useful Functions This chapter explains useful tips for giving presentations and the Security functions ...
Страница 98: ...Configuration Menu This chapter explains how to use the Configuration menu and its functions ...
Страница 127: ...Troubleshooting This chapter explains how to identify problems and what to do if a problem is found ...
Страница 153: ...Appendix ...


