203
8.
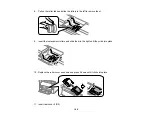
Insert the replacement rollers and slide them to the left until they click into place.
9.
Use a screwdriver to secure the inner cover to the printer with the three screws you removed.
10. Close the rear cover (E).
11. On the paper cassette you removed, pull up on the lever as shown to release the roller.
12. Slide the roller towards the lever and lift it out of the cassette.
Содержание C11CG70201
Страница 1: ...WF C8190 User s Guide ...
Страница 2: ......
Страница 16: ...16 8 Attach the front cover to the stands 9 Remove the output tray from the product ...
Страница 21: ...21 5 Remove the output tray 6 Remove the paper cassette from the product ...
Страница 39: ...39 3 Optional cabinet 1 Rear paper feed edge guides 2 Paper support and extension ...
Страница 106: ...106 You see this window 3 Select the double sided printing options you want to use 4 Click OK to return to the Main tab ...
Страница 116: ...116 You see the maintenance options 4 Click the Extended Settings button ...
Страница 129: ...129 10 Select the Layout tab 11 Select the orientation of your document as the Orientation setting ...
Страница 194: ...194 4 Pull out paper cassette 1 5 Open rear cover 1 D1 ...
Страница 195: ...195 6 Pull out rear cover 2 D2 7 Remove the roller cover inside the product ...
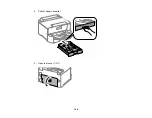
Страница 200: ...200 4 Pull out the paper cassette ...
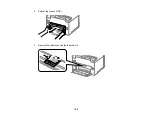
Страница 201: ...201 5 Open the rear cover E that matches with the paper cassette you removed ...

