


156
2.
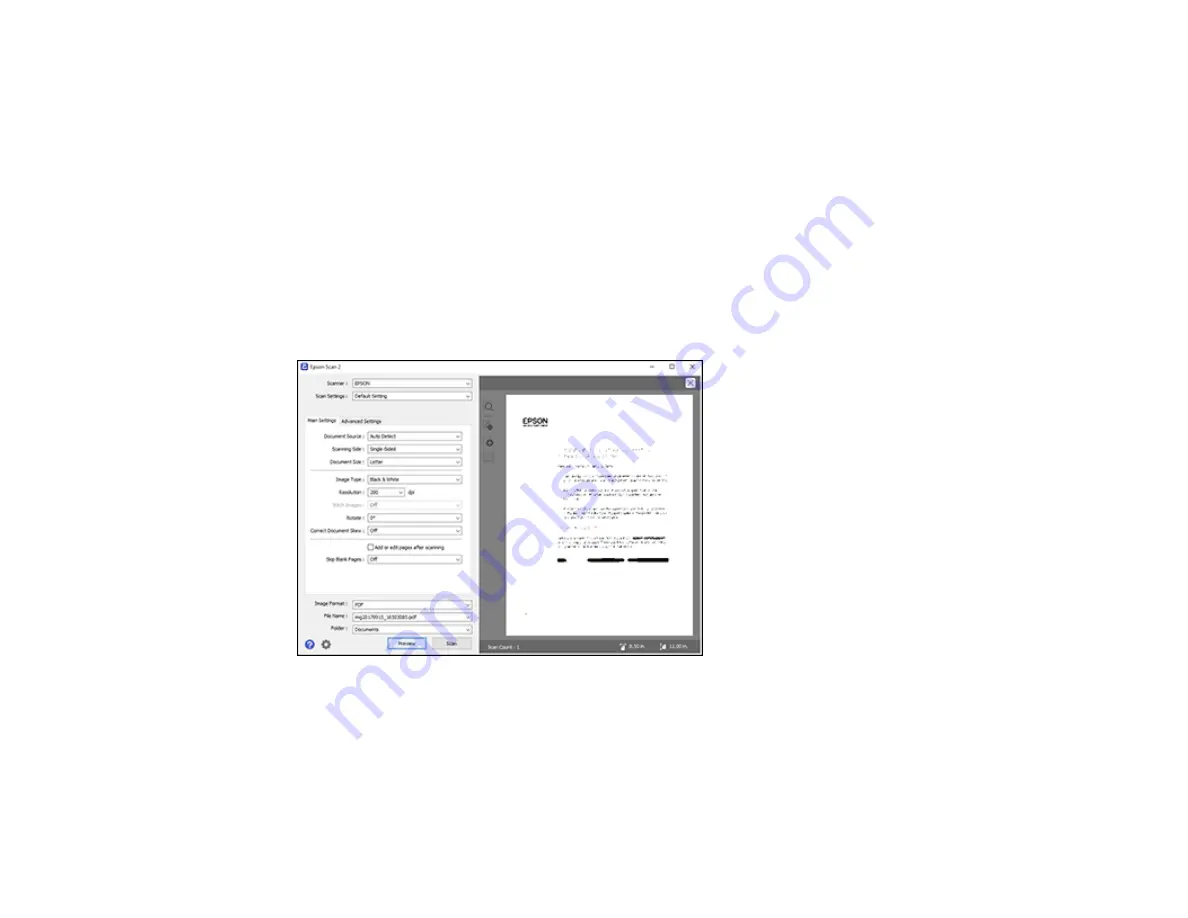
Select the
Document Source
setting that matches where you placed your original, or select
Auto
Detect
to have Epson Scan 2 automatically detect the source.
3.
Select the
Scanning Side
setting if you are scanning from the ADF.
4.
Select the
Document Size
setting that matches the size of your original. You can select
Customize
to enter a custom size, if necessary.
5.
Select the image type of your original and how you want it scanned as the
Image Type
setting.
6.
Select the
Resolution
setting you want to use for your scan.
7.
Select the
Rotate
setting to rotate the scanned image.
8.
Select the
Correct Document Skew
setting to correct skewed originals, image contents, or both.
9.
Click the
Preview
button.
Epson Scan 2 previews your original and displays the results in the Epson Scan 2 window.
10. Reinsert your original into the ADF, if necessary.
11. Select any of the additional settings that you want to use on the Main Settings tab.
12. Click the
Advanced Settings
tab and select any settings that you want to use.
13. Select the format in which you want to save your scanned file as the
Image Format
setting. If
necessary, select
Options
and select any desired format options.
Содержание C11CG36201
Страница 1: ...WF 7710 WF 7720 User s Guide ...
Страница 2: ......
Страница 61: ...61 2 Pull out the paper cassette and remove the paper cassette cover 3 Slide the edge guides outward ...
Страница 67: ...67 3 Slide the edge guides outward 4 Slide the edge guide to your paper size ...
Страница 76: ...76 3 Open the rear paper feed slot and push it back 4 Slide out the edge guides ...
Страница 124: ...124 10 Select the Layout tab 11 Select the orientation of your document as the Orientation setting ...
Страница 151: ...151 You see an Epson Scan 2 window like this ...
Страница 153: ...153 You see an Epson Scan 2 window like this ...
Страница 155: ...155 1 Start Epson Scan 2 You see this window ...
Страница 166: ...166 DSL connection 1 Telephone wall jack 2 DSL filter 3 DSL modem ...
Страница 167: ...167 ISDN connection 1 ISDN wall jack 2 Terminal adapter or ISDN router ...
Страница 247: ...247 You see a window like this 5 Click Print ...
Страница 259: ...259 2 Lift up the scanner unit 3 Make sure the print head is in the home position on the right ...
Страница 285: ...285 Front 6 Open the duplexer ...
Страница 286: ...286 7 Carefully remove any jammed paper stuck inside 8 Reinstall the duplexer ...


