background image

2

    MULTIMETER EM420B

Read this owner’s manual thoroughly before use

 WARRANTY

This instrument is warranted to be free from defects in material and workmanship 

for a period of two year. 

Any instrument found defective within two years from the delivery date and returned to 

the factory with transportation charges prepaid, will be repaired, adjusted, or replaced 

at no charge to the original purchaser. This warranty does not cover expandable items 

such as batteries or fuse. If the defect has been cause by a misuse or abnormal operation 

conditions, the repair will be billed at a nominal cost.

SAFETY INFORMATION

The multimeter has been designed according to IEC-61010 concerning electronic meas-

uring instruments with a measurement category (CAT II 600V) and Pollution degree2

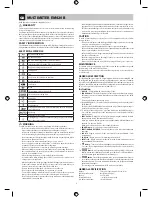
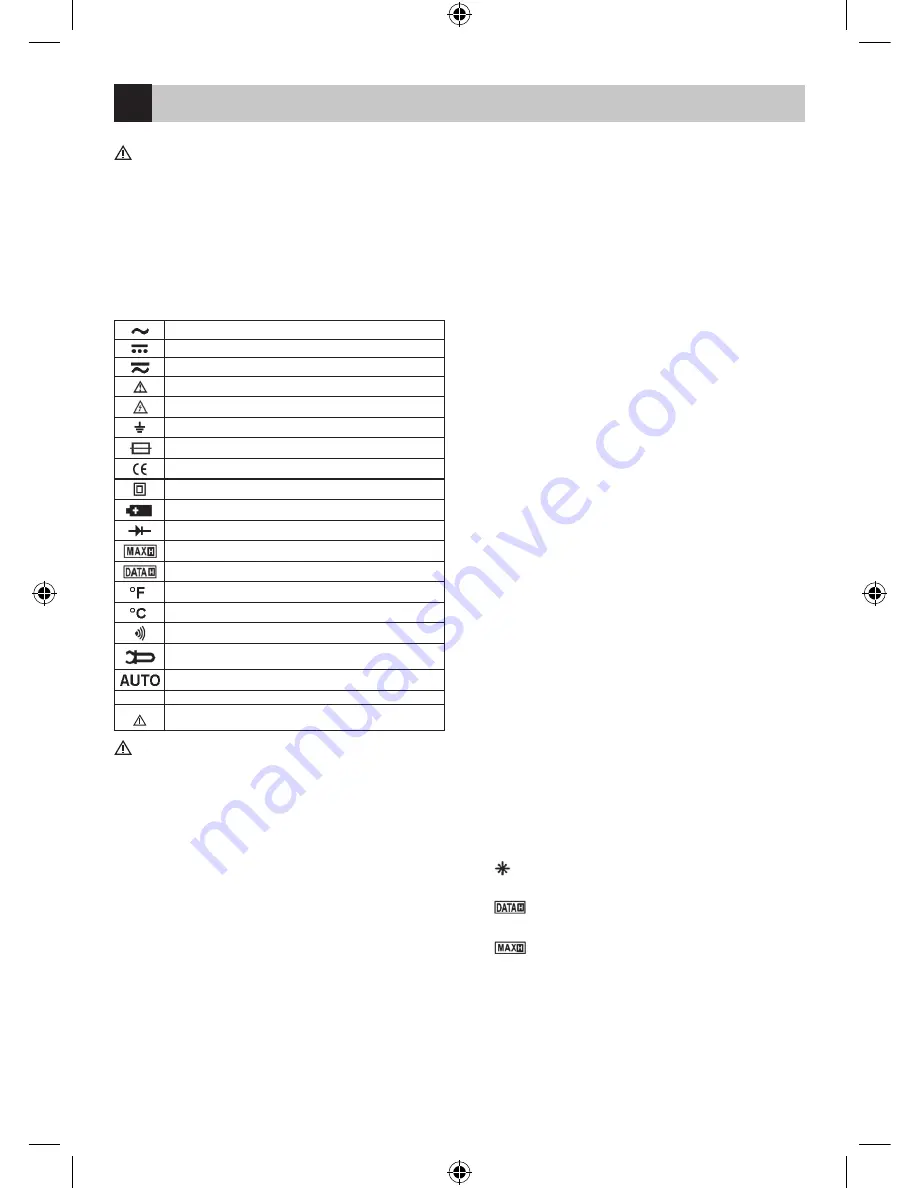
ELECTRICAL SYMBOLS

AC (Alternating Current)
DC (Direct Current)
DC or AC(alternating current or directive current)

Important safety information. Refer to the manual

Dangerous voltage may be present.

Earth ground

Fuse

Conforms to European Union directives

Double insulated.

Low battery

Diode

The maximum values is being held

The display data is being held

Fahrenheit

Centigrade

Continuity test
Measurement with clamp (optional), widening the field of applica-

tions of the meter
Autorange

Danger of electrical injury 
Warning, Danger. Please pay attention to the passages of this manual 

where this symbol is used.

 WARNING

To avoid possible electric shock or personal injury, follow these guidelines:

  • Do not use the meter if it is damaged. Before you use the meter, inspect the case. 

Pay particular attention to the insulation surrounding the connectors.

  • Inspect the test leads for damaged insulation or exposed metal. Check the test 

leads for continuity. Replace damaged test leads before you use the meter.

  •  Do not use the meter if it operates abnormally. Protection may be impaired. When 

in doubt, have the meter serviced.

  • Do not operate the meter around explosive gas, vapor, or dust.

  • Do not apply more than the rated voltage, as marked on the meter, between 

terminals or between any terminal and earth ground.

  • Before use, verify the meter’s operation by measuring a known voltage.

  • When measuring current, turn off circuit power before connecting the meter in 

the circuit. Remember to place the meter in the circuit. Remember to place the 

meter in series with the circuit.

  • When servicing the meter, use only specified replacement parts.

  • Use with caution when working above 30V ac rms, 42V peak, or 60V dc. Such 

voltages pose a shock hazard.

  •  When using the probes, keep your fingers behind the finger guards on the probes.

  • Connect the common test lead before you connect the live test lead. When you 

disconnect test leads, disconnect the live test lead first.

  • Remove the test leads from the meter before you open the case.

  • Do not operate the meter with the cover removed or loosened.

  • To avoid false readings, which could lead to possible electric shock or personal 

injury, replace the batteries as soon as the low battery indicator appears.

  • Do not use the test leads to measure the voltage which is more than 600V or the 

current which is more than 10A.

  •  Remaining endangerment: When an input terminal is connected to dangerous live 

potentional it is to be noted than this potential at all other terminals can occur!

  •  CATII-Measurement Category II is for measurements performed on circuits directly 

connected to low voltage installation. Do not use the meter for measurements 

within Measurement Categories III and IV.

CAUTION

To avoid possible damage to the meter or to the equipment under test, follow 

these guidelines:

  •  Disconnect circuit power and discharge all high voltage capacitors before testing 

resistance, continuity, diodes, or capacitance.

  • Use the proper terminals, function, and range for your measurements.

  •  Before measuring current, check the meter’s fuse and turn power OFF to the circuit 

before connecting the meter to the circuit.

  •  Before rotating Function / Range switch to change functions, disconnect test leads 

from the circuit under test.

  • Before inserting transistor to the adapter , always be sure all the test leads have 

been removed from the meter

  • Remove test leads from the meter before opening the battery cover or the case.

MAINTENANCE

To continue protection against fire, replace fuse only with the specified voltage and 

currents rating: F 250 mA L 250V, fast action.

To clean the meter, use a damp cloth and mild detergent only, do not use abrasives 

or solvents on it.

GENERAL DESCRIPTION

This digital multimetr is compact 3,5 digits digital multimeter for measuring DC and 

AC voltage, DC and AC current, resistance, temperature, diode, transistor, continuity, 

capacitance ( only EM420B)and battery(only EM420A). It has the functions of polarity 

indication, data hold, maximum value hold, overrange indicator and automatic power-

off. It can be operated easily and is ideal instrument tool.

Instruction

 1 

DISPLAY

 – 3,5 digit LCD with a max reading of 1999

 2 

RANGE button

 – The meter defaults to the autorange mode when you measure 

the voltage, current or resistance. When the meter is in the autorange mode, AUTO 

i s displayed.


 To enter and exit the manual range mode:

  a) Press RANGE button – The meter enters the manual range mode and the symbol 

AUTO turns off.


 Each press of the RANGE button increments the range. Then the highest range is 

reached, the meter wraps to lowest range

  b) To exit the manual range mode, press and hold down the RANGE button for 

2 seconds, the meter returns to the autorange mode and the symbol AUTO is 

displayed again.

 3 

FUNC. button

 – When you measure the current, pressing this button will switch 

the meter between DC function and AC function.

   When you measure the temperature, pressing this button will switch the meter 

between °F mode and °C mode


 When you measure the diode or the continuity functions.

 4 

POWER switch

 – It can be used to turn on/off the meter.

 5 

FUNCTION/RANGE SWITCH

 – This switch can be used to select desired function 

and range.

 6 

10A Jack

 – Plug-in connector for the red test lead for current (200 mA ~10 A) 

measurement.

 7

 COM Jack

 – Plug-in connector for black(negative) test lead.

 8 

INPUT Jack

 – Plug-in connector for the red test lead for all measurement except 

current(≥200mA) measurements.

 9   

Button

 – To turn on or off the backlight, press and hold this button for about 

2 seconds. The backlight will turns off automatically about 15 seconds later after 

you turn on it.

 10 


Button

 – After pressing the button, the present reading is held on the 

display, meanwhile is displayed on the LCD as an indicator. To exit th Hold Mode, 

press the button again and the indicator will disappear.

 11 


Button

 – The hold the maximum value, press this button and will appear 

as an indicator, the meter will hold the maximum of all readings taken since the 

button was pressed. To exit the maximum value hold mode, just press this button 

again and will disappear.


 In some ranges, the maximum value hold mode is not available.

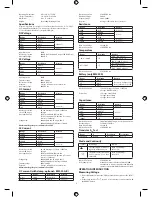
GENERAL SPECIFICATION

Display:  


LCD, 1999 counts, updates 2–3 times/sec

Overrange Indications:  

OL shown on display

Battery:  


3× 1,5V, AAA

Polarity Indication:  

„–„ displayed atomatically

Low Battery Indication: 

shown on display

GB

Содержание EM420B

Страница 1: ...w emos eu 2 3 1 M0420 EM420B GB MULTIMETER CZ MULTIMETR SK MULTIMETER PL MULTIMETR HU MULTIMETR SI MULTIMETER SRB HR BIH MULTIMETAR DE MULTIMETER UA RO MULTIMETRU LT MULTIMETRAS LV MULTIMETRS 130 185...

Страница 2: ...III and IV CAUTION To avoid possible damage to the meter or to the equipment under test follow these guidelines Disconnectcircuitpoweranddischargeallhighvoltagecapacitorsbeforetesting resistance conti...

Страница 3: ...nge switch to or position Select auto range or manual range with the RANGE button Operating Temperature 0 C to 40 C 75 RH Storage Temperature 10 C to 50 C 85 RH Dimensions 158 75 35mm Weight about 200...

Страница 4: ...is not connected i e at open circuit zhe symbol OL will be displayed as an overrange indicator 3 Before measuring in circuit resistance be sure that the circuit under test has all power removed and a...

Страница 5: ...e vysokonap ov kondenz tory P ed m en m se p esv d te e je kruhov p ep na rozsahu m en ve spr vn poloze V dn m p pad neprov d jte dn zm ny v m c m rozsahu poot en mkruhov hop ep na eprogram m en vpr b...

Страница 6: ...V Maxim ln nap t v rozpojen m m en m obvodu mus b t 250V St dav proud Rozsah Rozli en P esnost 200 A 0 1 A 1 5 5 2000 A 1 A 20 mA 0 01 mA 200 mA 0 1 mA 2 A 0 001 A 3 10 10 A 0 01 A Ochrana p ed p et e...

Страница 7: ...m lybysen sobithodnotou kter je ur en t mito pou it mi kle t mi aby hodnota byla odpov daj c nam en Nedot kejte se rukou ani jinou st t la m en ho obvodu M en odporu 1 Zapojtekoncovku ern ho z porn h...

Страница 8: ...o ak je uvo nen Vyme te bat riu ako n hle sa na displeji objav varovn indik tor vybit bat rie SK pou it hrub s ly hroz po kozen oto n ho z mku Vym te slab baterie za nov s p edepsan mi parametry Dopor...

Страница 9: ...alebohomo no vypn op podr an m tla tka po dobu 2 sek nd 10 Tla tko po stla en d jde k podr aniu pr ve nameranej hodnoty a na displejisaobjav n pis Preukon eniestla teop tla tkoan piszmizne 11 Tla tko...

Страница 10: ...rozmedz 200 mA a 10 A pripojte erven merac hrot do zdierky 10A 2 Kruhov mprep na omnastavterozsahmeran hopr duv A mA aleboA 3 Priru nomnastaven aprinezn mejhodnotepr duv dynastavtenajvy rozsah ktor zn...

Страница 11: ...automatick ho vypnutia sa vyrad V mena bat ri Ak sa objav na displeji symbol bat rie je nutn bat rie vymeni Pre v menu pou ite raubov k odpovedaj ci ve kosti men typ m e po kodi z mok a jemne to te o...

Страница 12: ...ciowych Nie korzystamy z tego multimetru do pomiar w zaliczanych do kategorii III i IV Uwaga Z multimetru EM420B korzystamy tylko tak jak wyspecyfikowano poni ej W przeciw nymraziemo edoj douszkodzeni...

Страница 13: ...kolejny pomiar mo na wykona dopiero po 15 minutach Spadek napi cia zakres 200 A 20 mA i 2 A 20 mV Zakres 2000 A 200 mA i 10A 200mV Zakres cz stotliwo ci 40 Hz do 400Hz Uwaga Jest to rednia warto odpow...

Страница 14: ...dzie Warto mierzonego pr du pojawi si na wy wietlaczu Je eli jest to pr d sta y a a czerwony przew d pomiarowy jest pod czony do bieguna dodatniego to wskazywana jest dodatnia warto nat enia pr du W p...

Страница 15: ...osoby czniezdzie mi kt rychpredyspozycje fizyczne umys owealbomentalneorazbrakwiedzyido wiadczenianiepozwalaj na bezpieczne korzystanie z urz dzenia je eli nie s one pod nadzorem lubnie zosta y poins...

Страница 16: ...km r se saz ramk r k vezet k pess g nek tesztje 4 A multim ter kikapcsol sa lenyom sa kikapcsolja s bekapcsolja 5 Terjedelem s funkci tkapcsol k v nt funkci t s terjedelmet v laszt 6 10A aljzat a pir...

Страница 17: ...az ellen ll s rt ke 30 a 100 k z tt tal lhat nem biztos hogy megsz lal a berreg Fesz lts g m r se 1 Csatlakoztassa a m r m szer fekete m nusz m r vezet k csatlakoztat s t a COM aljzatba sapiros pozit...

Страница 18: ...r hegyet a di da kat dj ra A k perny n megjelenik a di da k r lbel li fesz lts ge tereszt ir nyban A polarit s cser je ut n a k perny n az OL felirat jelenik meg Tranzisztor m r se er s t s 1 A k rka...

Страница 19: ...tealiskladi itemultimetravokoljuzvisokotemperaturo pra nostjo in vla nostjo Ne priporo amo uporabe naprave v okolju kjer obstaja mo no magnetsko polje ali kjer obstaja nevarnost eksplozije ali po ara...

Страница 20: ...proti preobremenitvi velikost A in mA varovalka F 250 mA L 250 V velikost 10 A brez varovalke Maksimalni vstopni tok Vti nica INPUT maks 200 mA Vti nica 10 A maks 10 A pri merjenju toka ki je vi ji o...

Страница 21: ...edno najvi jo velikost kijozni ujtedoprikazaustreznevrednostitoka esenazaslonuprika e simbol OL je potrebno prestaviti na vi ji velikost 6 Merjenje s kle ami opravite tako da je merjeni vodnik po zapr...

Страница 22: ...u itenavodilo Predodprtjemmultimetraizklju itemerilnevrviceod vti nic S tem prepre ite mo nost po kodbe z elektri nim tokom Opozorilo Zastalnoza itopredobremenitvijouporabitevarovalkozapredpisanitokin...

Страница 23: ...truje do 200 mA 9 Tipkapozadinskogosvjetljenjazaslona pritisniteipodr ite2sekunde e seupalitipozadinskoosvjetljenje Pozadinskoosvjetljenjeseautomatskiisklju uje nakon 15 sekundi ili ako ponovno dr ite...

Страница 24: ...ek namjestite najvi i raspon koji smanjuj ak dok se ne prika e pripadaju a vrijednost struje Kada se a zaslonu pojavi simbol OL neophodno je prebaciti na vi i raspon 4 Pomo u tipke FUNC odaberite mjer...

Страница 25: ...lo eg rukovanja Osigura uvijek mijenjate za isti tip sa istim parametrima F 250 mA 250V brza reakcija Osigura se nalazi ispod pokrova baterija Nakon izmjene pokrov baterije pa ljivo nametnite i zatvor...

Страница 26: ...agen in der Anweisung wo dieses Zeichen verwendet ist Beschreibung des Ger ts Der Multimeter EM420B stammt von der Reihe der Kompaktger te mit einem 3 5 Ziffernanzeiger die f r die Gleichstrom und Wec...

Страница 27: ...fnetenMesskreismuss 250Vbetragen 250V Gleichstrom Zangenmessung optionales Zubeh r f r EM420A B Bereich Aufl sung Genauigkeit Messung 200 A 0 1 mV 0 1 A 1 2 5 Messung 1000 A 1 mV 1 A 1 2 5 berlastungs...

Страница 28: ...smessung mittels der Zange ist 0 1A 0 1mV Falls Sie eine an gepassteZangeverwenden dannistderangegebeneWertmitdemgemessenen Wert identisch b BeiderVerwendungeinerZange derenEmpfindlichkeitkeine0 1A 0...

Страница 29: ...vermeiden Sie eine Stromunfall Bevor Sie das Multimeterverdeck ffnen trennen Sie die Messspitzen vom getesteten Kreis Reinigen Sie den K rper des Multimeters mit einem feuchten Tuch und einem feinenWa...

Страница 30: ...0 C 75 10 C 50 C 85 3 1 5 AAA F250mA 250V 5 20 OL LCD CAT II 600 158 75 35 200 18 C 28 C 75 DC 200 mV 0 1 mV 0 8 5 2 0 001 0 8 5 20 0 01 200 0 1 600 1 1 5 10 M 600 DC AC rms 200 mV 250V DC AC rms 600...

Страница 31: ...200 0 1 1 2 5 2 k 0 001 k 1 5 20 k 0 01 k 200 k 0 1 k 2 M 0 001 M 1 2 5 20 M 0 01 M 1 5 5 0 25 250 DC AC rms 20 C 1000 C 1 C 20 C 0 C 5 4 0 C 400 C 1 3 400 C 1000 C 2 3 0 F 1800 F 1 F 0 F 50 F 5 4 50...

Страница 32: ...0 1mV 1 COM a INPUT 2 3 AUTO RANGE OL 4 1 M OL EM420B 1 COM a INPUT 2 1000 F 20 F nF 3 AUTO RANGE 4 1 COM a INPUT 2 3 FUNC 4 30 1 COM a INPUT 2 3 FUNC 4 OL 1 hFE 2 COM aINPUT 2 3 NPN PNP a hFE 1 Temp...

Страница 33: ...rrezultatedem surareanormale nufolosi imultimetrul Poate fi ntrerupt siguran a Dac nu sunte i siguri de cauza defec iunii contacta i centrul de repara ii Nu m sura i cu multimetru tensiune mai mare i...

Страница 34: ...a se anuleaz i inscrip ia dispare n unele intervale func ia de nregistrare a valorii maxime nu este accesibil Parametrii tehnici Ecran LCD 1999 cifre3 5 cuindicareaautomat apolarit ii Metoda de m sura...

Страница 35: ...tonului RANGE n intervalul corespunz tor al valorii de curent preconizate 6 Conecta iconductoriidem surarecusonde nseriecucircuitulcurentuluim surat Valoareacurentuluim suratseafi eaz peecran Dac este...

Страница 36: ...sau aparatul m surat nlocuirea siguran ei Arderea siguran ei multimetrului este cauzat de obicei de eroarea utilizatorului nlocui i ntotdeauna siguran a cu alta de acela i tip cu parametri identici F...

Страница 37: ...ikli tik dr gn skudur l ir veln plovikl APRA YMAS is skaitmeninis multimetras yra kompaktinis 3 5 skai i multimetras skirtas matuoti nuolatin DC ir kintam AC tamp nuolatin DC ir kintam AC srov var tem...

Страница 38: ...elektros sm g Srov s matavimas 1 Prijunkite juod laid prie COM jungties o raudon prie INPUT jungties 2 Nustatykite FUNCTION RANGE perjung j A mA ar A pozicij Jei srov s stiprumasi ankstone inomas nus...

Страница 39: ...aip 30 skamb s zumeris Diodo matavimas 1 Prijunkitejuod laid prieCOMjungties oraudon prieINPUTjungties Raudono laido poliarumas teigiamas 2 Nustatykite FUNCTION RANGE perjung j pozicij 3 Paspauskite m...

Страница 40: ...lsto us termin lus funkcijas un diapazonu prieks veicamajiem m r jumiem Pirms str vas m r anas p rbaudiet ier ces dro inat jus un izsl dziet des baro anu pirms savienojat testeri ar di PirmsFunkciju D...

Страница 41: ...stera vadu INPUT spraudn DC spriegums diapazons rezol cija precizit te 200mV 0 1mV 0 8 5 2V 0 001V 0 8 5 20V 0 01V 200V 0 1V 600V 1V 1 5 Ieejas pretest ba 10M P rslodzes aizsardz ba 600 V DC AC rms 20...

Страница 42: ...bas m r jumiem 2 Kad ieejo ais nav pievienots pie atv rtas des simbols OL b s redzams ekr n 3 Pirms mer jumu veik anas des pretest b p rliecinieties ka dei ir no emta baro ana un kolektori ir piln ba...

Страница 43: ...ihes trauc jumiem kam da tipa ier ces lieto ana nav dro a ja vien to nelieto kop ar personu kas uzrauga dro bu Neizmetiet o ier ci kop ar sadz ves atkritumiem Nododiet to speci lajos elektronikas sav...

Страница 44: ...ni druga e ozna eno velja garancija na ozemeljskem obmo ju Republike Slovenije 9 Proizvajaleczagotavljaprotipla ilupopravilo vzdr evanjeblaga nadomestnedeleinpriklopneaparate tri leta po poteku garan...

Отзывы: