


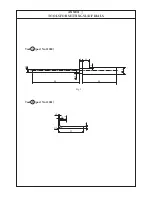

HEIGHT OF FEED DOG
13
e
2.7~3.2mm
2.7mm
2mm
d
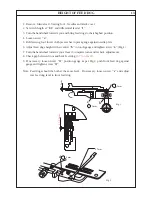
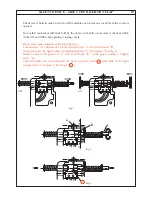
1. Remove: Mains lead - Sewing foot - Needles and Back cover
2. Set stitch length at
"0.5"
and differential feed at
"1"
.
3. Turn the handwheel towards you and bring feed dogs to their highest position.
4. Loosen screw
"a"
.
5. Refit sewing foot, lower cloth presser bar to press gauge against needle plate.
6. Adjust feed dogs height with eccentric
"b"
to touch gauge and tighten screw
"a"
.(Fig.1)
7. Turn the handwheel towards you at least 3 complete turns and recheck adjustments.
8. Check gap between front and back feed dog (
2.7 to 3.2mm
).
9. If necessary, loosen screw
"d"
, position gauge as per Fig.2, push front feed dog against
gauge and tighten screw
"d"
.
Note: Feed dogs should be both at the same level. If necessary, loosen screw
"e"
and adjust
rear feed dog level to front feed dog.
1.3mm
2mm
3mm
a
b
Fig.1
Fig.2
Содержание 745 -
Страница 1: ...745 845 SERVICE MANUAL 2 2 5 5 1 3 5 NA 6 0 B 1 2 1 T P T P...
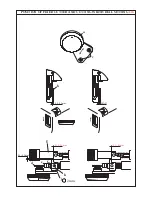
Страница 12: ...1a REMOVING MACHINE BASE COVER 1 Remove Mains lead 2 Remove Machine base Unit 1 by loosening screws a a 1 a a...
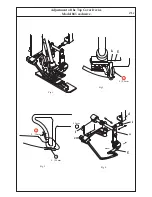
Страница 18: ...a HEIGHT AND ALIGNMENT OF CLOTH PRESSER BAR 4a 5 b c 4 7mm...
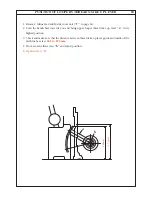
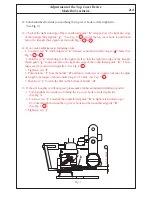
Страница 24: ...TIMING OF LOWER LOOPER 8a A B C D b a 5 2mm R1 Fig 1 Fig 2 Fig 3...
Страница 35: ...MOVING CUTTER AND VERTICAL FEED TIMING 14a R1 A a B d c Fig 2 Fig 4 Fig 3 Fig 1 2mm 0 5 0 5mm 1 0 1 5mm...
Страница 51: ...ANNEX SETTING POSITIONS OF SL DF DIALS b c f d g e 2 1 C B A...
Страница 53: ...d ANNEX SETTING POSITIONS OF SL DF DIALS h i Z k j p SL Dial DF Dial Fig 3 Fig 4 i A n k a Fig 2 view Z view Z...
Страница 61: ...M E M O...


