


37
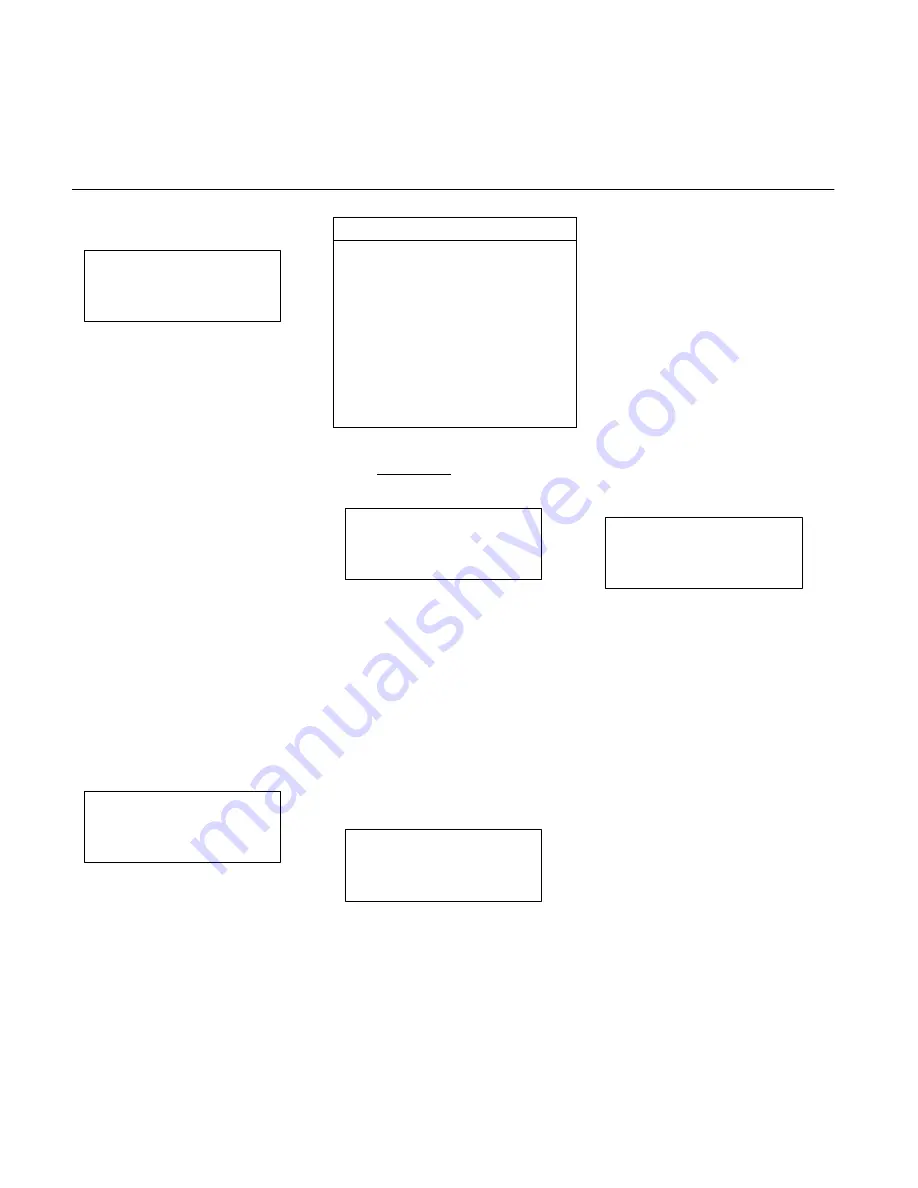
Push <SEL–F4 to select Segment #1.
SEGMENT#[2 ]
↑
QUIT F1
<DEL F2
JUMP TO
SAVE F3
SEGMENT#[ 1 ]
↓
<SEL F4
Press SAVE–F3.
Now when the program runs, it will keep
repeating as long as the run input is
‘On’. This is an example of an Absolute
Jump.
The Jump Event Condition screen
(Conditional Jump) would be used just
as the input and/or output event logic
equation.
Thus, the previous example could be
made to Jump only if an external input is
‘On’.
Run Mode – Running the
Program
Programs can be run from the operator
interface unit (Hand–Held Terminal) or
from digital I/O.
Running Programs from the
Hand–Held Terminal
Press ‘RUN’ to get the Run mode
screen, then press RUN–F1 key to get
the following screen:
RUN AXIS[ 1]
QUIT F1
AXIS
F2
PROGRAM#[ 10]
<SEL F3
RUN
F4
Press Axis–F2, to get the correct axis
and press <SEL–F3 to get the profile to
run.
CAUTION
1.
Pressing F4 now should cause
motion. Be sure the machine or
equipment is in proper
configuration to operate. Assure
that Enable and E-Stop circuits
are active and operating correctly.
2.
Selected profiles can be run from
either the digital I/O or from the
terminal.
Pressing the ‘Stop’ key will
always STOP any motion running.
Press RUN–F4 key: The selected axis
should start running and the following
screen will appear:
RUN AXIS[ 1]
QUIT F1
AXIS
F2
PROGRAM#[ 10]
<SEL F3
RUNNING
STOP F4
Pressing Stop–F4 will stop the selected
axis program motion.
The ‘Stop’ key STOPS all motion – both
axes.
Running Programs from Digital I/O
Programs can be commanded to run
from the digital inputs in various ways:
1. If the program number has been
selected to run with the Hand-Held
Interface, then that program will run
when the corresponding axis Run
input is activated.
RUN AXIS[ 1]
QUIT F1
AXIS
F2
PROGRAM#[ 10]
<SEL F3
RUN
F4
Select the program to run by pressing
<SEL–F3, until the desired program
number is displayed. (Program must
have been previously programmed).
2. The program to run can be selected
from digital inputs by using the select
inputs. Refer to Programming
Reference Manual for use of this
feature.
List
Several screens provide a function
called List. Selecting this key will send a
printer ready listing of the selected
parameters through the RS232C port.
For example, to print a listing of the axis
gains, select F4 from the following
screen:
CONFIGURATION
↑
EDIT F1
F2
AXIS
F3
GAINS
↓
LIST
F4
Refer to SMC20 Installation section
(page ##) for printer connections. The
printer must be configured as follows:
Serial/Parallel:
Serial
Baud Rate:
9600
Paper Orientation:
Portrait *
If you have any problem, refer to
Troubleshooting section (page ##).
* Portrait is the default paper orientation
for most printers. For example, this
page is printed in portrait orientation. If
the printer is set up for landscape
orientation (where the page is printed
lengthwise) some data may be missed.


