


3 Installation
3.7 Install field bus
DX-NET-ETHERCAT-2
01/14 MN040009EN
www.eaton.com
23
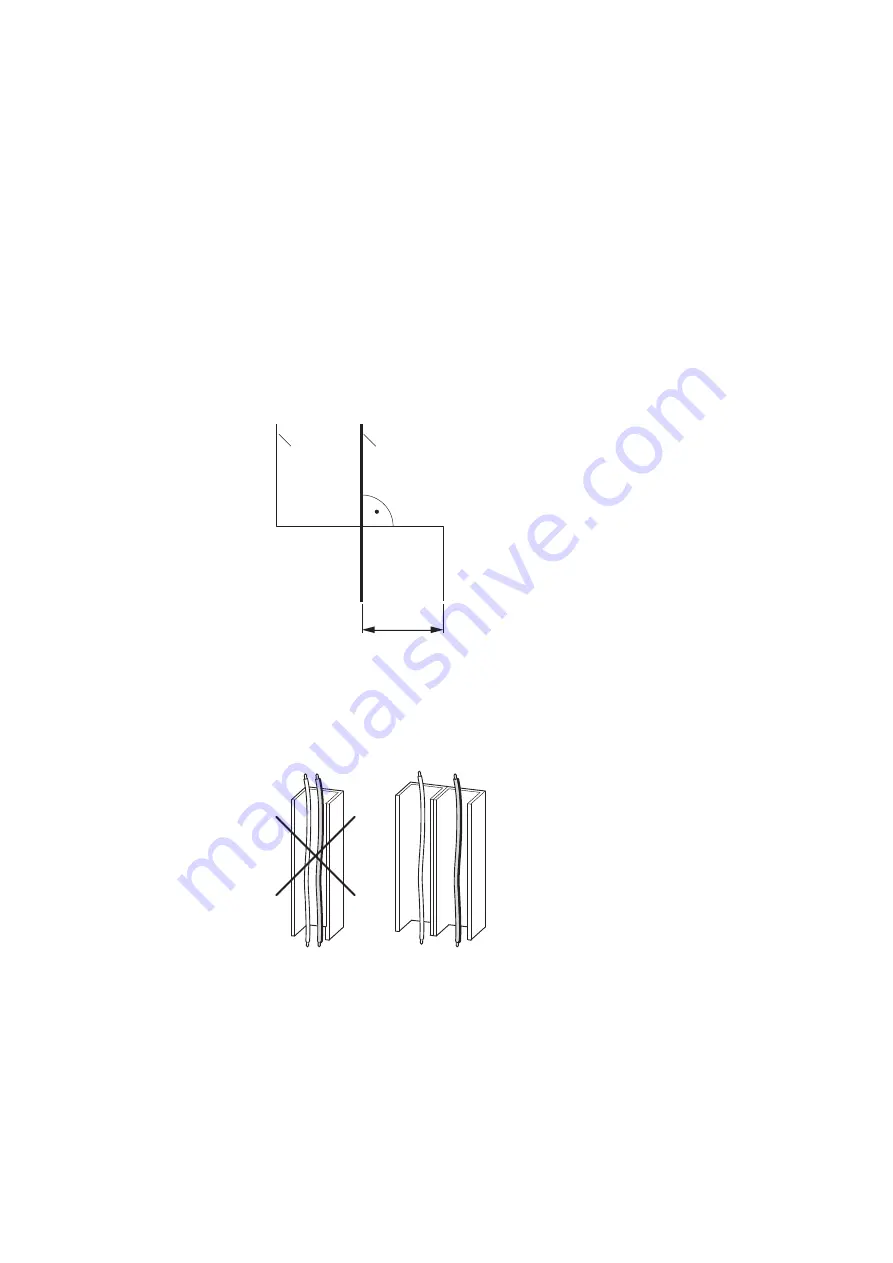
3.7 Install field bus
When installing the connection, make sure that the control and signal cables
(0 - 10 V, 4 - 20 mA, 24 VDC, etc.), as well as the field bus system‘s (Ether-
CAT) connection cables, are not routed directly parallel to mains connection
or motor connection cables conveying power.
With parallel cable routing, the clearances between control, signal and field
bus cables
②
and energy-carrying mains and motor cables
①
must be
greater than 30 cm. Cables should always intersect at right angles.
Figure 14:
Routing cables for EtherCAT
②
and
mains/motor cables
①
If the system requires a parallel routing in cable ducts, a partition must be
installed between the field bus cable
②
and the mains and motor cable
①
,
in order to prevent electromagnetic interference on the field bus.
Figure 15:
Separate routing in the cable duct
a
Mains and motor connection cable
b
EtherCAT cable
→
Never lay the cable of a field bus system directly parallel to the
energy carrying cables.
→
In all cases only use approved EtherCAT cables.
≧
300 mm
(≧ 11.81“)
②
①
a
b
a
b
Содержание PowerXL DX-NET-ETHERCAT-2
Страница 4: ...II ...
Страница 20: ...2 Engineering 2 2 LED indicators 16 DX NET ETHERCAT 2 01 14 MN040009EN www eaton com ...
Страница 28: ...3 Installation 3 7 Install field bus 24 DX NET ETHERCAT 2 01 14 MN040009EN www eaton com ...
Страница 54: ...4 Commissioning 4 12 CoE communication objects 50 DX NET ETHERCAT 2 01 14 MN040009EN www eaton com ...


