71
Net DVR
3. FTP upgrade
Operation steps:
1. Open the FTP server software, configure it follow the setup wizard. Create user name and
password in server. Set the root directory (the folder which will place upgrade file), set the
permission (must set the download permission ).
2. Enter server after configuration. Set the FTP server IP and port.
3. Start FTP service.
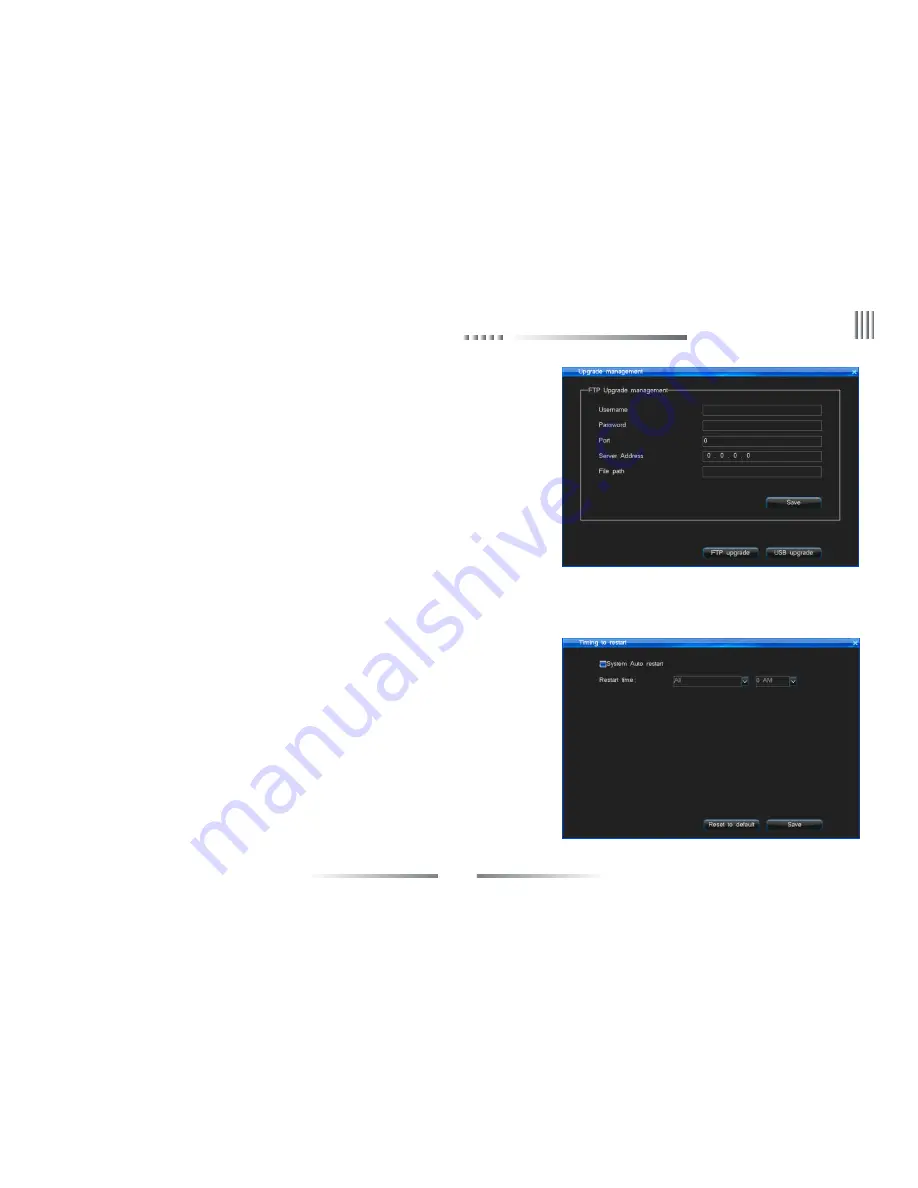
4. Click “System Maintenance” -> “Upgrade Management” -> “FTP upgrade”, set the DVR
information as below:
Userame = the username which create in step1.
Password = the password which create in step1.
Port = the server port which set in step2.
Server address = the server IP which set in step2.
File path = the location where you place the upgrade file. If you set the D:\ as the root directory,
then the upgrade.bin directory is D:\90XX\upgrade.bin, so the file path is\90XX\upgrade.bin,
then save, click “FTP upgrade” to upgrade host.
Choose “Main menu” -> “System Maintenance” -> “Timing to Restart” to enter the interface,
the interface is as the right lower picture:
Enable the system auto-restart function, set restart time then save. When the DVR host time
reach the set time, it will shows “Schedule time out, whether restart at once?”. Choose“Yes” to
confirm restart and choose “Cancel” to cancel restart. If you do no choice, the system will auto-restart
after 20 seconds.
4.10.5 Timing to Restart
eLineTechnology.com


