


FXS Gateway Overview
3.4 DHCP
mode
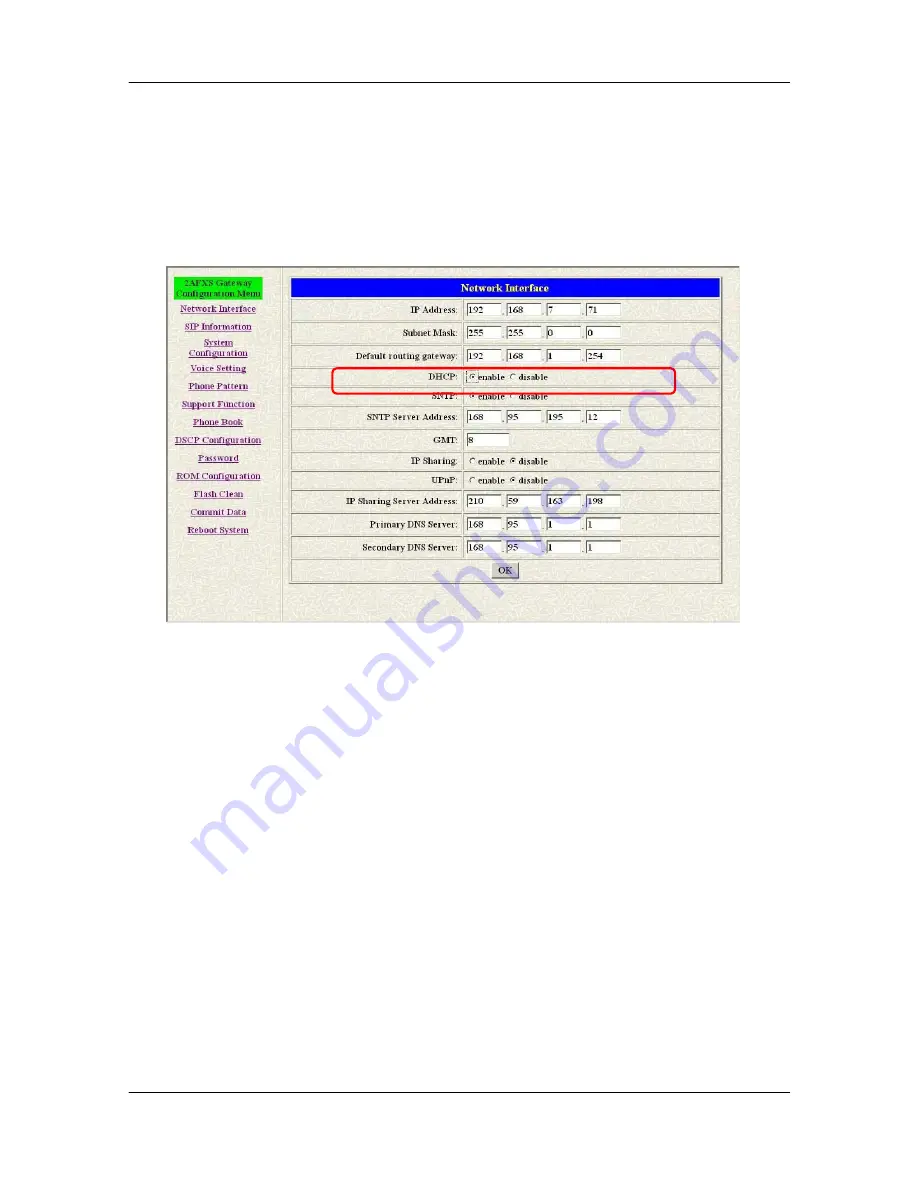
Step 1.
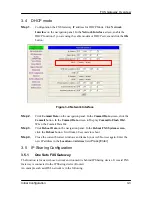
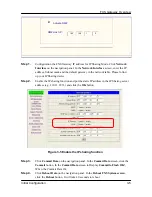
Configuration the FXS Gateway IP address for DHCP Mode. Click
Network
Interface
on the navigation panel. In the
Network Interface
screen, enable the
DHCP function if you are using the cable modem or DHCP server and click the
OK
button.
Figure 3-4 Network Interface
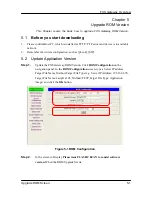
Step 2.
Click
Commit Data
on the navigation panel. In the
Commit Data
screen, click the
Commit
button. In the
Commit Data
screen to Display
Commit to Flash OK!
,
When the Commit Data Ok.
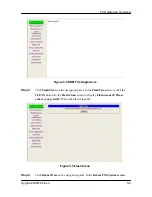
Step 3.
Click
Reboot Data
on the navigation panel. In the
Reboot FXS System screen
,
click the
Reboot
button. It will take 40 seconds to reboot.
Step 4.
Close the current browser windows and launch your web browser again. Enter the
new IP address in the
Location
or
Address
field.
Press [Enter].
3.5 IP Sharing Configuration
3.5.1
One Sets FXS Gateway
The function is for user whose network environment is behind IP Sharing device. It is said FXS
Gateway is connected to the IP Sharing device (Router).
An example such as ADSL network is in the following.
Initial Configuration
3-3


