User Manual | 46
Caution
Do not click CANCEL during firmware upgrade. It may cause considerable damage
to the system.
Settings may be changed to factory default. It is recommended to check the settings
and operating conditions of the NVR after the firmware upgrade.
Upgrading system using USB memory stick:
1.
Insert a USB drive with the firmware file formatted by FAT/FAT32 in any USB port of
the NVR (compatible with USB 2.0).
2.
Select ‘USB’ from the Method drop-down options and press the ‘Scan’ button.
3.
Once the system detects the USB drive, it will display the firmware file under
‘CURRENT VER’ and the ‘NEW VER’.
4.
Click START to begin the upgrade process.
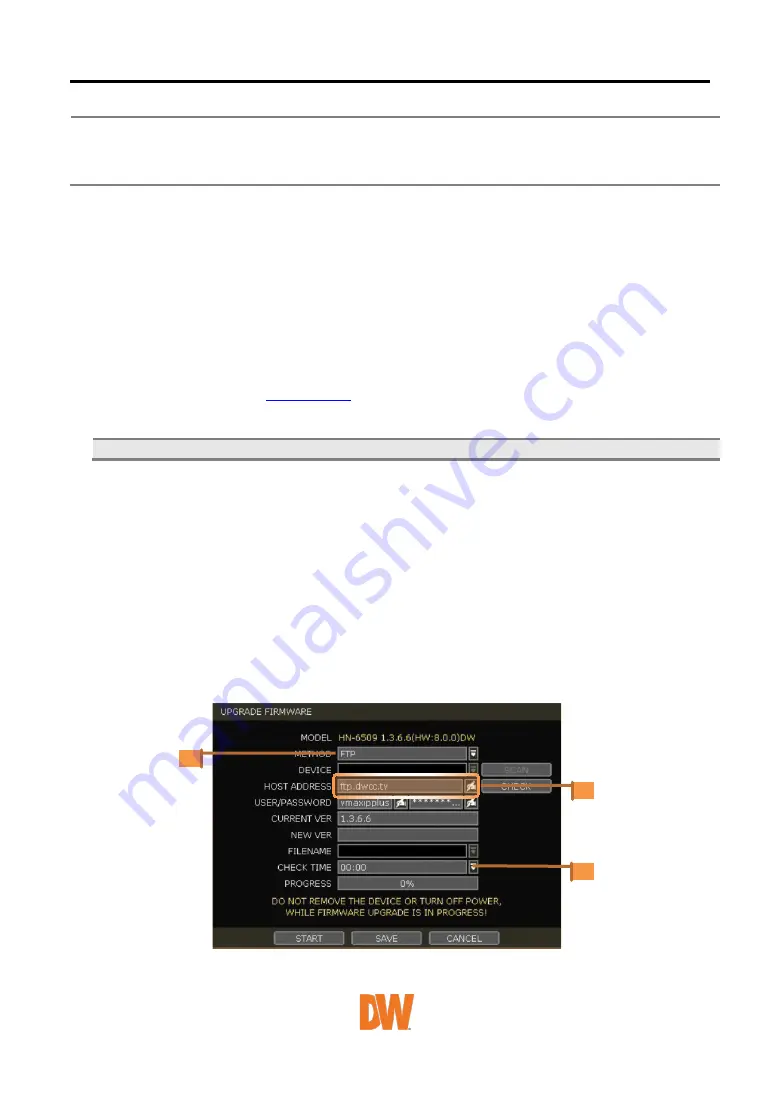
Upgrading system using Digital Watchdog’s Automatic Firmware Upgrade via FTP server:
1.
Select FTP in the drop-down options under ‘Method’.
2.
Enter the FTP’s address:
and enter the username and password (these
should be filled out automatically). Username: vmaxipplus, password: vmaxipplus.
NOTE The FTP server address is subject to change without a prior notice
3.
Enter Check Time. The system will automatically check the FTP server for newer
firmware every day at set hours.
4.
Click the [OK] button to proceed with the automatic firmware upgrade. After
completion, the system will reboot.
5.
Click ‘Check’ to allow the NVR to connect to the FTP server and check the latest
Firmware version. If a new firmware is available, the NVR will ask you whether you want
to upgrade it or not.
6.
Click ‘OK’ to confirm and click ‘START’ to start upgrading.
To setup the NVR to check for new firmware automatically:
1.
Select FTP from the METHOD drop-down options.
2.
Make sure the FTP information is entered correctly (see the section above).
3.
Enter your convenient time at CHECK TIME and then click the [SAVE] button.


