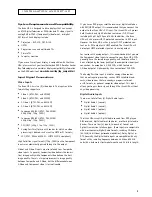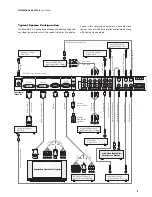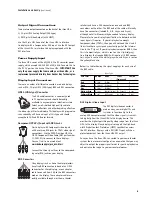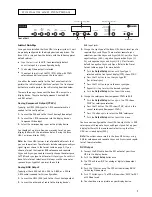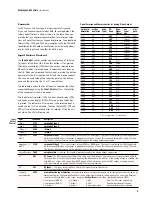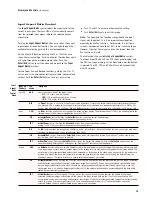
Picture Control
Pushin
g the
Pictur
e Control
button on
ce shows the current
picture control function. You can cycle through the available
functions by pushing this button repeatedly.
For each function, pushing the
▲
or
▼
button on
ce shows the
current setting. Pushing either of these buttons again will
increase or decrease the setting. Push the
Enter/Exit
button to
exit the menu and go back to the picture control selection.
The table below shows the available Picture Controls.
The Picture Control LED, the FPD (front panel display) and the
OSD (on-screen display) will turn on when the button is pressed.
The LED, FPD, and OSD will turn off automatically after 30 seconds.
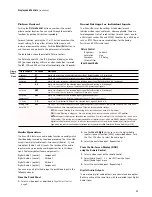
Saved Settings for Individual Inputs
Th
e iScan HD
+
saves th
e settings listed below for each
individual video input and format, where applicable. There are
two independent sets of saved settings for each input: one for
a 50Hz input such as PAL and SECAM, the other for a 60Hz input
such as NTSC. There are no saved settings for the Analog
Passthru and DVI Passthru input.
Pictur
e Control
Bri
ghtness
Contrast
Saturation
Hue
Sharpness
Y/C Delay
Chroma Filter
Input A
spect Ratio
11
Display
s and Controls
(continued)
Pictur
e Controls
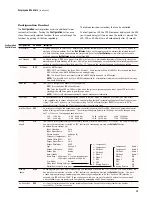
FPD shows
Description
Bri
ghtness
BRT
A
djusts the brightness of the selected input signal. Default setting is 0 (midrange).
Contrast
CNT
A
djusts the contrast of the selected input signal. Default setting is 0 (midrange).
Saturation
S
AT
A
djusts the color saturation setting of the selected input signal. Default setting is 0 (midrange).
Hue
HUE
A
djusts the hue (tint) of the selected input signal. Default setting is 0 (midrange).
Note: This control has no effect on Component or P
AL format input signals.
Sharpn
ess
SHRP
A
djusts the sharpness of the selected input signal. Default setting is 0 (midrange).
Note: This control has no effect on Component Video input signals
.
Sharpn
ess
(Component)
SHRC
A
djusts the sharpness of the selected input signal. Default is Off.
Note: This control has no effect on Composite video or S-Video input signals
.
Y/C Delay
YC D
A
djusts the Y/C differential Delay of the selected input signal. Default is 0.
Chroma Filter
(Auto CUE-C)
CUEC
A
uto CUE-C. This feature removes chroma upsampling errors (CUE) found in some video sources which have been
MPEG encoded and then improperly decoded. There are three available settings:
OFF
: N
o chroma filtering. Use this setting if the source does not have a CUE problem.
ON:
Chr
oma filtering is always on. Use this setting if the source is known to have a CUE problem.
A
UTO:
A
utomatic chroma error detection and correction. Use this setting if it is not known if a source has a
CUE problem. This setting is also recommended for all digital sources which use MPEG2 decoders (DVD players,
digital satellite receivers, etc.) as it will also detect and correct chroma errors created by all sources of this
type when the source is encoded as interlaced (also sometimes called Interlaced Chroma Problem, or ICP).
Pictur
e
Control
Menu
Audio Operation
Th
e iScan HD
+
featur
es an audio delay function to exactly match
the video delay incurred by the video processing. The iScan HD
+
accepts f
our digital audio inputs: two coaxial (Audio 1, 2) and
two optical (Audio 3 and 4) inputs. The location of the audio
inputs are shown on back panel diagrams earlier in this docu-
ment. The factory default audio assignment is:
Digital Audio 1 (coaxial) : Component 1
Digital Audio 2 (coaxial) : S-Video 1
Digital Audio 3 (optical) : S-Video 2
Digital Audio 4 (optical) : Component 2
You can assign a Digital Audio input to each Video input in the
following manner:
F
rom the Front Panel
1.
Select a vi
deo input as described in
Input Select Control,
pag
e 9.
2.
U
se the
Input A
djust
button to select th
e Digital Audio
input assignment function (ASEL) as described above. Push
the
▲
or
▼
button to select th
e audio input.
3.
Select th
e next video input. Repeat step 2.
F
rom the On-Screen Display (OSD)
using the Remote Control
1.
Select a vi
deo input on the remote control.
2.
Select A
udio Input 1, 2, 3, 4 or Off from the ‘Input
Adjust/Audio Input’ menu.
3.
Select th
e next video input. Repeat step 2.
Digital Audio Outputs
Th
ere are two digital audio outputs, one coaxial and one optical.
Both are active at the same time, with the selected input Digital
Audio stream.


