Input Aspect Ratio Control
Th
e
Input A
spect Ratio
con
trol selects the aspect ratio for the
current input signal. The iScan HD
+
will autom
atically convert
from the selected input aspect ratio to the selected output
aspect ratio.
Pushing the
Input A
spect Ratio
button on
ce shows the current
input aspect ratio control function. You can cycle through the
available functions by pushing this button repeatedly.
For the Input AR function, pushing the
▲
or
▼
button on
ce
shows the current setting. Pushing either of these buttons again
will cycle through the available aspect ratios. Push the
Enter/Exit
button to e
xit the menu and go back to the
Input
Aspect Ratio
selecti
on.
For the Zoom, Pan and Borders functions, pushing the
▲
or
▼
button selects th
e two control settings available: horizontal and
vertical. Push the
Enter/Exit
button to adjust each settin
g.
䊳
Push
▲
an
d
▼
to in
crease or decrease the setting.
䊳
Push
Enter/Exit
again to e
xit this mode.
Note:
Th
e Zoom and Pan function are applied to the input
signal, not the output. This is an important consideration,
especially for the Pan function. For example: If a full frame
image is not zoomed more than 100%, there is nothing to pan.
However, if part of the image is not on the screen, then the
Pan function will work.
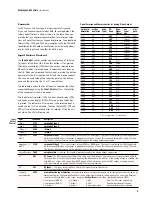
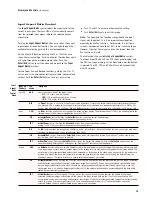
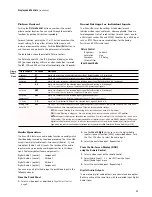
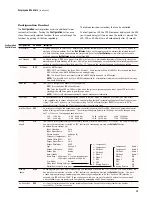
The table shows the available
Input A
spect Ratio
con
trols.
The Input Aspect Ratio LED, the FPD (front panel display) and
the OSD (on-screen display) will all illuminate when the button
is pressed. The LED, FPD, and OSD will turn off automatically
after 30 seconds.
10
Display
s and Controls
(continued)
Input A.R.
Controls
FPD
shows
Description
Input AR
INAR
Selects th
e aspect ratio of the input signal:
4/3:
4:3 aspect r
atio (full-frame)
LBX:
16:9 im
age aspect ratio in 4:3 frame
16/9:
16:9 aspect r
atio (full-frame)
PRST
Th
e
Pr
eset
fun
ction is set to 16:9 input aspect ratio by default. It stores the latest custom aspect ratio settings that you
have defined. This is unique to each input. A custom aspect ratio is defined as a standard aspect ratio (16:9, LBX or 4:3)
that has been modified with the Zoom, Pan and Borders controls. If no custom aspect ratio is defined, it will remain 16:9.
Zoom
ZOOM
Th
e
Z
oom
fun
ction zooms in on or magnifies the image on your display. The minimum zoom is 100%, (no zooming) while the
maximum zoom is 150% (zoom magnification factor of 1.5X).
HOR
Horizontal Zoom
con
trol. Pushing the
Enter/Exit
button sh
ows the current Zoom setting.
Pushing
▲
an
d
▼
button in
creases or decreases the zooming factor.
VERT
Vertical Zoom
con
trol. Pushing the
Enter/Exit
button sh
ows the current Zoom setting.
Pushing
▲
an
d
▼
button in
creases or decreases the zooming factor.
Pan
P
AN
Th
e
P
an
fun
ction allows the image to be shifted up, down, left and right. Note that the Pan function can only be used after
the image has been zoomed to any value greater than 100%.
HOR
Horizontal Pan
con
trol. Pushing the
Enter/Exit
button sh
ows the current Pan setting. Pushing the
▲
button pan
s to the
right. Pushing the
▼
button pan
s to the left.
VERT
Vertical Pan
con
trol. Pushing the
Enter/Exit
button sh
ows the current Pan setting. Pushing the
Enter/Exit
button sh
ows the
current Pan setting. Pushing the
▲
button pan
s up. Pushing the
▼
button pan
s the image down.
Borders
BORD
Th
e
Bor
ders
fun
ction allows you to add horizontal and/or vertical borders around the image. These borders will obscure part
of the input image. Certain input-to-output aspect ratios already result in left/right or top/bottom border being added. This
control allows the system-generated borders to be extended, or for borders to be added when none exist. As the borders are
adjusted (see below) the iScan will temporarily increase the gray level of the borders so that they are visible during the
adjustment process. The level will return to normal after the adjustment has ceased.
HOR
Horizontal Border
con
trol. Pushing the
▲
button m
oves the left and right borders towards the middle of the image, increasing
the border width and cutting off the sides of the input image. Pushing the
▼
button m
oves the left and right borders away
from the image and decreases their width. If there are system-generated left/right borders already present (e.g, when the
input aspect ratio is 4:3 and the output aspect ratio is 16:9), the border width cannot be decreased beyond the base width
created by the aspect ratio conversion.
VERT
Vertical Border
con
trol. Pushing the
▲
button m
oves the top and bottom borders towards the middle of the image,
increasing the border height and cutting off the sides of the input image. Pushing the
▼
button m
oves the top and
bottom borders away from the image and decreases their height. If there are system-generated top/bottom borders already
present (e.g, when the input aspect ratio is 16:9 and the output aspect ratio is 4:3), the border height cannot be
decreased beyond the base height created by the aspect ratio conversion.
Input
Aspect
Ratio
Control
Menu
㛮


