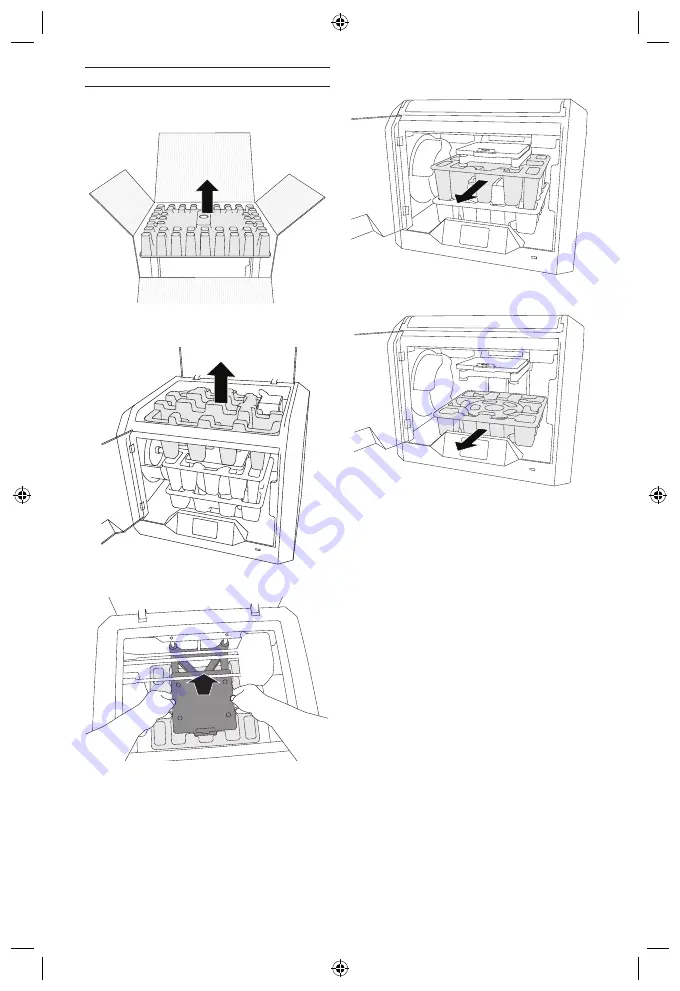
6.
Open door and remove middle insert.
7.
Remove bottom insert.
Tip: Keep packaging for future transportation
and storage.
UNPACKING
1. Place box on table, cut tape, and open.
2.
Remove top insert.
3.
Remove 3D40 FLEX and place on table.
4.
Open lid and remove top insert.
5.
Raise build plate by lifting from both sides.
TOUCH SCREEN
Using your Dremel 3D40 FLEX without a computer is easy with the onboard software and full colour touch screen.
Before building your model we want to familiarize you with the touch screen menu structure and options.
!
WARNING
OBSERVE ALL PROVIDED WARNINGS AND SAFETY INSTRUCTIONS WHEN USING THE
DREMEL 3D40 FLEX. FAILURE TO DO SO MAY RESULT IN FIRE, EQUIPMENT DAMAGE,
PROPERTY DAMAGE OR PERSONAL INJURY.
BUILD
Tap to select a 3D model and begin build process.
(See page 23 for detailed build instructions)
BUILD MENU
Tap Printer, USB Flash Drive, or Print Queue to
choose the destination of your desired file.
MODEL MENU
Tap to select the desired model or use arrows to
scroll through pages to find your model.
FILE DETAILS
BUILD
– Tap to begin build process.
DELETE
– Tap to remove model file from on-printer
storage or USB flash drive.
COPY TO PRINTER
– From USB flash drive, tap to
copy model file to on-printer storage.
BUILD STATUS
STOP
– Tap to cancel the current build process.
PAUSE/PLAY
– Tap to pause or resume the current
build process. Pause will allow you to access the
filament button.
CHANGE FILAMENT
– Tap to change filament during
the current build process to add more
filament or change colors.
10
Содержание 3D40 FLEX
Страница 368: ...368 ...
Страница 413: ...校准 轻击将喷头和打印平台移动到零点位置 JOG 模式 轻击显示选项 将喷头和打印平台沿 X Y Z 轴移 动 413 ...
Страница 586: ......
Страница 587: ......
Страница 588: ...Dremel Konijnenberg 60 4825 BD Breda The Netherlands 2610Z10167 11 2019 All Rights Reserved ...


