Vigor2110 Series User’s Guide
86
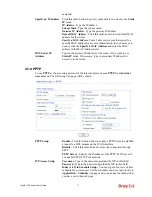
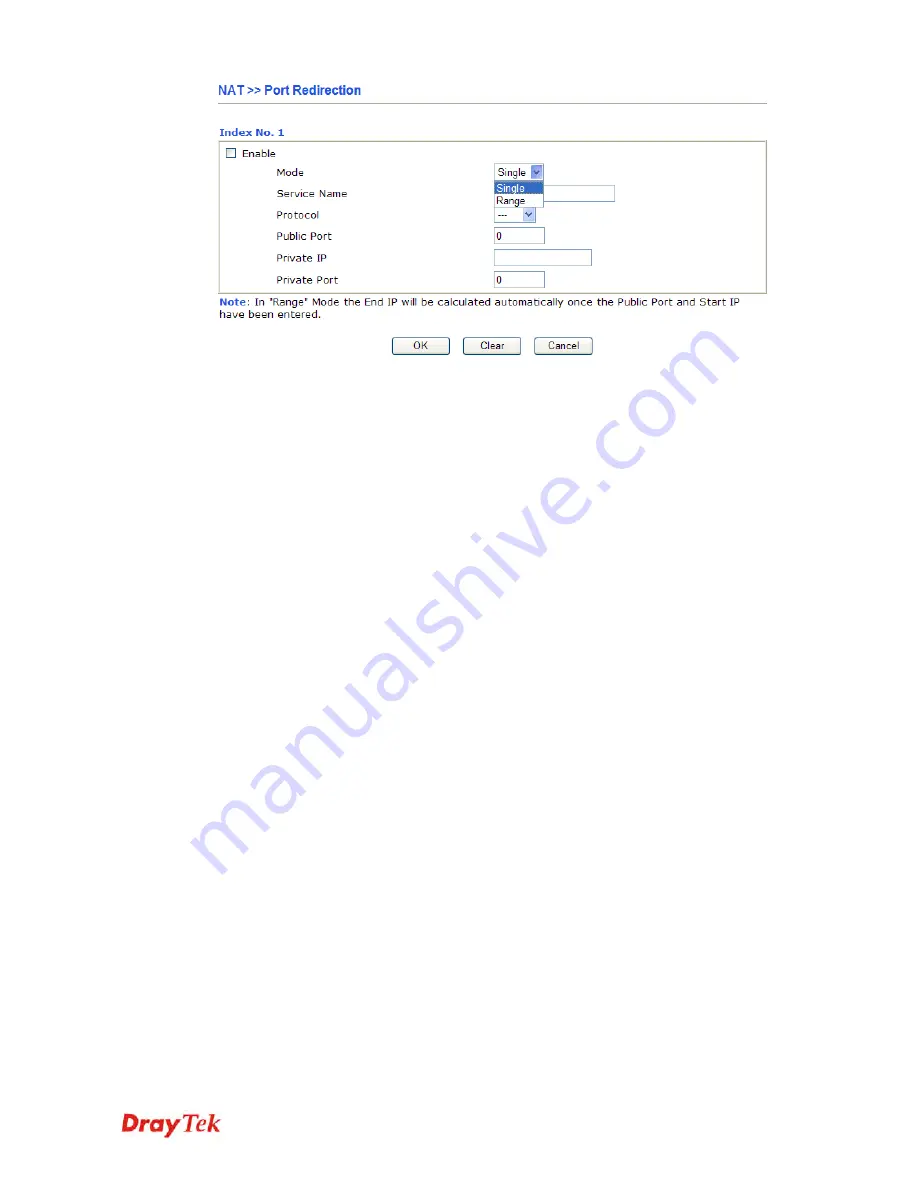
Enable
Check this box to enable such port redirection setting.
Mode
Two options (Single and Range) are provided here for you to choose.
To set a range for the specific service, select
Range
. In Range mode,
if the public port (start port and end port) and the starting IP of
private IP had been entered, the system will calculate and display the
ending IP of private IP automatically.
Service Name
Enter the description of the specific network service.
Protocol
Select the transport layer protocol (TCP or UDP).
Public Port
Specify which port can be redirected to the specified
Private IP and
Port
of the internal host. If you choose
Range
as the port redirection
mode, you will see two boxes on this field. Simply type the required
number on the first box. The second one will be assigned
automatically later.
Private IP
Specify the private IP address of the internal host providing the
service. If you choose
Range
as the port redirection mode, you will
see two boxes on this field. Type a complete IP address in the first
box (as the starting point) and the fourth digits in the second box (as
the end point).
Private Port
Specify the private port number of the service offered by the internal
host.
Note that the router has its own built-in services (servers) such as Telnet, HTTP and FTP etc.
Since the common port numbers of these services (servers) are all the same, you may need to
reset the router in order to avoid confliction.
For example, the built-in web configurator in the router is with default port 80, which may
conflict with the web server in the local network, http://192.168.1.13:80. Therefore, you need
to
change the router’s http port to
any one other than the default port 80
to avoid conflict,
such as 8080. This can be set in the
System Maintenance >>Management Setup
. You then
will access the admin screen of by suffixing the IP address with 8080, e.g.,
http://192.168.1.1:8080 instead of port 80.
Содержание Vigor 2110
Страница 1: ......
Страница 22: ...Vigor2110 Series User s Guide 14 This page is left blank...
Страница 30: ...Vigor2110 Series User s Guide 22...
Страница 145: ...Vigor2110 Series User s Guide 137...
Страница 220: ...Vigor2110 Series User s Guide 212 14 Click Send 15 Now the firmware update is finished...


