


26
OM-HY/6G(CE)
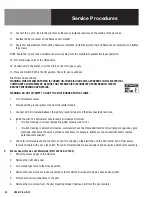
Service Procedures
The following procedures are based upon having access to the steamer on all four sides. If the steamer is installed between other
appliances and there is not enough room on the sides for access, the steamer must then be pulled out from its position to gain
proper access.
Care should be taken in moving the steamer so as not to stress or pull on the electrical and water connections.
A. Top Right Side Panel (Louvered) - Removal (P/N
1. With a flat blade screw driver remove the two 10-32 screws on the lower edge and one screw on the top edge of the
panel. The panel is held to the steamer by two spring-like clips at the rear and bottom edge.
2. Once the screws are removed SLIDE the panel towards the front with a lifting motion. Do not attempt to PRY the panel.
Once the panel is free of the rear and lower clips, it may be lifted off.
ASSEMBLY TIP: When replacing the panel, press the rear edge inward so that both clips will be retained by the back flange.
Make sure that the holes in the panel are in alignment with the tapped holes in the steamer so that the replacement of the two
10-32 screws will be easy and not damage the screws.
B. Steamer Table Panels (Front P/N
1. To remove the steamer table lower panel, simply raise the panel and swing out. There are no fasteners on this panels and
it is retained only by upper and lower tracks.
2. To remove the front and side panels remove the screw(s) holding the panel, then remove the panels.
3. The front and rear panels are unique and the two side panels are identical and interchangeable.
C. Left Side - Removal (P/N
Under normal conditions, the left side cover should never have to be removed as there are no operational and/or replacement
parts to be accessed. The single exception is if the door has been reversed so that the handle is on the LEFT and the Door
Interlock Switch is found to be defective and must be replaced. The door switches for BOTH door positions are installed at the
time of manufacture, so there is no need to access the switch if the door is to be reversed.
1. If the top/left side cover must be removed due to a faulty door switch, remove the right side panel (as above) first. Then
remove the top left panel in the same manner.
D. Adjustable Legs (P/N
1. Each leg is provided with a screw type support post. These may be extended or retracted by turning them with a wrench
or ChannelLock. Make sure that all four legs are in tight contact with the floor for proper steamer support.
2. If damaged, these posts may be replaced by tapping out (on opposite sides of the leg) the threaded fitting which is
friction held in each stainless steel leg. The stainless leg and the threaded fitting are one assembly.
NOTE: The following components and assemblies are to be found in the lower table portion of the steamer.
E. Steam Generator Drain Valve (P/N
1. Turn off power and allow steamer to drain completely. Remove back cover panel and loosen hose clamps.
2. Disconnect both ends of the drain hose from the spray box and the steam generator.
3. Unplug and disconnect the valve electrical wires. Remove the nuts holding the valve to the plate. Remove the valve from
the threaded studs. Then remove the silicone hose from the valve.
4. Inspect the silicone hose for any damage or lime buildup. Replace hose if required.
Содержание Unified Brands Groen HyperSteam HY-6G
Страница 25: ...OM HY 6G CE 25 Electrical Schematic ...
Страница 41: ...OM HY 6G CE 41 ...
Страница 42: ...42 OM HY 6G CE ...
Страница 43: ...OM HY 6G CE 43 ...


