background image

OP001012

1-37

Safety

Proper Tools

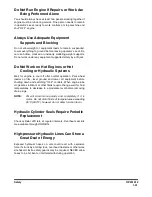
Use only tools suited to the task. Using damaged, low quality,
faulty, or makeshift tools could cause personal injury. There is a
danger that pieces from, chisels with crushed heads, or
hammers, may get into your eyes and cause blindness.

Use of Lighting

When checking fuel, oil, battery electrolyte, or window washing
fluid, always use lighting with antiexplosion specifications. If
such lighting equipment is not used, there is a danger of an
explosion.

If work is carried out in dark places without using lighting, it may
lead to injury, so always use proper lighting.

Even if the place is dark, never use a lighter or flame instead of
lighting. There is a danger of fire. There is also danger that
battery gas may catch fire and cause an explosion.

Fire Prevention and Explosion Prevention

All fuels, most lubricants and some coolant mixtures are
flammable. Leaking fuel or fuel that is spilled onto hot surfaces
or onto electrical components can cause a fire.

Store all fuels and all lubricants in properly marked containers
and away from all unauthorized persons.

Store oily rags and other flammable material in a protective
container.

Do not smoke while you refuel the machine or while you are in a
refueling area.

Do not smoke in battery charging areas or in areas that contain
flammable material.

Clean all electrical connections and tighten all electrical
connections. Check the electrical wires daily for wires that are
loose or frayed. Tighten all lose electrical wires before you
operate the machine. Repair all frayed electrical wires before
you operate the machine.

Remove all flammable materials before they accumulate on the
machine.

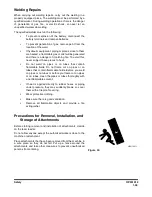
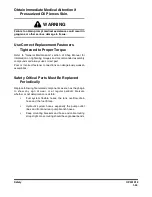
Do not weld on pipes or on tubes that contain flammable fluids.
Do not flame cut on pipes or on tubes that contain flammable
fluids. Before you weld on pipes or on tubes or before you flame
cut on pipes or on tubes, clean the pipes or tubes thoroughly
with a nonflammable solvent.

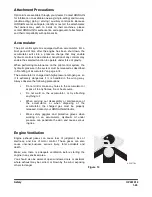
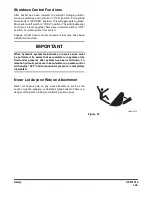
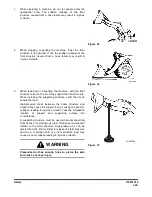
Figure 26 

HDO1037L

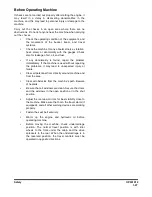
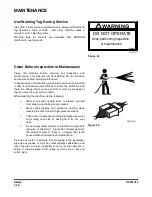
Figure 27 

HDO1040L

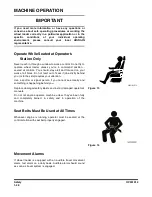
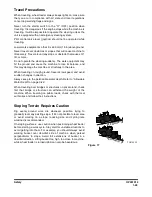
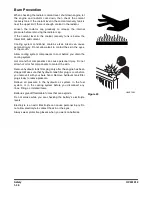
HDO1015I

Figure 28 

Содержание DL220

Страница 1: ...ommended that consumers periodically contact their distributors for recent documentation on purchased equipment This documentation may include attachments and optional equipment that is not available in your machine s package Please call your distributor for additional items that you may require Illustrations used throughout this manual are used only as a representation of the actual piece of equi...

Страница 2: ......

Страница 3: ... 24 Machine Operation 1 28 Maintenance 1 36 Battery 1 46 Towing 1 48 Shipping and Transportation 1 49 Operating Controls 2 1 Component Locations 2 2 Operator s Area 2 4 Steering Console and Pedals 2 5 Front Instrument Panel 2 14 Right Side Switch Panel 2 25 Various Cabin Locations 2 40 Heater and Air Conditioner Operation 2 44 Stereo CD Player Optional 2 49 Seat Adjustment 2 51 Seat Belt 2 53 Door...

Страница 4: ...ng Machine 3 20 If Engine Stalls While Traveling 3 21 Allowable Water Depth 3 22 Inspection Maintenance and Adjustment 4 1 Basic Preventive Maintenance 4 1 Safety When Servicing 4 4 Preventive Maintenance 4 12 Table of Recommended Lubricants 4 14 Fluid Capacities 4 16 Lubrication and Service Chart 4 17 Maintenance Intervals 4 20 10 Hour Daily Service 4 22 50 Hour Weekly Service 4 31 250 Hour Month...

Страница 5: ...ng Brake Adjustment 4 81 Tires 4 82 Transportation 5 1 Loading and Unloading 5 1 Summary of Safety Precautions for Lifting 5 2 Troubleshooting 6 1 Engine 6 1 Hydraulic System 6 3 Travel System 6 5 Steering 6 6 Braking 6 7 Electrical System 6 7 Specification 7 1 General Specifications 7 1 Working Range and Dimensions 7 2 Working Capacities 7 4 Approximate Weight of Workload Materials 7 4 Index 8 1 ...

Страница 6: ...950106 00117E Table of Contents IV ...

Страница 7: ...950106 00117E I I Presentation 1Presentation PRESENTATION FG015573 Figure 1 ...

Страница 8: ...e common rail system is positioned at an angle above the pistons and are controlled via the camshaft and a electronic control module ECM The cylinder head covers all cylinders The engine has four valves per cylinder The accelerator position is transferred electrically from accelerator pedal Electrical System The machine has three control units The Gauge Panel for the instrumentation is integrated ...

Страница 9: ...tion of Falling Object Protective Structure roof protection and ROPS is an abbreviation of Roll Over Protective Structure roll over protection Never carry out any unauthorized alterations to the cabin e g lowering the roof height drilling welding on brackets for fire extinguisher radio aerial or other equipment without first having discussed the alteration with personnel at the DOOSAN Infracore En...

Страница 10: ...s EU declaration also covers attachments manufactured by DOOSAN CE The documentation is a valuable document which must be kept safe and retained for at least ten years The document should always accompany the machine when it is sold If the machine is used for other purposes or with other attachments than described in this manual safety must at all times and in each separate case be maintained The ...

Страница 11: ...terference COMMUNICATION EQUIPMENT INSTALLATION Protection Against Electromagnetic Interference This machine has been tested in accordance with EU directive 89 336 EEC governing electromagnetic interference It is therefore very important that all nonapproved electronic accessories such as communication equipment must be tested before installation and use since they can cause interference to the el...

Страница 12: ...1 Reference Number Description 1 Primary Marking The machine PIN stamped into right side 2 Product Plate The manufacturer s name and address machine PIN 3 Additional Plate for Product Plate Machine weight engine output year of manufacture year of delivery and position of CE mark EU EEA countries only 4 Cabin The manufacturer s name and address product number machine model designation max machine w...

Страница 13: ... page 1 15 4 General Hazard Information on page 1 15 5 Before Starting Engine on page 1 24 6 Machine Operation on page 1 28 7 Maintenance on page 1 36 8 Battery on page 1 46 9 Towing on page 1 48 10 Shipping and Transportation on page 1 49 DANGER Improper use of wheel loader could cause serious injury or death Before operating wheel loader or performing maintenance operator or technician must read...

Страница 14: ...y or accidents Always observe safety precautions and follow recommended procedures CAUTION This word is used on safety messages and safety labels and indicates potential of a hazardous situation that if not avoided could result in minor or moderate injury It may also be used to alert against a generally unsafe practice WARNING This word is used on safety messages and safety labels and indicates po...

Страница 15: ...efore the safety messages in this manual and on the machine may not include all possible safety precautions If any procedures or actions not specifically recommended or allowed in this manual are used you must be sure that you and others can do such procedures and actions safely and without damaging the machine If you are unsure about the safety of any procedures contact a DOOSAN distributor ...

Страница 16: ...n the machine There are several specific warning signs on this machine The exact location of hazards and the description of the hazards are reviewed in this section Please become familiarized with all warning signs Make sure that all the warning signs are legible Clean the warning signs or replace the warning signs if you cannot read the words Replace the illustrations if the illustrations are not...

Страница 17: ...OP001012 1 5 Safety 1 3 12 6 4 11 5 9 10 8 3 7 10 9 4 6 2 FG015631 Figure 1 ...

Страница 18: ... people nearby before operating and sure all persons are clear of area Always make sure when leaving operator s seat to Lower bucket or other working tools to the ground Lock transmission selector in neutral Set park brake Turn key switch OFF Remove key from switch If hydraulic components and units are ABNORMAL consult nearest DAEWOO dealer or authorized service shop Do not attempt to make an over...

Страница 19: ... When Opening Engine Hood 190 00095 4 Warnings for Using Wheel Block 4190 2547A 190 00207 WARNING Before opening hood shut down engine ACO1420L WARNING Block wheels to prevent machine movement before disengaging park brake AMO0400L ...

Страница 20: ...d function to operate under force of gravity When shutting machine down lower front attachment to ground After engine has been shut down turn key to ON position and move joystick controls to release pressure in accumulator Remove key WARNING EXPLOSION HAZARD Keep away from flame Do not weld on or drill into the accumulator ACO1480L CAUTION Any raised attachment will lower to ground if accumulator ...

Страница 21: ...rushing could occure in articulated area when machine turns Make sure people are clear of machine before starting engine or moving steering wheel Lock safety bar during servicing or transporting machine FG015714 WARNING HYDRAULIC OIL HOT OIL CAN CAUSE INJURY OR BLINDNESS To prevent hot oil from spurting out Turn engine off Allow oil to cool Lift cap to relieve pressure ACO1410L ...

Страница 22: ...410L DANGER Battery fumes can explode Keep sparks and flames away from batteries Always avoid storing metals like tools or flammable materials around or on the batteries Explosion or fire can be caused by shortcircuiting batteries Sulfuric acid in battery is poisonous It is strong enough to burn skin eat holes in clothing and cause blindness if splashed in eyes If you spill acid on yourself 1 Flus...

Страница 23: ...5 11 Warnings to Use Safety Lock 4190 1993 190 00121 WARNING Sudden or accidental movement of boom may cause injury or death Securely brace boom before working or walking under raised boom FG015713 WARNING Safety lock must be in LOCK position when servicing pivot area or transporting machine AMO0440L ...

Страница 24: ...OP001012 Safety 1 12 12 Warning Tag 190 00695A 190 00098A WARNING DO NOT OPERATE When Performing inspection or maintenance FG013220 ...

Страница 25: ...with these aids there still may be blind spots which cannot be seen from the operator s seat so always be careful when operating Adjust the visual aids for the best visibility criteria for all areas around the machine When swinging or backing up press button to change display mode on monitor so you can check rear and side of machine Before moving the machine look around the work site through mirro...

Страница 26: ...of the flagman Signals should only be given by one flagman When working in dark places turn ON work lights and front lights on the machine Set up additional lighting in the area Stop operations if there is poor visibility such as fog snow rain or sandstorms Check mirrors and rear view camera optional lens on machine before starting operations Clean off any dirt and adjust view to ensure good visib...

Страница 27: ... you are taking medication that makes you feel sleepy if you have been drinking or if you are suffering from emotional problems These problems will interfere with your sense of judgment in emergencies and may cause accidents When working with another operator or with a person on work site traffic duty be sure that all personnel know the nature of the work and understand all hand signals that are t...

Страница 28: ...ephones inside the operator s cabin when driving or operating the machine There is a danger that this may lead to an unexpected accident Never bring any dangerous objects such as flammable or explosive items into the operator s cabin To ensure safety do not use the radio or music headphones when operating the machine There is a danger that this may lead to a serious accident When operating the mac...

Страница 29: ...these hazards can cause disabling or permanent injuries NOTE The equivalent continuous A weighted sound pressure level at the workstation for this machine is 74 dB A Measurement is obtained on a dynamic machine following the procedures and cabin conditions as described in ISO 6396 NOTE The guaranteed sound power level emitted by the machinery for this machine is 105 2 dB A Measurement is obtained ...

Страница 30: ... machine on terrain where working and traveling conditions are good Remove any large rocks or obstacles Fill any ditches and holes Provide machines for and schedule time to maintain good terrain conditions 7 Travel over longer distance e g on public roads at adjusted medium speed Always adjust the speed to prevent bouncing Asbestos Dust Hazard Prevention Asbestos dust can be HAZARDOUS to your heal...

Страница 31: ...running Fuel Oil and Hydraulic Fluid Fire Hazards Fuel oil and antifreeze will catch fire if it is brought close to a flame Fuel is particularly flammable and can be hazardous Always strictly observe the following Add fuel oil antifreeze and hydraulic fluid to the machine only in a well ventilated area The machine must be parked with controls lights and switches turned OFF The engine must be OFF a...

Страница 32: ...the coolant to cool then loosen the cap slowly to relieve the pressure To prevent hot oil from spurting out shut down engine wait for the oil to cool then loosen the cap slowly to relieve the pressure Injury from Work Equipment Do not enter or put your hand arm or any other part of your body between movable parts such as between the work equipment and cylinders or between the machine and work equi...

Страница 33: ...other at the work site Check the kit periodically and make any additions if necessary Know what to do in case of injury from fire Keep emergency numbers for doctor ambulance service hospital and fire department near your telephone If the machine catches fire it may lead to serious personal injury or death If a fire occurs during operation escape from the machine as follows Turn the starter switch ...

Страница 34: ...rs Any serious impact or damage to the system requires a complete integrity reevaluation Reinstallation recertification and or replacement of the system may be necessary Install Additional Safety Equipment If Conditions Require Laminate glass protection for the front side or rear windows along with tempered glass may also be recommended depending upon particular site conditions Contact your DOOSAN...

Страница 35: ... Accumulator on page 4 74 The accumulator is charged with high pressure nitrogen gas so it is extremely dangerous if it is handled in the wrong way Always observe the following precautions Do not drill or make any holes in the accumulator or expose it to any flames fire or heat source Do not weld on the accumulator or try attaching anything to it When carrying out disassembly or maintenance of the...

Страница 36: ...ition of the riverbed and the depth and flow of the water before operating in water or crossing a river NEVER work in water that is more than the permissible water depth Refer to Allowable Water Depth on page 3 22 Any object in vicinity of boom could represent a potential hazard or cause the operator to react suddenly and cause an accident Use a spotter or signal person when working near bridges p...

Страница 37: ...e Remove any dirt from the window glass mirrors handrails and steps Do not leave tools or spare parts laying around in the operator s cabin The vibration of the machine when traveling or during operations may cause them to fall and damage or break the control levers or switches They may also get caught in the gap of the control levers and cause the work equipment to malfunction or move dangerously...

Страница 38: ...vice work is in progress or if a warning tag is attached to controls in the cabin A machine that has not been used recently or is being operated in extremely cold temperatures could require a warm up or maintenance service before start up Check gauges and monitor displays for normal operation before starting the engine Listen for unusual noises and remain alert for other potentially hazardous cond...

Страница 39: ...the machine is used without repairing the problems it may lead to unexpected injury or failure Clear all personnel from directly around machine and from the area Clear all obstacles from the machine s path Beware of hazards Be sure that all windows are clean Secure the doors and the windows in the open position or in the shut position Adjust the rearview mirrors for best visibility close to the ma...

Страница 40: ...t anyone operate machine unless they ve been fully and completely trained in safety and in operation of the machine Seat Belts Must Be Used at All Times Whenever engine is running operator must be seated at the control station with seat belt properly engaged Movement Alarms If wheel loader is equipped with an audible travel movement alarm test alarm on a daily basis Audible alarm should sound as s...

Страница 41: ...rough ground travel at low speed and avoid sudden changes in direction Always keep to the permissible water depth Refer to Allowable Water Depth on page 3 22 When traveling over bridges or structures on private land check first that bridge or structure can withstand the weight of the machine When traveling on public roads check with the local authorities and follow their instructions Sloping Terra...

Страница 42: ...that safety margin NOTE Before starting any operation near power lines either aboveground or buried cable type you should always contact power utility company directly and work out a safety plan with them Before Starting to Dig Contact Authorities Below ground hazards also include natural gas lines water mains tunnels and buried foundations Know what s underneath work site before starting to dig B...

Страница 43: ... inadequate supports when work is being done Block wheels fore and aft to prevent any movement Digging Beneath Overhangs Digging beneath an overhang is dangerous Overhang could collapse on top of operator and cause serious injury or death Go on to another digging area before steep overhangs are formed Know height and reach limits of wheel loader and plan ahead while working Park wheel loader away ...

Страница 44: ... be guidelines standards or restrictions on equipment that may be used to perform certain kinds of work Check and follow all local requirements which may also be related to below ground hazards and power lines Never Use Ether Starting Aids An electric grid type manifold heater is used for cold starting Glowing heater element can cause ether or other starting fluid to detonate causing injury Observ...

Страница 45: ... hitting the work equipment always do the following When working in tunnels on bridges under electric wires or when parking the machine or carrying out other operations in places with limited height be extremely careful not to hit the bucket or other parts To prevent collisions operate the machine at a safe speed when working in confined spaces indoors or in crowded areas Do not pass the bucket ov...

Страница 46: ... becomes unstable In cold weather do not touch metal surfaces with your bare hands If you touch a metal surface in extremely cold weather your skin may freeze to the metal surface Parking Machine Avoid making sudden stops or parking the machine wherever it happens to be at the end of the work day Plan ahead so that the wheel loader will be on firm level ground away from traffic and away from high ...

Страница 47: ...ll lock down security equipment that may have been installed on machine Never Let Anyone Ride on Attachment Never let anyone ride on any work attachment such as the bucket crusher grapple or clamshell grab bucket There is a danger of the person falling and suffering serious injury IMPORTANT When hydraulic system maintenance or service work must be performed be aware that accumulators in system sto...

Страница 48: ...lf When washing the machine do the following Wear shoes with nonslip soles to prevent yourself from slipping and falling on wet places Wear safety glasses and protective clothing when washing the machine with high pressure steam Take action to prevent touching high pressure water and cutting your skin or having mud fly into your eyes Do not spray water directly on electrical components sensors con...

Страница 49: ... that is spilled onto hot surfaces or onto electrical components can cause a fire Store all fuels and all lubricants in properly marked containers and away from all unauthorized persons Store oily rags and other flammable material in a protective container Do not smoke while you refuel the machine or while you are in a refueling area Do not smoke in battery charging areas or in areas that contain ...

Страница 50: ... cool before you drain the cooling system Hot oil and hot components can cause personal injury Do not allow hot oil or hot components to contact the skin Remove hydraulic tank filter plug only after the engine has been stopped Make sure that hydraulic tank filter plug is cool before you remove it with your bare hand Remove hydraulic tank filter plug slowly to relieve pressure Relieve all pressure ...

Страница 51: ...hat contain flammable fluids Do not flame cut on pipes or on tubes that contain flammable fluids Before you weld on pipes or on tubes or before you flame cut on pipes or on tubes clean the pipes or tubes thoroughly with a nonflammable solvent If heat is applied directly to rubber hoses or piping under pressure they may suddenly break so cover them with a fireproof covering Wear protective clothing...

Страница 52: ...out with the inspection cover open but not locked there is danger that it may suddenly close and cause injury if there is a gust of wind Prevention of Crushing and Cutting You should always have at least two people working together if the engine must be run during service One person needs to remain in the operator s seat ready to work the controls or stop the machine and shut off the engine Unless...

Страница 53: ... operation Park wheel loader on firm level ground and lower all equipment before shutting down and switching OFF controls When engine lube oil gearbox lubricant or other fluids require change wait for fluid temperatures to decrease to a moderate level before removing drain plugs NOTE Oil will drain more quickly and completely if it is warm Do not drain fluids at temperatures exceeding 95 C 203 F h...

Страница 54: ...zed oil has enough force to pierce the skin and cause serious injury Always use a piece of wood or cardboard to check for suspected hydraulic leaks Never use your hands or expose your fingers Do not bend high pressure lines Do not strike high pressure lines Do not install lines tubes or hoses that are bent or damaged Make sure that all clamps guards and heat shields are installed correctly to prev...

Страница 55: ...tical Parts Must Be Replaced Periodically Replace following fire related components as soon as they begin to show any sign of wear or at regular periodic intervals whether or not deterioration is visible Fuel system flexible hoses the tank overflow drain hose and the fuel fill cap Hydraulic system hoses especially the pump outlet lines and front and rear pump branch hoses Keep mounting brackets an...

Страница 56: ...s oil fuel solvent filters and batteries Check Tire Pressure and Condition Maintain tire pressure but do not overinflate Inspect tires and wheels daily When inflating tires follow procedures in Maintenance Section which include using an extension to allow you to avoid standing in front of or over a tire Do not change a tire unless you have both experience and proper equipment NOTE Refer to Recomme...

Страница 57: ... structure verify that it can handle the load High pressure loads between the boom structure and support may cause the support to slip causing the boom to collapse leading to injuries or death Take the installation location of support and supporting surface into consideration A supporting structure must be used when disconnecting front hoses or removing any other mechanical component related to th...

Страница 58: ... vegetable oil Call a doctor or poison prevention center immediately When cleaning the top surface of the battery wipe it with a clean damp cloth Never use gasoline thinner or any other organic solvent or detergent Tighten the battery caps securely Explosive battery gas can be set off by sparks from accidental contact or static discharge Turn OFF all switches and engine when working on batteries K...

Страница 59: ...e or vehicle do not allow the two machines to touch Wear safety glasses or goggles while required battery connections are made 24 volt battery units consisting of two series connected twelve volt batteries have a cable connecting one positive terminal on one of the 12 volt batteries to a negative terminal on the other battery Booster or charger cable connections must be made between the nonseries ...

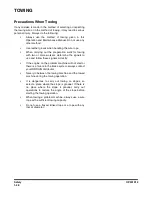
Страница 60: ...ne the signals to use and follow these signals correctly If the engine on the problem machine will not start or there is a failure in the brake system always contact your DOOSAN distributor Never go between the towing machine and the towed machine during the towing operation It is dangerous to carry out towing on slopes so select a place where the slope is gradual If there is no place where the sl...

Страница 61: ...aration for transport The hauling vehicle trailer and load must all be in compliance with local regulations governing the intended shipping route Partial disassembly or teardown of wheel loader may be necessary to meet travel restrictions or particular conditions at the work site Refer to Transportation on page 5 1 of this Operation and Maintenance Manual for information on loading unloading and t...

Страница 62: ...OP001012 Safety 1 50 ...

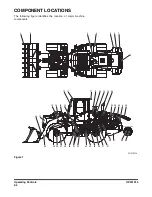
Страница 63: ...0 Seat Belt on page 2 53 11 Door Side Latch on page 2 54 12 Arm Rest on page 2 55 13 Fuse Box Relay Engine Emergency Stop Switch on page 2 56 Each group is explained with a point location drawing or photo and a brief description of each control switch gauge or valve Indicator lights work besides the gauges on the instrument panel The operator should monitor machine pressure on the instrument panel...

Страница 64: ...T LOCATIONS The following figure identifies the location of major machine components 1 2 3 4 5 6 7 23 24 26 8 25 9 22 10 19 20 11 17 18 17 16 15 14 13 44 12 30 29 27 28 35 33 34 32 21 31 40 37 38 36 39 41 42 43 OPPOSITE SIDE FG015574 Figure 1 ...

Страница 65: ...adder 17 Work Light 18 Operator s Cabin 19 Air Cleaner 20 Engine Air Intake Precleaner 21 Engine 22 Muffler 23 CAC Cooler 24 Radiator 25 Grille 26 Fan 27 Fuel Tank 28 Engine Oil Fill Cap 29 Engine Oil Filter 30 Engine Oil Level Dipstick 31 Rear Axle Pivot 32 Rear Axle 33 Drive Shaft Rear 34 Transmission 35 Transmission Oil Filter 36 Drive Shaft Center 37 Center Pin 38 Steering Wheel Cylinder 39 Bo...

Страница 66: ...s controls in operator s cabin 1 3 4 FG006189 2 Figure 2 Reference Number Description 1 Steering Console and Pedal See page 2 5 2 Various Cabin Locations See page 2 40 3 Right Side Switch Panel See page 2 25 4 Seat Adjustment See page 2 51 Reference Number Description ...

Страница 67: ...nce Number Description 1 Starter Switch 2 Horn Button 3 Combination Switch 4 Accelerator Pedal 5 Steering Wheel Adjustment Lever 6 Brake Pedals 7 Steering Wheel 8 Kick down Switch 9 Transmission Lever 10 Front Instrument Panel See page 2 14 11 Hour Meter 12 Hazard Warning Light Switch Reference Number Description ...

Страница 68: ...ssure warning light should remain ON after the other four have turned OFF NOTE Preheat Indicator Light The operation of the preheat cycle depends on coolant temperature When the engine coolant is cold enough the preheat indicator light will remain ON until the engine preheat cycle is completed The preheat cycle takes about twenty seconds to complete and the indicator light will turn OFF When the l...

Страница 69: ...Pressing the button at the end of the combination switch Figure 5 or the lowest button at the tip of the left pilot control valve lever joystick Figure 7 the horn will sound NOTE Starter switch must be ON Figure 5 AHO0890L FG003935 Figure 6 FG003941 Figure 7 ...

Страница 70: ...ate the windshield washer without any fluid If operate without any fluid the washer motor may be damaged Check level in washer tank and add fluid as required NOTE Using soapy water or synthetic detergent instead of window cleaning fluid may damage the wiper blade or painted surfaces Use standard window cleaning fluid SSK703 D Horn Button The center button on end of lever activates horn Only while ...

Страница 71: ...l 2 Figure 13 to desired position Push lever down Tilt angle is 21 Adjusting Steering Wheel Telescopic Pull lever 1 Figure 12 upward and move wheel 2 Figure 12 to desired position Push lever down telescopic stroke is 80 mm FG003937 Figure 10 CAUTION The further the pedal is pressed the more engine speed increases However do not press the pedal more than necessary otherwise it will increase fuel co...

Страница 72: ...ar This will allow the driver to perform a quick digging movement NOTE Kick down is RELEASED when transmission is placed in NEUTRAL position or the switch is pressed again Kick down function range Automatic 2nd 3rd 4th Manual 2nd FG002183 Figure 13 CAUTION When descending down an incline slow down the machine by using both the brake pedal and the engine as a brake by shifting the transmission to a...

Страница 73: ... Neutral When the lever is returned to the center position between forward and reverse the transmission is in NEUTRAL R Reverse When the lever is pulled back transmission is in REVERSE 1st 2nd and 3rd are available Rotating the switch shifts transmission between 1st 2nd 3rd or 4th gears NOTE There is a transmission display on the dash that indicates gears direction of travel error codes and kick d...

Страница 74: ... NEUTRAL to FORWARD and REVERSE 10 Front Instrument Panel See Front Instrument Panel on page 2 14 11 Hour Meter A LCD Meter that records total time When engine is running the hourglass icon blinks every four seconds This shows that the hour meter is working FG003943 Figure 19 CAUTION LOCK transmission lever Whenever machine is parked LOCK transmission lever in NEUTRAL to prevent accidental machine...

Страница 75: ... light up and flash warning others in the area At the same time the directional indicator lights on the instrument panel will turn ON to warn the operator The hazard warning lights operate independent of the starter switch O In this position this switch turns OFF hazard warning lights I In this position this switch turns ON all turn signals and they flash simultaneously NOTE Hazard warning lights ...

Страница 76: ...OP001013 Operating Controls 2 14 FRONT INSTRUMENT PANEL FG015582 9 8 2 7 6 17 18 10 11 12 13 14 15 16 3 4 5 24 23 19 20 21 22 1 40 50 0 10 30 20 15 20 0 30 25 5 10 F R STOP 25 Figure 23 ...

Страница 77: ...r 7 Transmission Display Reference Number Description Reference Number Description 8 Left Turn and Hazard Warning Light 9 High Beam Indicator Light 10 Work Light Indicator Light 11 Preheat Indicator Light 12 Engine Coolant Temperature Warning Light 13 Reverse Fan Indicator Light 14 Engine Oil Pressure Warning Light 15 F R Forward Reverse Selector Indicator Light 16 Electric Steering Select Indicat...

Страница 78: ...This meter displays speed at which vehicle is traveling 3 Fuel Gauge This gauge displays amount of fuel in tank F means the tank is full E means the tank is empty If the pointer comes close to the E red zone add fuel as soon as possible When the pointer comes close to the E red zone approximately 11 7l 3 U S gal of fuel remains 10 1 HA0O2012 Figure 24 10 0 50 40 20 30 FG004182 Figure 25 Figure 26 ...

Страница 79: ... revolutions per minute FG003949 Figure 27 CAUTION When the pointer indicates red zone it means the engine is overheated Stop the operation let the engine run at low rpm and wait for it to cool down Do not shut down engine If engine is shut down heat surge may occur FG003950 Figure 28 CAUTION When the pointer indicates red zone it means the transmission is overheated Stop the operation let the eng...

Страница 80: ... range indicator bars will indicate which gear is selected by displaying the corresponding number of bars The forward and reverse indicator bars will be OFF when the transmission is in MANUAL MODE When transmission is in AUTOMATIC MODE all the gear range indicator bars and both travel direction indicators will be ON 8 Left Turn and Hazard Warning Light This light blinks when left turn signal is tu...

Страница 81: ...GH BEAM 10 Work Light Indicator Light This indicator light will turn ON when the front and or rear work lights are activated 11 Preheat Indicator Light This indicator light will turn ON when the engine preheat function is operating Do not start engine as long as this light is ON Figure 34 HAOD394L 2658A Figure 35 Figure 36 HAOA639L ...

Страница 82: ...tomatically reduced Allow the engine to run at low idle speed until the temperature gauge registers in the blue zone again When the blue zone is reached allow the engine to idle for an additional three five minutes before shutting down the engine If not allowed to idle heat surge may develop which will damage the engine Allowing the engine to idle will dissipate heat Check the coolant level look f...

Страница 83: ...ork when this light is ON it will result in serious engine damage 15 F R Forward Reverse Selector Indicator Light This indicator light will turn ON when the 2nd gear function is selected NOTE See F R Forward Reverse Travel Control System Optional on page 3 16 for further information 16 Electric Steering Select Indicator Light Optional This indicator light will turn ON when the electric steering sy...

Страница 84: ... position this red warning light should turn ON When engine is running this red light should turn OFF If light remains ON when engine is running alternator is defective 19 Parking Brake Indicator Light This indicator light will turn ON when the parking brake is APPLIED If vehicle is moved while parking brake is applied a warning alarm will sound FG004174 Figure 42 Figure 43 HAOA610L Figure 44 P 07...

Страница 85: ...recognized by the ECU and cause a malfunction in operation it can be displayed with the engine warning light to indicate a warning to the operator If this Light turns ON or blinking check the engine as described under the engine diagnostic switch See page 2 35 Light turned ON nonfatal system error Light is BLINKING fatal system error NOTE The engine warning light flashes out the two digit fault co...

Страница 86: ...wn engine NOTE The light will also turn ON when the system is being tested 25 Water Separator Light This symbol indicates when the water is full in the fuel prefilter When this symbol appears drain the water from the fuel prefilter as soon as possible Figure 49 AJO0450L DANGER Emergency steering indicator light If this light turns ON while operating machine discontinue operation immediately This l...

Страница 87: ...adlight Switch 8 Front Work Light Switch 9 Rear Work Light Switch 10 Rear Wiper Switch 11 Pilot Cutoff Switch 12 Parking Brake Switch 13 Transmission Cutoff Switch 14 Mirror Heating Switch 15 Reverse Fan Switch 16 Engine Diagnostic Switch 17 Boom Float Switch Optional 18 LIS Switch Optional 19 Seat Heater Switch Optional 20 Fuel Heater Switch Optional 21 Emergency Steering Test Switch Optional 22 ...

Страница 88: ...pattern and description of operation A When the log forks control lever 6 Figure 52 is pushed forward the log forks are allowed to open B When the log forks control lever 6 Figure 52 is pulled back the log forks are allowed to close This lever is capable of forward travel and reverse travel 2nd gear function 1 Neutral Switch When this switch is pressed 2nd gear function will be operated and then 2...

Страница 89: ...hile KD 5 Figure 52 switch is pressed machine can travel reverse When machine is travelled it can convert forward and reverse travel without pressing KD 5 Figure 52 switch 4 Horn Switch See page 2 29 5 Kick down Switch See page 2 29 NOTE Operating condition of 2nd gear function Start a engine Transmission lever is neutral Parking brake switch is off release NOTE Release condition of 2nd gear funct...

Страница 90: ...earward detent position 6 Figure 54 Bucket will return to set dig position Boom Height Kick out right lever in full rearward detent position 7 Figure 54 Lever will remain in this position until boom is at a preset height then will return to neutral automatically A Kick down Switch Two Places See page 2 10 B Horn Switch Two Places Log Fork Switch Optional Horn switch function Log fork switch functi...

Страница 91: ... Manual 2nd NOTE Kick down is RELEASED when transmission is placed in NEUTRAL position or the switch is pressed again A second kick down switch Figure 57 is on the end of the transmission lever 3 Horn Button Two Places Pressing the lowest button at the tip of the left pilot control valve lever joystick Figure 59 or the button at the end of the combination switch Figure 60 will sound the horn NOTE ...

Страница 92: ...celerate the machine 4 Up and downshifts are made automatically between 1st 2nd 3rd 4th gears forward and between 2nd 3rd 4th in reverse 5 It is unnecessary to use kick down function for 1st gear Auto 2 4 mode Travel mode 1 1 3 is same as Auto 1 4 2 Up and downshifts are made automatically between 2nd 3rd 4th gears forward and between 2nd 3rd 4th in reverse 3 Kick down switch must be used for shif...

Страница 93: ...t panel switch and headlights NOTE If the switch is not in this position with the engine not running the pilot buzzer will sound to warn the operator that the batteries are being discharged I In this position this switch turns ON clearance tail instrument panel and switch lights II In this position this switch turns ON clearance tail instrument panel and headlights 8 Front Work Light Switch O In t...

Страница 94: ...n this position windshield washer fluid sprays onto the rear windshield while running the rear wiper When released the switch returns to the O OFF position II In this position this switch turns ON windshield wiper mounted on rear windshield of operator s cabin Figure 66 AHO0850L O I II CAUTION Do not turn ON the work light when traveling on public roads Figure 67 HAOD421L O O I II CAUTION The wash...

Страница 95: ...d the indicator light on the front instrument panel comes ON This brake can also be used as an emergency brake Figure 68 HBOI110L O I CAUTION When driving or parking the pilot cutoff switch must be changed to O OFF position Figure 69 HA0O2019 P O I WARNING Set the parking brake switch in the I APPLIED position before leaving the loader Make sure to APPLY the parking brake switch before trying to s...

Страница 96: ...pressing the left brake pedal This mode is suitable for a load handling operation When the accelerator pedal is pressed in this setting more power is concentrated on the load handling system to quicken the boom lifting speed NOTE 1 Transmission CUTOFF function dose not operate at 3rd and 4th gear for protection of transmission 2 Despite transmission CUTOFF switch the right brake pedal has braking ...

Страница 97: ...If the engine warning light turns ON or blinks when the engine is running it means a fault code has been recorded When this occurs the engine diagnostic switch allows the operator to view the fault codes The active fault code is started after this switch turns ON OFF if during the output of the fault code this switch turns ON OFF again the output of the current fault code is interrupted and the ne...

Страница 98: ...g and working It improves dynamic stability machine life and comfortability It is most effective when traveling with load in the bucket O In this position the LIS turned OFF I In this position the LIS turned ON at all travel speeds II In this position the LIS will AUTOMATICALLY TURN ON if the forward travel speed exceed 6 km h 3 7 MPH or reverse travel speed exceed 4 km h 2 5 MPH LIS will automati...

Страница 99: ... system using the following procedure A Turn starter switch to I ON position NOTE Do not start engine B Press emergency steering test switch and turn steering wheel at the same time If system is functioning properly the unit should steer The emergency steering indicator light should turn ON NOTE If unit does not steer do not operate unit until problem is corrected C Release switch Switch will auto...

Страница 100: ...evices Thus damage can be avoided 24 Cup Holder Place to put beverages 25 F R Forward Reverse Selector Switch Optional O In this position the F R control switch is OFF I In this position the F R control switch is activated When released the switch returns to the O OFF position but the system is still activated When this switch is depressed again F R control switch is OFF NOTE 1 When activating sys...

Страница 101: ... instrument panel O In this position the machine is in NEUTRAL I In this position the machine travels FORWARD II In this position the machine travels REVERSE NOTE If the transmission lever is moved out of NEUTRAL while operating the F R control switch the transmission lever will override the switch The F R control switch system will require that the F R selector switch to be pressed again with the...

Страница 102: ...1 2 3 5 8 6 7 FG006505 Figure 84 Reference Number Description 1 Cabin Light 2 Stereo CD Player Optional 3 Heater and Air Conditioner Control Panel 4 Speakers 5 Storage Compartment 6 Windshield Washer Tank 7 Electrical Box 8 Fuse Box Reference Number Description ...

Страница 103: ...ned ON and OFF irrespective of the position of the starter switch 2 Stereo CD Player Optional For operation of stereo see Stereo CD Player Optional on page 2 49 3 Heater and Air Conditioner Control Panel For operation of heater and air conditioner see Heater and Air Conditioner Operation on page 2 44 FG004192 Figure 85 V O E U M S U P N H O F F O SOUND TUNE L AM FM 1 4 3 2 5 6 SCAN PROGRAM AST FG0...

Страница 104: ...ides behind of the operator s seat Keep the operation manual and other documents in this compartment 6 Windshield Washer Tank Contains windshield washer fluid It is located behind the operator s seat 3 Figure 89 7 Electrical Box Contains relays and electric components It is located on left side of cabin Figure 88 HBOM350L 3 2 1 FG003889 Figure 89 FG015585 Figure 90 ...

Страница 105: ...1013 2 43 Operating Controls 8 Fuse Box The fuse box is on the upper side of electric box For a detailed explanation of fuses see Fuse Box Relay Engine Emergency Stop Switch on page 2 56 FG015587 Figure 91 ...

Страница 106: ...ned into one unit to the right side of the operator s seat If necessary the operator can control interior cabin temperature using the operation panel 3 3 2 2 1 5 4 FG006506 Figure 92 Reference Number Description 1 Operation Panel 2 Front Nozzle Air Conditioner 3 Front Nozzle Defroster 4 Foot Nozzle 5 Rear Nozzle Reference Number Description ...

Страница 107: ... Conditioner Switch A OFF Switch Turns OFF the heater and air conditioner unit B A C Switch Turns ON the air conditioner when one of the blower switches is activated FG003966 1 4 5 2 3 Figure 93 Reference Number Description 1 Fan and Air Conditioner Switch 2 Blower Fan Switches 3 Temperature Control Switch 4 Selector Switch for Wind Direction 5 Ventilation Selector Switch Reference Number Descript...

Страница 108: ...tch The temperature control consists of 24 stages An LED is turned ON for every three stages Whenever pushing it it changes in stages Pushing it continuously it changes continuously A COOL Switch Lowers the temperature B WARM Switch Raises the temperature LED COLOR STATUS Green LED Air conditioner Full green maximum operation of air conditioner Red LED Heater Full red maximum operation of heater 4...

Страница 109: ... air flow for defrosting front window of operator s cabin 5 Ventilation Selector Switch A A Switch Draws fresh air into operator s compartment B B Switch Recirculates air within the operator s compartment Used to rapidly reduce condensation on windows FG006508 Figure 98 FG006509 Figure 99 Figure 100 HAOC981L A B ...

Страница 110: ...or temperature Operate the air conditioner from twenty thirty minutes a week to circulate the refrigerant in the system NOTE The blower switch must be on LO speed NOTE The filter must be cleaned out every 500 hours and replaced with a new one every 1 000 hours NOTE In the event that the unit is being operated in a dusty environment the cleaning and replacement must be performed more frequently If ...

Страница 111: ... V O E U M S U P N H O F F O SOUND TUNE L AM FM 1 4 3 2 5 6 SCAN PROGRAM AST FG000108 2 3 7 9 8 5 6 10 4 1 Figure 101 Reference Number Description 1 Power Volume Control 2 Sound Mode Selector 3 Band Selection 4 Tuning Up Down 5 Scan Function Auto Store 6 Preset Station 7 Tape Ejection 8 Fast Forward Rewind 9 Tape Loading Slot 10 LCD Reference Number Description ...

Страница 112: ...OP001013 Operating Controls 2 50 CD Player Optional AST DIR FG000109 Figure 102 ...

Страница 113: ...ment range is 60 mm 2 36 in for both front and rear 4 Weight Adjustment Knob Turning knob 4 Figure 104 to right makes suspension harder Turning knob to left makes suspension softer Adjust according to operator s weight by checking weight indicator dial Adjustment range is from 50 120 kg 110 265 lb 5 Backrest Adjustment Lever Pulling up right lever 5 Figure 104 allows seat backrest to be moved forw...

Страница 114: ...ect and maintain the suspension and adjustment mechanisms of the seat regularly 3 Check that the machine is properly maintained Tire pressure brakes steering linkages etc 4 Steer brake accelerate shift gears move the attachments and load the attachments smoothly 5 Adjust the machine speed and travel path to reduce the vibration level Slow down if it is necessary when passing rough terrain Drive ar...

Страница 115: ...osition for maximum comfort and machine control then fasten seat belt Seat belts must be worn across pelvic region and adjusted snugly to lessen chance and severity of injury in event of an accident Never fasten a seat belt across abdomen Under no circumstances should operator be standing in cabin when operating wheel loader Do not adjust seat position while vehicle is moving because a loss of con...

Страница 116: ...s emergency exit from the cabin can be opened in two positions Position 1 ventilation position Open the window and secured it with the lock bar A Figure 110 Position 2 full opened position Open the window and push it to backward 3 To release doors from both sides of the cabin Pull the handles Figure 111 in the direction of arrows The handles are located on both sides of the operator s seat 1 FG003...

Страница 117: ...ng Controls ARM REST Knob 1 Figure 112 is used to allow armrest to be moved to the most convenient position for the operator Loosen knob and move armrest 2 Figure 112 to desired position Tighten knob 1 2 FG003898 Figure 112 ...

Страница 118: ...use is blown turn OFF the starter switch and shut off the power supply Remedy the cause if needed and replace the fuse with a new one FUSE BOX 1 FUSE BOX 2 FG003972 Figure 114 Fuse Box One No Name Capacity 1 Rear Wiper Window Washer 10A 2 Parking Brake Pilot Cut Off 10A 3 Rotating Beacon Optional 10A 4 CCTV Optional 10A 5 Spare 10A 6 Cigar Lighter 10A 7 Turn Signal Light Hazard Light Indicate Ligh...

Страница 119: ...IS Optional 10A 4 Electric Steering Optional 10A 5 Emergency Steer Optional 10A 6 Horn Front Wiper 10A 7 Position Light Left 10A 8 Position Light Right 10A 9 Fuel Heater Optional 30A 10 Work Light Rear 20A 11 Mirror Heater 15A 12 Work Light Front 15A 13 Stereo Clock 12V Socket 15A 14 Memory Backup Pilot Buzzer 15A ...

Страница 120: ...the relay by the batteries at back of unit under engine compartment hood When a short circuit or an overload occurs the circuit breaker automatically cuts off current thus preventing electrical wires from burning HEATER SAFETY MIRROR START SELECT COMPRESSOR BACK UP LIS FNR STEREO DISPLAY ILL ALARM 1 ALARM 2 RAISE HEAD LAMP FAN CONDENSER WIPER REAR LAMP RETURN TO DIG FLOAT HORN HEATER FUEL FG015589...

Страница 121: ...t shut down when using the starter switch it can be stopped by moving the engine emergency stop switch to the I Emergency Stop position O In this position the engine emergency stop system is OFF I In this position Emergency Stop is selected the engine will shut down NOTE When released the switch will return to O OFF position FG003978 Figure 118 HAOB100L A Figure 119 WARNING When changing the fusib...

Страница 122: ...located in the battery box It is used for preventing the battery when the machine will not be used for a long time If the machine will not be used for an extended period of a month or more turn the battery disconnect switch to the OFF position FG015626 Figure 122 OFF O N FG015624 Figure 123 ...

Страница 123: ... BREAK IN PROCEDURES All wheel loaders are inspected and adjusted before leaving the factory However it is required that the operator follow these steps during initial break in period Failure to follow these steps may result in damage to equipment or reduced performance 1 Make sure to check all fluid levels before starting and every 8 10 operating hours 2 Do all Daily maintenance and service check...

Страница 124: ...This will ensure that the parking brake is APPLIED 2 Move all control levers to NEUTRAL position 3 Make sure transmission neutral lock is in the N NEUTRAL LOCK position Figure 1 HA0O2019 P O I FG003979 Figure 2 IMPORTANT If transmission lever is not in NEUTRAL position engine will not start FG003980 Figure 3 ...

Страница 125: ... I ON position All indicator lights should turn ON NOTE If unit is equipped with and emergency steering system Test system before starting engine If system does not function properly do not start unit Follow test procedure given with test switch 7 Rotate starter key to START position Starter motor should crank immediately and engine should start within a few seconds Figure 4 HBOI111L O I O I HAAH0...

Страница 126: ...al engine vibration and noises If any are heard or felt investigate cause NOTE If engine coolant temperature gauge shows red while running take the following action Discontinue work and allow engine to run at LOW IDLE Open engine compartment cover for good ventilation Once engine temperature gauge returns to the green zone shut down engine After engine has cooled check coolant level look for signs...

Страница 127: ...ntrol levers to NEUTRAL position 3 Make sure transmission neutral lock is in the N NEUTRAL LOCK position 4 Set pilot cutoff switch to O LOCKED position This will LOCK pilot control valve lever joystick HA0O2019 P O I Figure 9 FG003979 Figure 10 IMPORTANT If transmission lever is not in NEUTRAL position engine will not start FG003980 Figure 11 Figure 12 HBOI111L O I ...

Страница 128: ...tarter switch to the I ON position Figure 14 When preheat cycle is completed the preheat indicator light 1 Figure 15 will turn OFF 7 Rotate starter key to START position Starter motor should crank immediately and engine should start within a few seconds O I HAAH0040 Figure 13 FG000084 O I Figure 14 F R 1 FG015594 Figure 15 FG000085 O I Figure 16 ...

Страница 129: ... pressure oil temperature coolant temperature etc are in normal operating range If any engine system is not normal turn starter key to O OFF position 10 Perform Hydraulic System Warm up Cold Weather on page 3 10 FG003899 O I Figure 17 IMPORTANT If engine does not start after approximately fifteen seconds of cranking release starter key Wait five minutes for starter motor to cool down Repeat step 7...

Страница 130: ...ERY TERMINAL 3 Follow normal engine starting procedures 4 After engine has started remove negative jumper cable and then positive cable WARNING Wear safety glasses Never connect negative leads to positive terminals and vice versa DO NOT connect auxiliary or booster battery ground terminal directly to battery terminal Locate and use a ground point on machine frame Depleted batteries generate hydrog...

Страница 131: ...Set parking brake switch to the I APPLIED position This will ensure that the parking brake is APPLIED 4 Set bucket on ground 5 Put pilot cutoff switch to O LOCK position This will LOCK pilot control valve lever joystick 6 Allow engine to idle for one two minutes to cool down FG003979 Figure 19 FG003980 Figure 20 Figure 21 HA0O2019 P O I Figure 22 HBOI111L O I ...

Страница 132: ...the oil through the system Do this for five minutes NOTE Do not allow cylinders to pass hydraulic oil over relief valve for more than twenty seconds at a time 5 Cycle boom and bucket about five times without a load to circulate oil through system Hydraulic System Warm up Cold Weather 1 Follow Steps 1 through 3 in Hydraulic System Warm up 2 Do not operate machine at full speed until system has full...

Страница 133: ...e parking brake is engaged serious damage to parking brake disk will result Select a transmission gear that is appropriate for top speed that will be traveled Choosing a gear that is too high will reduce acceleration and will unnecessarily heat transmission converter oil Never place transmission in NEUTRAL when going down a hill Over speeding transmission can damage transmission gears Never change...

Страница 134: ...ng travel as a result of accidentally touching pilot control valve lever joystick 4 Press brake pedal 5 Set transmission neutral lock is in the D DRIVE position 6 Set parking brake switch to the O RELEASE position This will RELEASE the parking brake Figure 26 HBOI111L O I FG002183 Figure 27 FG003980 Figure 28 Figure 29 HAOP043L P O I ...

Страница 135: ...ORWARD position 9 Release the brake pedal while slowly pressing the accelerator pedal FG003979 Figure 30 FG003980 Figure 31 WARNING When traveling at high speed or on a steep hill do not make sharp changes in direction This could cause vehicle to overturn When traveling or changing direction always look carefully to be certain that no one is in path of vehicle ...

Страница 136: ...k is in the N NEUTRAL LOCK position 4 Set parking brake switch to the I APPLIED position This will ensure that the parking brake is APPLIED Figure 32 FG002183 FG003979 Figure 33 FG003980 Figure 34 CAUTION LOCK transmission lever Whenever machine is parked LOCK transmission lever in NEUTRAL to prevent accidental machine movement Figure 35 HA0O2019 P O I ...

Страница 137: ...rger 8 Rotate starter key to O OFF position Remove key 9 If machine is parked on a slope install wheel chocks in front of and behind vehicle wheels Figure 36 HBOI111L O I FG003900 O I Figure 37 Figure 38 2876A WARNING Always secure machine with wheel chocks when parked on a slope Leaving machine in gear will provide no braking effect because transmission clutch is hydraulically operated When engin...

Страница 138: ...and reverse To activate system perform the following steps 1 Place transmission lever in NEUTRAL NOTE Do not move the transmission lever out of NEUTRAL If the lever is moved the system will be deactivated 2 Press F R selector switch to the I position and then release The switch will return to the O position but the system will be activated When system is activated the F R selector indicator light ...

Страница 139: ... starter switch is turned OFF When the system is deactivated the F R selector indicator light Figure 41 will be turned OFF ADDITIONAL BRAKING Machine hydraulic system can supply additional dynamic braking force during travel To accomplish this move pilot control valve lever joystick to crowd position and hold it there Hydraulic pump will be driven to supply output at maximum pressure relief pressu...

Страница 140: ...r in Raise or Hold Raise position until boom has reached maximum height Then remove your hand from lever Lever will automatically return to NEUTRAL position This prevents hydraulic pump from working against relief valve maximum pressure BUCKET ANGLE INDICATOR Upper right side of bucket includes a bracket that indicates angle of bottom of bucket Top of bracket is parallel with bottom of bucket If b...

Страница 141: ...cket will automatically position itself to be in a preselected digging position usually flat To adjust bucket to desired preselected digging position perform the following steps 1 Operate controls to place bucket on ground and in desired digging position usually flat Return bucket lever to its NEUTRAL position 2 Shut down engine 3 Loosen bolts 1 Figure 47 on bracket 2 4 Position bracket 2 Figure 4...

Страница 142: ...the loader you are going to tow for steering it Before you tow a vehicle make sure you have checked the following Check the weights of your loader and the vehicle to be towed and make sure you loader has sufficient braking capacity to stop the towed load Check if the vehicle to be towed can be braked and steered If not do not allow anyone to ride on the towed vehicle Check the tow rope or tow bar ...

Страница 143: ...t by a trailer truck to your nearest repair shop In addition to the above measures release the parking brake if the engine will not start or the hydraulic pumps are defective IF ENGINE STALLS WHILE TRAVELING BRAKE SYSTEM The brakes can be applied approximately 9 times by pressing the brake pedal due to the oil pressure stored in the accumulator after engine is turned OFF if the engine stalls while...

Страница 144: ...umb the allowable water depth is about 460 mm It can be different according to type of tires This means that the loader should not be used in a river Observe the following conditions 1 Check the water depth in advance when crossing across a river 2 Use the same precautions before crossing across a swampy area 3 Do not enter rivers whose river bed is steep or has a rapid flow CAUTION Avoid use of t...

Страница 145: ...The intervals recommended between checks oil changes and lubrication apply provided that the machine is used under normal environmental and operating conditions See Lubrication and Service Chart on page 4 17 Arrival and Delivery Inspection Before the machine leaves the factory it is tested and adjusted The dealer must also if the warranty is to apply carry out Arrival and Delivery Inspections acco...

Страница 146: ...he warranties are to apply The first within 100 operating hours and the second at the latest at 1000 operating hours The carrying out of these inspections is a condition for the warranty to apply Condition Test A Condition Test is carried out at authorized dealer workshops and provides information about the general condition of the machine ...

Страница 147: ...nt Fuel 6 Draining Coolant 7 Pre Fuel Filter 8 Filling Point Transmission 9 Draining Hydraulic Oil 10 Pilot Filter 11 Oil Dipstick 12 Oil Filter Engine 13 Draining Engine Oil 14 Filling Point Engine 15 Main Fuel Filter 16 Battery 17 Return Oil Filter 18 Filling Point Coolant 19 Filing Point Washer Fluid 20 Filling Point Hydraulic Oil 21 Ventilation Filters Cabin 22 Battery 23 Alternator Belt 24 Su...

Страница 148: ...s lifting devices or working methods are used other than those described in this publication Further safety rules and information and warning texts are given within the respective section NOTE Lifting with a jack must only be carried out by trained personnel WARNING If work has to be carried out on the machine before it has cooled down care must be observed with regard to risk of burns from hot li...

Страница 149: ...FG015607 Figure 3 Reference Number Description 1 The bucket attachment must be resting on the ground 2 Apply the parking brake 3 Shut down engine and take out the ignition key Does not apply when checking oil level in transmission 4 Carefully release the pressure in pressure lines and pressure vessels to avoid risks 5 Attach a black and yellow Warning Tag to the steering wheel 6 Connect the frame ...

Страница 150: ...es when required Do not wear loose fitting clothing or jewelry Keep service surfaces and handholds clean from oil dirt and ice Use the stepping areas provided with antislip protection to avoid the risk of slipping Worn painted over or loose protections must be replaced Remember that high pressure water jets when washing and spilled oil can cause the protections to loosen Do not direct the water je...

Страница 151: ...angerous to one s health the machine must be especially equipped for this purpose Special local safety regulations apply within such areas and also when servicing the machine Shut down engine before opening engine covers etc Make sure that no tools or other objects which may cause damage have been forgotten in or on the machine Check that the equipment you are using for lifting or supporting parts...

Страница 152: ...ut down engine by turning the ignition key to the 0 OFF position 4 Leave the cabin 5 Turn off the battery disconnect switch 6 Start putting out the fire and notify the fire brigade department if necessary It is forbidden to smoke or have an open flame near a machine when filling with fuel or when the fuel system has been opened and in contact with the surrounding air Diesel fuel oil is flammable a...

Страница 153: ...nd starter motor to the preheating element on the engine Electrical cables must not lie directly against oil or fuel lines The following applies for welding and grinding work A fire extinguisher must be kept near at hand The ventilation must be good when working indoors Approved respirator must be used The work surface must be cleaned Do not weld or grind on components which are filled with flamma...

Страница 154: ...which take a long time to heal It usually means that damaged tissue must be surgically removed Several hours may pass after contact with the acid before any symptoms appear and therefore one is not given any immediate warning The acid may remain on the machine parts for several years after a fire If swelling redness or a stinging feeling appears and one suspects that the cause may be contact with ...

Страница 155: ...he environment must be taken care of in an environmentally safe way Check List After Fire When handling a machine which has been damaged by fire or been exposed to intense heat the following protective measures must under all circumstances be followed Use thick gloves made of rubber and wear goggles which are certain to protect your eyes Never touch burnt components with your bare hands as there i...

Страница 156: ...ions Machines working in extremely hot or dusty conditions will require more frequent service checks Total hours of machine operation are determined by hour meter that is on the front instrument panel Product Identification Number P I N Location The PIN is stamped on the product identification plate Figure 9 on the right side of front frame above wheel cover NOTE Please make note of these numbers ...

Страница 157: ...recautions 1 Before performing any maintenance checks move pilot cutoff switch to LOCKED position Place a Warning Tag on controls so that no one begins to operate machine while maintenance checks are being performed 2 Clean up all fuel spills Fuel spills are hazardous especially around engine 3 Inspect all fuel lines for leakage Replace any lines fittings O rings or filters that show signs of wear...

Страница 158: ...S ZS 46 IV RUBIA TIR 7400 10W40 RUBIA POLYTRAFIC 10W40 RUBIA 8600 10W40 TOTAL MULTIS EP 2 JID 80W90 CHEVRON AW 32 BELOW 0 C AW 46 ABOVE 0 C DELO 400 15W40 DELO GREASE EP 2 DELO GEAR OIL or RPM UNIV GEAR 80W90 TEXACO RANDO HDZ 46 URSA SUPER PREMIUM 15W40 MULTIFAK ALL PURPOSE EP 2 MULTI GEAR EP SAE 80W90 ESSO UNIVIS N 46 ESSOLUBE XT 5 15W40 RONEX MP SPARTAN EP220 or EXXON GX 80W90 MOBIL MOBIL DTE 13...

Страница 159: ...4 and above Antifreeze Recommended Concentration Manufacturers Meeting ASTM D3306 50 Antifreeze 50 Distilled Water Doosan Genuine Solution Dexcool ELC by Chevron Texaco Alugard G48 by BASF Others meeting or exceeding ASTM D3306 CAUTION Do not mix oils from different manufacturers DOOSAN does not endorse specific brands but does suggest that owners select quality oils whose suppliers provide assura...

Страница 160: ...ls must be used make the oil drain intervals half of the API CI 4 values 3 Engine oil drain intervals need to be reduced by 50 when fuel sulfur content exceeds 0 5 5000 ppm Component Capacity Engine DL 06 Engine Oil Pan with Filter 27 liters 7 1 U S gal NOTE The filter holds an additional 1 liter 1 qt of oil Cooling System 40 liters 10 6 U S gal Fuel Tank 243 liters 64 U S gal Hydraulic Oil Tank 1...

Страница 161: ...herefore grease the bearing until new clean grease is forced out through the outer seal Between 10 and 15 strokes with a normal handheld grease gun is required to grease one of the bearings for the lifting arms Wipe off grease fittings and grease gun before greasing so that dirt and sand is not introduced through the grease fittings Symbol key These standard symbols are used in Lubrication and Ser...

Страница 162: ... Maintenance and Adjustment 4 18 Lubrication and Service Chart 1500h 2000h 500h 250h 1000h 50h 1500h 250h 10h 10h 50h 1000h 500h 2000h 16 22 6 14 8 11 9 19 19 7 1 5 3 4 10 18 15 21 2 21 1 12 13 1 4 1 FG015609 23 Figure 12 ...

Страница 163: ... F 16 Full Flow Filter Element 1 F 17 Oil Suction Strainer Strainer 1 C 18 Brake and Pilot Filter Element 1 19 Air Cleaner Element Outer 1 C Element Inner 1 20 Air Intake Precleaner Case 1 C 21 Air Conditioner Filter Outer Cartridge 1 C Inner 1 C 22 Air Breather Filter Element 1 23 Fuel Cap Filter Element 1 V Maintenance and Refill C Cleaning F First Time Exchange Only F100 Every 10 Hours for Firs...

Страница 164: ...Lights 4 28 Start Engine Check Starting Ability and Observe Exhaust Color at Start up and at Normal Operating Temperature Listen for Any Abnormal Sounds 4 28 Check Operation of All Controls 4 28 Inspect Cooling Fan Blade 4 29 Check Engine Drive Belt Wear 4 29 Check Air Intake System 4 30 50 Hour Weekly Service Perform All Daily 10 Hour Service Checks 4 31 Grease Front Attachment Pins 4 31 Grease S...

Страница 165: ... Outer Air Cleaner Element 4 51 Drain and Replace Transmission Oil and Filter 4 52 Clean Fuel Tank and Strainer 4 53 Replace Air Conditioner Inner Filter 4 55 Check Air Conditioner Refrigerant 4 55 Check and Adjust Engine 4 56 Change Air Breather Filter 4 56 Replace Hydraulic Full Flow Filter 4 57 Change Fuel Cap Filter 4 58 1 500 Hour 9 Month Service Perform All Daily 10 50 250 and 500 Hour Servi...

Страница 166: ...se Front Attachment Pins on page 4 31 Inspect All Tires for Correct Tire Pressure and Signs of Damage or Abnormal Wear 1 Inflate tires to proper operating pressure for working conditions See Tires on page 4 84 Check Engine Oil Level NOTE When checking level using a dipstick always remove and wipe it clean before making final level check 1 Check level of engine oil every day before starting engine ...

Страница 167: ...ce transmission lever in NEUTRAL Apply parking brake Shut down engine 4 Block tires Once tires are blocked start engine and have a person remain in the cabin 5 Allow engine to idle until transmission temperature is to 80 C 176 F 6 Remove transmission dipstick Figure 16 Wipe dipstick clean and then insert it back into transmission 7 Remove dipstick and check oil level mark Oil level must be between...

Страница 168: ...bled as shown in Figure 20 The hole 1 in the base of the filter fits over a circular base in the bottom of the tank The retaining rod 3 screws into the top of the filter 2 but the spring 4 slides over the top of the rod Be certain that this spring does not fall into the tank during reassembly 1 If filter assembly was removed insert assembly into the tank and check to make sure it is securely in pl...

Страница 169: ...ion to make sure that the hoses piping fittings cylinders and hydraulic motors are not showing any signs of leakage If any is noted determine the source of the leak and repair Fill Fuel Tank 1 At end of each work day fill fuel tank Add fuel through fuel fill cap Figure 22 When working at a temperature of 0 C 32 F or higher use ASTM No 2 D or its equivalent At temperatures below 0 C 32 F use ASTM N...

Страница 170: ...propylene glycol 1 Check sight gauge 1 Figure 26 that is attached to the radiator Coolant level must be visible in red centered circle shown on gauge To add coolant remove fill cap 2 Figure 26 of the radiator and add coolant to proper level by checking sight gauge 1 Figure 26 If temperature is below freezing see Antifreeze Concentration Tables on page 4 75 for antifreeze protection Use the table t...

Страница 171: ...loped 2 Do not allow replaceable bucket teeth to wear down to the point that bucket base edge is exposed Figure 28 NOTE These instructions are only for DOOSAN OEM buckets If you are using other manufacturers buckets refer to their specific instructions Inspect Seat Belt for Proper Operation Inspect the Structure for Cracks and Faulty Welds 1 During the daily walk around inspection and when greasin...

Страница 172: ...isten for Any Abnormal Sounds Check Operation of All Controls 1 With engine at rated speed operate all of the controls 2 Follow cold weather hydraulic system warm up procedures 3 Note any slow operations or unusual movements Determine the cause and repair fault before operating IMPORTANT Cold weather operation requires that the operator fully warm up the hydraulic oil before beginning machine oper...

Страница 173: ...yed or has pieces of material missing 2 Before installing new belts make sure all pulley grooves are clean and not worn Replace pulley if damaged or if the grooves are worn 3 All pulley support bearings shafts and brackets must be in working order 4 When replacing belts and pulleys pulley alignment must be checked with belts tensioned and brackets securely clamped A misalignment that can be detect...

Страница 174: ...ed minimum the belt will be able to slip damaging the belts and pulley grooves NOTE When operating in abrasive conditions check tension every 100 hours Check Air Intake System 1 Park the machine on a level surface apply the parking brake lower the attachment to the ground and shut down engine 2 Check the engine intake hose and hose clamps for damage and tightness 3 If damaged wrinkled or loose rep...

Страница 175: ...Attachment Pins 1 Following fittings are greased daily or every 10 hours for first 100 hours of operation to comply with new machine break in requirements After that greasing must be done every 50 hours If bucket is being used in water grease fittings immediately after machine is removed from water A B C D E F FG015610 Figure 33 ...

Страница 176: ...ucket hinge pins 2 locations Figure 34 Lever link connecting pin 1 location Figure 35 Bucket link connecting pin 1 location Figure 36 B Arm lever connecting pin 1 location Figure 37 FG015611 Figure 34 FG015612 Figure 35 FG015613 Figure 36 FG015614 Figure 37 ...

Страница 177: ...der heads left right 2 locations Figure 39 Lift cylinder rod ends 2 locations Figure 40 E Remote location points Remote fittings for bucket cylinder head 50 HOUR 1 Figure 41 Remote fittings for loader arm foot end 50 HOUR 2 Figure 41 FG006252 Figure 38 FG015622 Figure 39 FG006254 Figure 40 FG006255 1 2 Figure41 ...

Страница 178: ...and Head Ends 1 Steering cylinder rods 2 locations one on each side of machine 2 Steering cylinder head ends 2 locations Use remote grease fittings mounted on frame 1 and 2 Figure 45 1 FG015615 Figure 42 FRONT PIVOT REAR PIVOT FG008094 Figure 43 FG008101 Figure 44 2 3 1 FG001640 Figure 45 Reference Number Remote Grease Fittings 1 and 2 50 Hours Steering Cylinder Head Ends 3 250 Hours Drive Shaft C...

Страница 179: ...First 50 Hours NOTE Replace engine oil and filter after first 50 hours on a new machine and every 500 hours thereafter See page 4 48 Replace Hydraulic Full Flow Filter After First 50 Hours NOTE Replace hydraulic full flow filter after first 50 hours of operation or rebuild and every 1 000 Hours thereafter Follow procedure under 1 000 hour maintenance interval See page 4 57 FG001641 Figure 46 FG001...

Страница 180: ...inted under 250 hour maintenance interval Check Air Conditioner and Alternator Belt Tension on page 4 39 Clean Exterior of Radiator Oil Cooler and Air Conditioner Condenser 1 Dust and dirt accumulation on fins of radiator 1 CAC cooler 4 oil cooler 2 and additional transmission cooler 3 greatly reduce their cooling efficiency Use compressed air water and steam to clean fins on radiator oil cooler a...

Страница 181: ...nd inspect it for damage 3 Use compressed air to clean filter If element is very dirty use a mild soap and water solution to clean it NOTE Clean air conditioning filter every 50 hours and replace a new one every 500 hours of service NOTE If water was used to clean filter be sure it is completely dry before installation NOTE In the event that the unit it being operated in a dusty environment the cl...

Страница 182: ... Lower boom and position bucket on ground Shut down engine 2 Position a container under hydraulic tank drain plug Open tank breather cap See Figure 19 on page 4 24 Loosen drain valve at bottom of tank Figure 51 Allow all water and sediment to drain out Tighten drain valve NOTE Dispose of drained fluids according to local regulations Figure 50 WARNING Be certain that hydraulic oil has cooled before...

Страница 183: ...e replaced at prescribed intervals the air cleaner is serviced regularly and that the exhaust system and lubricating oil lines do not leak In case jarring noises can be heard or if the turbocharger vibrates it must be reconditioned or replaced immediately Only authorized dealer workshops should carry out work on the turbocharger Check Air Conditioner and Alternator Belt Tension Loosen the tension ...

Страница 184: ...n requirements NOTE After first change oil and filter must be changed every 1 000 hours Follow procedure under 1 000 hour maintenance interval See page 4 52 Replace Axle Differential and Planetaries Oil After First 250 Hours NOTE The differential and planetaries oil must be drained and refilled after first 250 hours of operation There after every 1 500 hours of operation See page 4 60 2 3 1 FG0016...

Страница 185: ... every 1 000 hours 6 months service 2 Remove and clean rubber evacuator valve 1 Figure 58 from bottom of air cleaner housing cover 2 Figure 58 Inspect seal lips for wear or damage Replace valve if necessary NOTE Install evacuator valve with lips parallel to the cover 3 Remove the access cover 2 Figure 58 by loosening the latches 3 4 Remove the outer filter 4 Figure 58 from the housing Do not remov...

Страница 186: ...and inner filters Do not clean inner filter Water Trap Take care of fuel spillage by using a vessel or a plastic hose Drain the water trap every 250 hours Draining water from the fuel has to be done by hand A nonreturn valve in the filter head prevents the fuel from running back to the tank As no fuel can run back the pressure will remain and as a consequence no water will be drained unless new fu...

Страница 187: ...pilot filter Perform the following steps 1 Vent hydraulic oil tank 2 Unscrew element cover 5 Figure 64 Cover is filled with oil Dispose of oil 3 Remove O ring 3 Figure 64 and filter 4 4 Use a nonflammable nontoxic solvent to clean out cover 5 Figure 64 5 Insert a new filter 4 Figure 64 into cover 5 Install a new O ring 3 6 Screw cover 5 Figure 64 onto filter head 1 FG015618 Figure 63 Figure 64 ...

Страница 188: ... clean fuel This will help reduce fuel system priming 5 Start engine After engine has run for a couple of minutes shut down engine and look for signs of leaks If engine does not start fuel system may need priming Prime fuel system using the following procedure A Loosen plug on top of fuel filter head B Unscrew and pump the hand operated primer pump near fuel injection pump Pump primer until fuel i...

Страница 189: ... must have the following characteristics 5 micron rating engine mounted Remove Disconnect the wiring harness from the fuel heater if equipped Loosen and remove the fuel filter Make sure the seal ring does not stick to the filter head Remove the ring with an O ring pick if necessary NOTE Both fuel filters must be removed at the same time Install new filter Apply a small amount of oil around filter ...

Страница 190: ...r gasket with fuel NOTE Fill fuel filter with clean fuel This will help reduce fuel system priming Clean Exterior of Radiator Oil Cooler and Air Conditioner Condenser 1 Dust and dirt accumulation on fins of radiator oil cooler and additional transmission cooler greatly reduce their cooling efficiency Use compressed air water and steam to clean fins on radiator oil cooler and transmission cooler NO...

Страница 191: ... for damage 3 Use compressed air to clean filter If element is very dirty use a mild soap and water solution to clean it NOTE Clean air conditioning filter every 500 hours and replace with a new one every 1 000 hours of service NOTE If water was used to clean filter be sure it is completely dry before installation NOTE In the event that the unit it being operated in a dusty environment the cleanin...

Страница 192: ... 104 F NOTE Dispose of drained fluids according to local regulations 2 Replace engine oil filter Figure 75 Engine oil filter is a spin on type Remove and discard filter 3 Install new filter Apply a small amount of oil around filter gasket Screw filter on head until gasket contacts head by hand turn filter 3 4 1 turn more with filter wrench NOTE See Fluid Capacities on page 4 16 for capacity and Ta...

Страница 193: ...filter with clean 15W 40 oil Replace Air Conditioner Outer Filter Clean air conditioning outer filter every 50 hours and replace with a new one every 500 hours of service See Clean Air Conditioner Outer Filter on page 4 37 Figure 76 CAUTION The lubricating oil filter must be full of oil at start up to prevent engine damage ...

Страница 194: ...environments the filter needs to be replaced more often The filter can be cleaned according to instructions which your authorized dealer will give you However after the filter has been cleaned five times or if it is damaged it must be replaced NOTE Make a mark on the decal at the end of the secondary filter every time the primary filter is replaced or cleaned In connection with replacing the filte...

Страница 195: ...ess it is to be replaced Replace Outer Air Cleaner Element 1 Replace inner filter when outer filter is replaced 2 After removing outer filter remove wing nut and inner filter 3 Clean out inside of air cleaner housing Do not use compressed air to blow out housing 4 Install new inner filter and secure it into position with wing nut Do not clean and reuse inner filter 5 Install new outer filter and s...

Страница 196: ...ricants on page 4 14 of this manual for recommended oil for the operating conditions 4 Remove drain plug Allow all transmission fluid to drain into a receptacle Clean drain plug Figure 80 NOTE Dispose of drained fluids according to local regulations 5 Install drain plug in transmission 6 Remove inlet strainer Use a nonflammable nontoxic solvent to clean strainer 7 Inspect gasket on inlet strainer ...

Страница 197: ... If oil level is above top high mark on dipstick drain oil until level is at high mark NOTE If transmission cannot reach an operating temperature of 80 C 176 F then the oil level must be below the high mark Periodically check oil level during the workday to ensure that oil level does not rise above high mark on dipstick 18 Check filter for leaks while engine is running Clean Fuel Tank and Strainer...

Страница 198: ...nk 3 Drain the remaining fuel into a suitable container NOTE Dispose of drained fluids according to local regulations 4 Remove bolts inspection cover and gasket Figure 85 from fuel tank 5 Clean inside of the tank and suction stainer 6 Install the inspection cover with a new gasket Tighten the bolts Do not overtighten 7 Close drain valve 8 Fill fuel tank 9 Check for any leaks at cover and plug FG00...

Страница 199: ...ioner Refrigerant 1 Apply the parking brake and lower attachment to the ground 2 Remove the cover 3 Press the HI flow control switch to set maximum air flow 4 Set the temperature control switch fully to the cool position and fully open the cabin doors 5 Slightly accelerate the engine to about the middle speed range compressor speed 1500 1800 rpm 6 Compare the flow of bubbles in the sight glass wit...

Страница 200: ...cap 2 Figure 87 slightly to release the internal pressure 3 Unscrew the bolt 1 Figure 87 and take off the breather cap 2 Figure 87 4 Change a filter cartridge 3 Figure 87 and assemble the breather cap by tighting the bolt NOTE Used filter should always be disposed of according to local regulations Amount of Refrigerant Appearance of the Sight Glass Solutions Normal Almost clear Any bubbles disappe...

Страница 201: ...own onto its base until top of element is approximately 4 mm 0 157 below edge of tank 8 Install a new O ring 4 Figure 88 on cover 2 Set spring 3 into place on element 6 9 Set cover 2 Figure 88 into place over element 6 Install bolts 1 through cover 2 and tighten them 10 Tighten breather cap on tank WARNING The hydraulic oil will be hot after normal machine operation Allow system to cool before att...

Страница 202: ...olt to CCW direction to loosen 2 After disengaging it as shown on Figure 91 carefully lay it on floor 3 After disengaging Figure 91 disengage rubber as shown on Figure 92 FG015720 Figure 89 WARNING External shock or damages to fuel cap may lead to permanent damage to filter FG015684 Figure 90 FG015685 Figure 91 FG015686 Figure 92 ...

Страница 203: ...e and Adjustment 4 After disengaging as shown on Figure 92 you may now exchange it to a new filter as shown on Figure 93 5 After exchanging to a new filter you may now assemble back in reverse order FG015687 Figure 93 FG015688 Figure 94 ...

Страница 204: ...rained so that axle end level plugs 1 Figure 95 are in the lowest position Apply parking brake Block wheels 2 Clean areas around drain plugs on both ends of axle Remove plugs NOTE See Fluid Capacities on page 4 16 for capacity and Table of Recommended Lubricants on page 4 14 of this manual for recommended oil for the operating conditions NOTE Dispose of drained fluids according to local regulation...

Страница 205: ...e must be made at least once a year especially in case of a change in braking behavior like e g Braking noise Braking power reduced Deceleration changed Brake fluid level changed Braking pressure changed Insert feeler gauge into oil level check hole to check thickness of brake disks NOTE Minimum thickness s 4 5mm 0 18 in Figure 97 ...

Страница 206: ...tall air cleaner cover NOTE Make sure that all gaskets on wing nuts and cover are properly installed and seated Check Steering Brake Drive Shaft Engine and Fuel System Replace Pipes and Hoses 1 Replace hoses that carry brake fluid to wheel brakes Also replace hoses that carry hydraulic fluid to steering cylinders 2 It is difficult to determine condition of many hoses The best way to ensure safe op...

Страница 207: ...r cap from bleeder screw on wheel 3 Place one end of a plastic hose 2 over bleeder screw 1 Place other end of hose in a container 3 filled with brake fluid 4 Station one person in operator s cab and one person at bleeder screw on wheel being bled 5 Open bleeder screw 1 Then press down on brake pedal until it rests on floor of cab Hold pedal down on floor of cab Close bleeder screw while pedal is b...

Страница 208: ...e Radiator cleaning is performed while the engine is running Take extreme caution when working on or near a running engine Make sure to lock out and tag the controls notifying personnel that service work is being performed Do not remove the radiator cap unless it is required Observe the coolant level in the coolant recovery tank CAUTION Do not mix ethylene glycol and propylene glycol when changing...

Страница 209: ...Capacities on page 4 16 for capacity 2 Position a catch tank beneath hydraulic tank drain plug Open tank breather cap See Figure 19 on page 4 24 Remove drain plug from bottom of tank Figure 102 Allow all hydraulic oil to drain out FG014461 Figure 101 CAUTION Be certain that hydraulic oil has cooled before draining it Hot oil could splash and cause burns FG015616 Figure 102 FG014462 Figure 103 FG01...

Страница 210: ...ove spring 2 Figure 105 and suction filter 4 by pulling on rod 3 C Clean in side and outside of strainer Replace strainer if it is broken D Position strainer on boss portion of suction pipe E Fill hydraulic oil tank Check level using sight gauge on side of tank F 6 Install tank drain plug Refill tank by pouring oil in through breather cap opening Install and tighten breather cap 7 Start engine and...

Страница 211: ...to fill the brake accumulator with oil 3 Shut down engine 4 Turn the starter switch to ON position 5 Count the number of times you can depress the right hand brake pedal before the brake warning light comes on 6 If the number counted is less than five 5 there is some problem with the accumulator Contact your nearest DOOSAN dealer WARNING Pressurized Nitrogen gas in brake accumulator may explode ca...

Страница 212: ... more than 2 years before being discarded or installed on a machine In service lifetime of hoses fitted on a machine can never exceed 6 years but replace hoses described in Replace Pipes and Hoses on page 4 62 every year Always replace hoses having exceeded the allowed in service lifetime irrespective of the external appearance wear Always store hoses in a dark place at a maximum of 65 relative hu...

Страница 213: ...r and oil cooler fins to remove dirt and dust 3 Clean fuel system intake strainer and fuel filter more frequently 4 Inspect starter motor and alternator and clean as often as necessary Rocky Terrain 1 Check wheels tires rims and valve stems for damage or excessive wear 2 Inspect for loose or damaged fittings and bolts 3 On a more frequent basis inspect bucket and boom for damage or excessive wear ...

Страница 214: ... 30 60 12 mm x std 8 57 62 11 89 86 14 52 105 12 mm x 1 5 9 00 65 12 59 91 14 94 108 14 mm x std 13 55 98 18 95 137 23 10 167 14 mm x 1 5 14 94 108 21 02 152 24 89 180 16 mm x std 20 88 151 29 46 213 35 54 257 16 mm x 1 5 22 54 163 31 53 228 38 03 275 18 mm x std 28 90 209 40 52 293 48 41 350 18 mm x 1 5 32 50 235 45 92 332 55 04 398 20 mm x std 40 94 296 57 95 419 69 01 499 20 mm x 1 5 46 05 333 ...

Страница 215: ...e batteries create hydrogen gas An explosion hazard exists particularly with a deeply discharged battery Make sure that open flames burning objects or sparks are kept away from the battery compartment Battery electrolyte is diluted sulfuric acid Take extreme caution when handling the batteries The electrolyte can cause severe chemical burns If any electrolyte gets on your clothing or skin wash it ...

Страница 216: ...rmal BLACK Insufficient charging check alternator TRANSPARENT Insufficient battery electrolyte replace with new battery NOTE Colors may vary from one battery manufacturer to another Always refer to instructions on battery The batteries should always be replaced in pairs Using an old battery with a new one will shorten the life span of the new battery ...

Страница 217: ...t Engine overheating is often caused by bent or clogged radiator fins The spaces between the fins can be cleaned by use of air or water under pressure When straightening bent fins use care not to damage the tubes or break the bond between the fins and the tubes Heavy duty diesel engines require a balanced mixture of water and antifreeze Drain and replace the mixture every year or 2 000 hours of op...

Страница 218: ...llow There are even some that come in a blue green color The blue green color makes it very difficult to tell the difference of what type of antifreeze is in a cooling system The colors are only a dye added to the clear antifreeze Do not rely on color Keep careful machine records of what brand and type of antifreeze is used in the unit If you are unsure of what type of antifreeze is in the system ...

Страница 219: ...thylene Glycol Doosan Genuine Antifreeze Solution for all seasons 2 000 Hour Yearly Ambient Temperature Cooling Water Antifreeze 10 C 14 F 80 20 15 C 5 F 73 27 20 C 4 F 67 33 25 C 13 F 60 40 30 C 22 F 56 44 40 C 40 F 50 50 Propylene Glycol Doosan Genuine Antifreeze Solution for all seasons 2 000 Hour Yearly Ambient Temperature Cooling Water Antifreeze 10 C 14 F 78 22 15 C 5 F 71 29 20 C 4 F 65 35 ...

Страница 220: ...pilot system hoses until accumulator pressure has been released from the circuit To release pressure turn the starter switch to I ON position and operate pilot control valve lever and brake pedal Even though the engine is shut down hydraulic actuated components may move while releasing pilot pressure Keep all personnel away from machine while performing this operation Set pilot cutoff switch to O ...

Страница 221: ...ure 1 Attach gauge to port 2 Figure 110 2 Adjust relief valve cartridge on brake pilot and fan motor supply valve Figure 112 Relief pressure Figure 112 for brake charging is 80 5 kg cm2 1 138 70 psi 1 3 2 4 5 FG015619 Figure 110 Reference Number Description Pressure 1 Main Pump Pressure TPM 210 5 kg cm2 2 Brake Charge Pressure TP2 80 kg cm2 3 Steer Pump Pressure TPS at Only Steering Relief 200 5 k...

Страница 222: ...is not impossible to adjust pressure NOTE Transmission clutch pressure is 16 kg cm2 228 psi Control Lever Activation Pressure 1 Attach gauge to port 5 Figure 110 2 Adjust relief cartridge Figure 114 on brake and pilot and fan motor supply valve Relief pressure must be set at 28 30 kg cm2 398 427 psi 3 Loosen lock nut on adjusting screw Turn adjusting screw clockwise to raise relief pressure Turn a...

Страница 223: ...OP001015 4 79 Inspection Maintenance and Adjustment Parking Brake Release Pressure 1 Attach pressure gauge to parking brake port 2 Parking brake pressure must be 52 65 kg cm2 740 925 psi ...

Страница 224: ...rrent The proportional relief valve has a fail safe characteristic this means max relief valve setting is adjusted automatically if the voltage supply is interrupted e g broken wire This results in a max fan speed and therefore in a max cooling performance Fan Motor Pressure Standard 100 5 0 kg cm2 1 422 70 0 psi Fan rpm 1 200 7 8 4 3 2 9 1 6 5 FG014480 Figure 116 Reference Number Description 1 En...

Страница 225: ...ort 6 on the inlet hose 3 Check the maximum pressure by fully depressing the accelerator pedal and reading the pressure gauge Maximum fan motor pressure 100 2 kg cm2 The fan speed is approximately 1200 rpm at this time 6 3 4 5 2 1 8 7 FG008112 Figure 117 Reference Number Description 1 Fan Motor 2 Fan Guard 3 Inlet Line 4 Drain Line 5 Outlet Line 6 Relief Valve 7 Relief Valve 8 Reversable Solenoid ...

Страница 226: ...ht oil to all exposed cylinder rods Apply a coating of light oil to all control linkages and all control valve spools Check condition of oil coating each month and add to coating where necessary Battery Disconnect cables from battery or remove battery from machine If battery is removed fully charge battery and store it Cooling System Care If cooling system does not need antifreeze and is filled wi...

Страница 227: ...g bolt 3 Figure 118 clockwise four turns 0 25 mm rotation to set the clearance to 1 mm 0 4 in 5 Install lock bracket 1 Figure 118 and bolt 2 Repeat steps 1 5 for other side Front Axle Parking Brake Emergency Release 1 Locate parking brake release bolt on the lower section on both sides of the housing 2 Loosen lock nut 4 Figure 118 from adjusting bolt 5 3 Tighten adjusting bolt 5 Figure 118 until i...

Страница 228: ...the tire tread as shown in the figure Tire installed on a split rim may explode causing injury or in the worst case death Use a long air hose with a self attaching air chuck which allows you to stand outside the danger area Tires on stored wheels spare wheels must be kept laying down on their side and only be inflated sufficiently to keep the rim parts in position Wheel Nut Tightening Check After ...

Страница 229: ... must be removed from machine and replaced or if a tire must be replaced on wheel allow this task to be performed only by experienced service personnel A tire rim could be propelled off wheel and cause serious bodily injury or death See Figure 119 WARNING Improper servicing or changing tires and rims can cause explosion resulting in serious injury or death Do not service or change tires and rims u...

Страница 230: ...one for the load to be handled and transported over a particular distance If L5 tires are used for loading and carrying operations due attention must be paid to the transporting distances Radial tires are to be preferred for loading and carrying operation as the buildup of heat is less in this type of tire Tires Working Pressure Driving Pressure Remarks Front Rear Front Rear Bias Ply Tire 4 1 Bar ...

Страница 231: ...art of the trailer NOTE Have someone in clear view and in a safe position provide directions while loading 5 Lower the bucket and lock each control lever using the pilot cutoff switch 6 Apply the parking brake and set the articulation stopper in the LOCKED position 7 Tape over the exhaust stack outlet to prevent turbo Windmilling damage 8 Place blocks in front of and behind the tires to prevent th...

Страница 232: ...and work site crew Condition of ground support Wheel loader configuration and attachments Weight lifting height and lifting radius Safe rigging of load Proper handling of suspended load Tag lines on opposite sides of load can be very helpful in keeping a suspended load secure if they are anchored safely to control points on ground Figure 3 ...

Страница 233: ...l system Clean system and add new fuel Air in fuel system Purge air from system Engine stop control failed Replace stop control Engine stop relay failed Replace relay Engine starts runs only at low speed or shuts down Engine oil viscosity incorrect Change oil Clogged or dirty fuel injectors Clean injectors Fuel filters plugged Replace filters Engine stop motor cable out of adjustment Readjust Engi...

Страница 234: ...de oil for weather conditions change oil Clogged oil filter Change filter and oil Defective alarm switch Contact your DOOSAN dealer Oil leakage from pipe or joint Clogged suction strainer Excessive engine wear Defective oil pump Coolant temp warning light turns ON Low engine coolant level Add coolant Loose slipping broken fan belt Adjust or replace belt Clogged radiator fins Clean Scale or mineral...

Страница 235: ...Remedy Problem Possible Cause Remedy None of the controls function loud noise from pumps Hydraulic pump failed Contact your DOOSAN dealer Low hydraulic oil level Add hydraulic oil as required Suction line plugged or damaged Clean or replace as required None of the controls function no noise from pumps Pilot pump failure Contact your DOOSAN dealer Cutoff solenoid valve failed Replace solenoid Relie...

Страница 236: ... cooler Clean exterior of cooler Oil cooler faulty Contact your DOOSAN dealer Fan belt loose Tighten fan belting as required Actuators on one side of boom have little power or do not operate Overload relief valve is not operating properly Repair valve or replace Damaged hydraulic hose Replace hose Loose hydraulic fittings Tighten fittings Internal damage to control valve housing Replace control va...

Страница 237: ...age to torque converter Repair or replace Engine malfunction See Engine Troubleshooting Table Brake valve Disassemble and clean Unusual transmission noise Low transmission fluid or low quality fluid Add fluid or change fluid Worn transmission parts Replace parts Broken gears or bearings Replace parts Transmission fails to operate Damaged transmission clutch disks Replace disks Damaged wires in tra...

Страница 238: ...ng pump failure Repair or replace Leaking steering cylinder Repair cylinder Rust on steering column bearing and spline Lubricate Tire air pressure is low Inflate to proper pressure High initial resistance to movement of steering wheel Air in load sensing line inside priority valve Bleed system to remove air Sediment blocking orifice of load sensing line inside priority valve Clean and repair Sedim...

Страница 239: ...r bleeding brakes brakes are not fully released Damaged brake disks Replace disks Damaged brake disk return spring Replace return springs Problem Possible Cause Remedy Battery has no power and will not accept a charge Damaged battery plates Replace battery Alternator not charging properly Repair or replace alternator Bad ground Clean and tighten Loose electrical connector Clean and tighten Alterna...

Страница 240: ...OP000040 Troubleshooting 6 8 ...

Страница 241: ...r SAE J1995 160 ps 118 kw 1800 rpm Rated Horse Power SAE J1995 150 ps 110 kw 2200 rpm Max Torque 70 kg m 686 N m 1400 rpm Transmission Full Automatic Power Shift Full Automatic Power Shift Speeds 4 Forward 3 Reverse Brake Systems Service Brakes Full Hydraulic Separate Dual Line Wet Discs Parking Brake Spring Applied Oil Released on Front Axle Wet Disc Performance Travel Speed 6 9 4 3 12 8 7 9 24 5...

Страница 242: ... 7 2 WORKING RANGE AND DIMENSIONS Figure 1 illustrates exterior machine dimensions and working range of machine when it is equipped with a standard bucket 4 0 T R S B D E A L O Q P C F 4 5 15 J M N H I K G FG015634 Figure 1 ...

Страница 243: ...9 6 2 883 mm 9 6 Dump Height at 45 with cutting edge I 2 835 mm 9 4 2 825 mm 9 3 Dump Reach at 45 without cutting edge with base edge J 1 036 mm 3 5 1 046 mm 3 5 Dump Reach at 45 with cutting edge K 1 060 mm 3 6 1 070 mm 3 6 Digging Depth L 90 mm 4 100 mm 4 Max Bucket Hinge Height M 3 870mm 12 8 3 860mm 12 8 Max Tilt Angle at Carry Position N 48 Max Tilt Angle at Ground O 44 Max Tilt Angle at Full...

Страница 244: ... yard of many types of workload materials APPROXIMATE WEIGHT OF WORKLOAD MATERIALS MATERIAL LOW WEIGHT OR DENSITY 1 100 KG M3 1 850 LB YD3 OR LESS MEDIUM WEIGHT OR DENSITY 1 600 KG M3 2 700 LB YD3 OR LESS HIGH WEIGHT OR DENSITY 2 000 KG M3 3 370 LB YD3 OR LESS Charcoal 401 kg m3 695 lb yd3 Coke blast furnace size 433 kg m3 729 lb yd3 Coke foundry size 449 kg m3 756 lb yd3 Coal bituminous slack pil...

Страница 245: ...61 kg m3 1 620 lb yd3 Gypsum crushed to 3 inch size 1 522 kg m3 2 565 lb yd3 Gravel DRY packed fragments 1 810 kg m3 3 051 lb yd3 Gravel WET packed fragments 1 922 kg m3 3 240 lb yd3 Limestone graded above 2 1 282 kg m3 2 160 lb yd3 Limestone graded 1 1 2 or 2 1 362 kg m3 2 295 lb yd3 Limestone crushed 1 522 kg m3 2 565 lb yd3 Limestone fine 1 602 kg m3 2 705 lb yd3 Phosphate rock 1 282 kg m3 2 16...

Страница 246: ...WEIGHT OR DENSITY 1 100 KG M3 1 850 LB YD3 OR LESS MEDIUM WEIGHT OR DENSITY 1 600 KG M3 2 700 LB YD3 OR LESS HIGH WEIGHT OR DENSITY 2 000 KG M3 3 370 LB YD3 OR LESS IMPORTANT Weights are approximations of estimated average volume and mass Exposure to rain snow or ground water settling or compaction due to overhead weight and chemical or industrial processing or changes due to thermal or chemical t...

Страница 247: ...3 18 Boom Float Switch 2 36 Brake Charge Pressure 4 75 Brake Pedal 2 10 Brakes Accumulator 4 65 Bleeding 4 61 Brake Fluid Warning 2 23 Brake Fluid Warning Light 2 23 Brake Pedal 2 10 Troubleshooting 6 7 Bucket Angle Indicator 3 18 Capacity 7 4 Position Switch 3 19 Teeth and Side Cutters 4 27 C Cab Light 2 41 Center Pins 4 35 Cigar Lighter 2 30 Circuit Breaker 2 58 Clean Exterior of Radiator Oil Co...

Страница 248: ...l Tank Drain Water 4 38 Hydraulic System Check Oil Level 4 24 Control Lever Activation Pressure 4 76 Fan Motor Pressure 4 79 Full Flow Filter Replace 4 35 4 57 Hydraulic Oil Replace 4 63 Hydraulic Pressures 4 75 Leaks in the Hydraulic System 4 25 Long Term Storage 4 80 Service Brake Outlet Pressure 4 76 Steering Pump Pressure 4 76 System Pilot Filter Replace 4 43 System Warm up 3 10 System Warm up...

Страница 249: ...justment of Armrest 2 52 Backrest Adjustment 2 51 Headrest 2 52 Weight Adjustment 2 51 Seat Belt 2 53 Seat Belt Inspection 4 27 Shipping and Transportation 1 49 Shutdown Engine Stop 3 9 Machine 3 14 Shutdown Control Functions 1 35 Sloping Terrain 1 29 Speakers 2 42 Speedometer 2 16 Starter Switch 2 6 Start up Cold Weather Engine Start 3 5 Engine Start 3 2 Hydraulic System Warm up 3 10 Hydraulic Sy...

Страница 250: ...heck 4 23 Oil Temperature Gauge 2 17 Transportation 5 1 Travel Precautions 1 29 Travel System Troubleshooting 6 5 Troubleshooting 6 1 U Unauthorized Modifications 1 15 Unloading and Loading 5 1 V Vibration 2 52 Vibration Level 1 17 Visibility 1 33 Visibility Information 1 13 W Weight of Workload Materials 7 4 Wheel Nut Torque 4 83 Window Washer Liquid 4 27 Work Area 1 32 Work Light Indicator Light...

Отзывы:

Похожие инструкции для DL220