


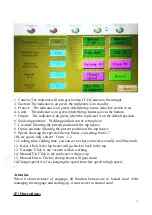


21
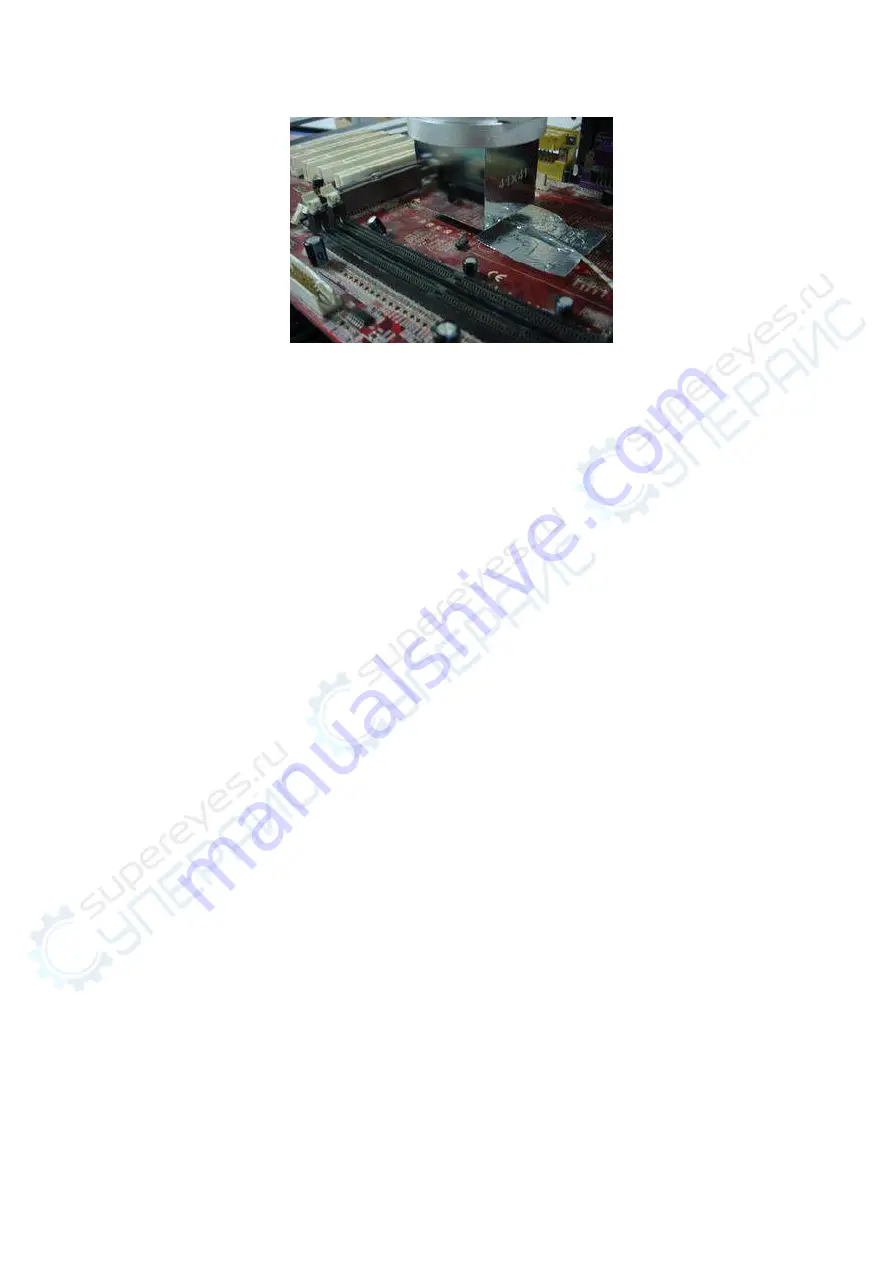
Picture sixteen
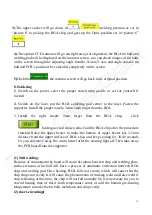
c Adjust the position of PCB board so that the ready to be heated parts is
under the upper warm wind nozzle (Like picture sixteen)
d Adjust the adjusting knob of head blow-dryer up and down so that the upper warm
wind nozzle is 2-3mm higher than the surface of PCB board
e Choose the touch screen interface (like picture five), click “start”, then the upper
heater begin to heat
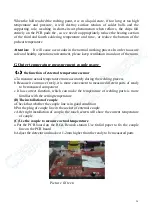
f Now the screen will show red. light blue.green three curves (Picture seventeen)
The temperature curve of external couple (light blue)
The current temperature curve of internal couple of upper heater (red)
The current temperature curve of internal couple of bottom heater (green)
Picture seventeen
(D) Use the external couple to adjust the temperature
Statement: Statement: In this step, fault operating will cause
temperature deviation or even out of control, please be careful!
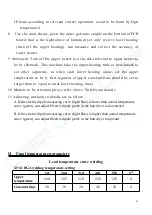
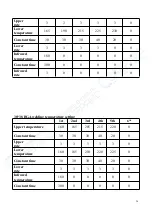
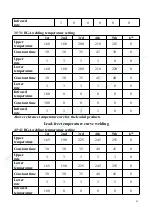
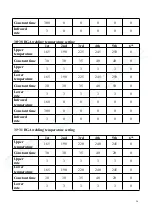
1 Set upper temperature/time/speed rate and so on (upper heater correction)
2 Suggest that do the correction on abandoned circuit, avoid damaging the
circuit and components on it
3
Carry out above process step (Three), install outer galvanic couple well,
and center the galvanic couple under the top head blow-dryer
4 Turn off the bottom heating process (Set the data relevant to bottom
heating to be 0), back to interface as image 5, click "Start" button, the
machine begins to heat according to data has been set Thus the outer


