Accessing the Diagnostic Utility
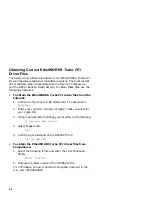
To access the Diagnostic utility, use the following procedure.
1.
Insert the EtherWORKS Turbo PCI distribution diskette into the
disk drive.
2.
Set the system to the disk drive being used.
3.
Type
NICDIAG
at the DOS prompt.
An introductory window appears. Follow the screen instructions
to display the Main Menu.
4.
Select the View Configuration option, then press
Enter
to display
the current EtherWORKS Turbo PCI board configuration. Press
Enter
again to display more detailed configuration information.
These parameters are for viewing only, and cannot be changed.
5.
Select the Diagnostic option, then press
Enter
to run the
diagnostics.
When the diagnostics are complete, the screen displays the
diagnostic result code and lets you know whether the board
diagnostics passed or failed.
6.
Press
ESC
to return to the NICDIAG Main Menu.
7.
Select the Exit option from the Main Menu.
The following warning message appears:
Do you really want to quit? (Y/N)
8.
Press
Y
to exit NICDIAG.
9.
Restore the CONFIG.SYS file if modified.
10. Reboot your system.
2–10
Содержание EtherWORKS Turbo PCI
Страница 4: ......
Страница 8: ......
Страница 11: ...Figure 1 EtherWORKS Turbo PCI Product Kit LJ 03736 TI0 6 3 1 7 5 4 2 xi...
Страница 12: ......
Страница 19: ...Figure 2 2 Removing the PCI Slot Cover L J 0 0 4 6 2 T I 0 2 5...
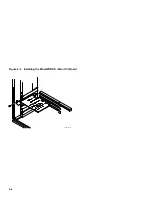
Страница 20: ...Figure 2 3 Installing the EtherWORKS Turbo PCI Board LJ 03735 TI0 2 6...
Страница 28: ......
Страница 32: ......
Страница 40: ......

