


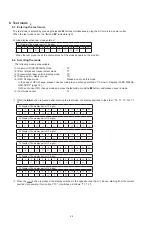


26
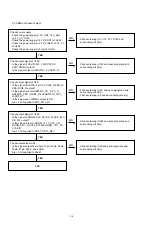
(3) Accumulated laser on time display mode
Press the
8
or
9
button to select [Y] and press the
1
button to set it.
The accumulated laser on time is displayed.
FL Display (The display part of 13 digits)
1
2
3
4
5
6
7
8
9
10
11
12
13
T
C
Y
m
m
m
m
m
m
h
(Y=1 : CD, 2 : DVD , 3 : BD, mmmmmm : Time(Fractions of hours are counted up one hour on the display.)
When the
2
button is pressed, the layer above the current layer is displayed. See "6.4 Stopping the mode".
---To clear the accumulated laser on time---
Press the
1
button while the accumulated laser on time is displayed ("TC1, "TC2", "TC3" ) until "TC4
*
clear??"
appears at the display.
FL Display (The display part of 13 digits)
1
2
3
4
5
6
7
8
9
10
11
12
13
T
C
4
*
c
l
e
a
r
?
?
If the
1
button is pressed, the accumulated laser on time of CD, DVD and BD is cleared.
FL Display (The display part of 13 digits)
1
2
3
4
5
6
7
8
9
10
11
12
13
T
C
1
0
h
When "TC1", "TC2" or "TC3" is selected with the
8
or
9
button, "mmmmmm" is displayed as "0" so you can
check.
(4) Picking up No. display mode
Press the
8
or
9
button to switch to the pickup number display.
The pickup number is a 15-digit number, so it is displayed in two sections.
FL Display (The display part of 13 digits)
1
2
3
4
5
6
7
8
9
10
11
12
13
T
G
X
Y
Y
Y
Y
Y
Y
Y
Y
(X (display position) = 1 : Lower digits, 2 : Upper digits. YYYYYYYY: Pickup number)
When the
2
button is pressed, the layer above the current layer is displayed. See "6.4 Stopping the mode".
(5) Test mode cancel
A con
fi
rmation message is displayed. Press the
1
button to set, canceling the test mode.
FL Display (The display part of 13 digits)
1
2
3
4
5
6
7
8
9
10
11
12
13
T
I
1
R
e
a
l
l
y
?
When the
2
button is pressed, the layer above the current layer is displayed. See "6.4 Stopping the mode".
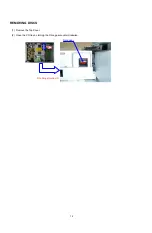
Содержание DBP-2012UDCI
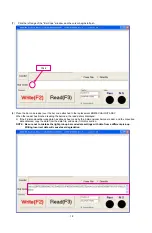
Страница 17: ...17 5 On the screen below select ComPort XX Select the USB 232C TTL conversion jig port 6 Check Directory ...
Страница 40: ...40 Personal notes ...
Страница 76: ...Personal notes Personal notes 76 ...
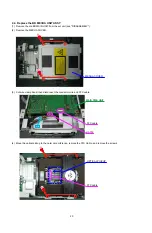
Страница 80: ...80 PACKING VIEWs 7 8 8 14 15 16 17 19 18 17 16 19 9 13 12 11 10 z 1 3 4 5 6 ...
Страница 86: ...86 LAN8710 MAIN UNIT U901 Block Diagram ...
Страница 87: ...87 NJM2566AV MAIN UNIT U20 Block Diagram ...
Страница 91: ...91 2 FL DISPLAY FL TUBE 15 BT 114GNK Display UNIT U3 ...
Страница 92: ...92 Personal notes ...