background image

87

Basic version

Simple version

Information

ENGLISH

Advanced version

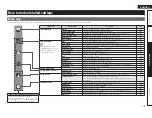
Setting items

Setting details

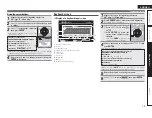
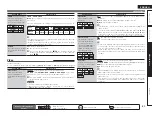
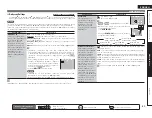
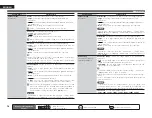
LFE

Adjust the low-frequency 
effects level (LFE).

–10dB – 0dB

 For proper playback of the different sources, we recommend setting 

to the values below.

• Dolby Digital sources : “0dB”
• DTS movie sources : “0dB”
• DTS music sources : “–10dB”

Center Image

Assign center channel 
signal to front left and right 
channels for wider sound.

0.0 – 1.0 (0.3)

Panorama

Assign front L/R signal also 
to surround channels for 
wider sound.

ON 

: Set.

OFF

 : Do not set.

Dimension

Shift sound image center 
to front or rear to adjust 
playback balance.

0 – 6 (3)

Center Width

Assign center channel 
signal to front left and right 
channels for wider sound.

0 – 7 (3)

Delay Time

Adjust delay time to control 
sound stage size.

0ms – 300ms (30ms)

AFDM
(Auto flag detect mode)

Detect the source’s 
surround back channel 
signal and set the 
optimum surround mode 
automatically.

ON

 : Set.

OFF

 : Do not set.

[Example] Playing Dolby Digital software (with EX flag)

• When “AFDM” is set to “ON”, the surround mode is automatically set 

to the DOLBY D + PL

g

x C mode.

•  To play in the DOLBY DIGITAL EX mode, set “AFDM” to “OFF” and 

“Surround Parameters” – “Surround Back” to “MTRX ON”.

  Some Dolby Digital EX sources do not include EX flags. If the playback 

mode does not switch automatically even when “AFDM” is set to 
“ON”, set “Surround Parameters” – “Surround Back” to “MTRX ON” 
or “PL

g

x CINEMA”.

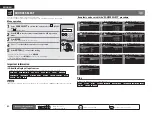
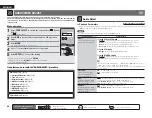
AUDIO/VIDEO ADJUST

Remote control operation 

buttons

Move the cursor 
(Up/Down/Left/Right)

Confirm the setting

Return to previous menu

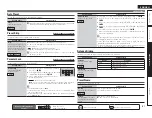
Setting items

Setting details

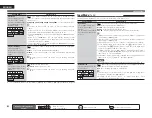
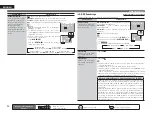
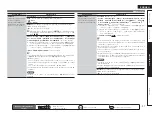
Surround Back

Sets the method of 
generating of the surround 
back channel.


n

For 2-channel sources

ON

 : The surround back channel is used.

OFF

 : No signal is played from the surround back channels.


n

For multi-channel sources

Set the decoding method for the surround back channel.

DSCRT ON

 : Play the surround back signals included in the 7.1-channel 

source.

MTRX ON

 : Generate and play the surround back channel signals from 

the surround channel signals by means of the Dolby Digital EX decoder.

ES DSCRT

z

1

 : Play the surround back signals included in the 

6.1-channel DTS source.

ES MTRX

z

2

 : Generate and play the surround back channel signals 

from the surround channel signals of the DTS source by means of the 
DTS-ES decoder.

ON

z

3

 : Convert the 5.1-channel source of the DTS-HD input signals to 

the 7.1-channel output recommended by DTS and then play.

PL

g

x CINEMA

z

4

 : Generate and play the surround back signals by 

decoding the signals in the Dolby Pro Logic 

g

x Cinema mode.

PL

g

x MUSIC

 : Generate and play the surround back signals by 

decoding the signals in the Dolby Pro Logic 

g

x Music mode.

OFF

 : Do not play the surround back channel.

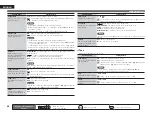
z

1  This can be selected when playing DTS sources including a signal to 

identify discrete 6.1-channel signals.

z

2  This can be selected when playing DTS sources.

z

3  This can be selected when playing the 5.1-channel source of DTS-HD.

z

4  This can be selected when “Speaker Config.” – “Surround Back” 

(

v

page 96) is set to “2 spkrs”.

• This can also be set by pressing 

STANDARD

.

• If the source being played contains a surround 

back signal, the decoder type is automatically 
selected by the AFDM function. Set “AFDM” to 
“OFF” to switch to your preferred decoder.

NOTE

If the setting in “Speaker Config.” – “Surround 
Back” (

v

page 96) is “None”, “Surround Back” is 

not displayed.

Содержание AirPlay AVR-4311CI

Страница 1: ...anual Manuel de l Utilisateur Simple version Version simplifiée v 4 Basic version Version basique v 14 Advanced version Version avancée v 53 Information Part names and functions vpage 120 v 119 Informations Nomenclature et fonctions vpage 120 ...

Страница 2: ...e fallen into the apparatus the apparatus has been exposed to rain or moisture does not operate normally or has been dropped 15 Batteries shall not be exposed to excessive heat such as sunshine fire or the like FCC INFORMATION For US customers 1 COMPLIANCE INFORMATION Product Name AV Surround Receiver Model Number AVR A100 This product complies with Part 15 of the FCC Rules Operation is subject to ...

Страница 3: ...il contre l humidité l eau et la poussière Débrancher le cordon d alimentation lorsque l appareil n est pas utilisé pendant de longues périodes Ne pas obstruer les trous d aération Ne pas laisser des objets étrangers dans l appareil Ne pas mettre en contact des insecticides du benzène et un diluant avec l appareil Ne jamais démonter ou modifier l appareil d une manière ou d une autre Ne pas recouvr...

Страница 4: ...ng an iPod 30 Tuning in radio stations 33 Playing a network audio 37 Playing a USB memory device 48 Selecting a listening mode Surround Mode 50 Standard playback 50 DENON original surround playback 52 Stereo playback 52 Direct playback 52 Pure direct playback 52 Advanced version 53 Speaker installation connection Advanced connection 54 Install 54 Connect 56 Set up speakers 63 Playback Advanced ope...

Страница 5: ...ced in the sound images High definition audio support The unit is equipped with a decoder which supports high quality digital audio format for Blu ray Disc players such as Dolby TrueHD DTS HD Master Audio etc Audyssey MultEQ XT 32 Audyssey MultEQ corrects both time and frequency response problems in the listening area so that every listener can enjoy music and movie with the optimum sounds It perfo...

Страница 6: ... a soft cloth Follow the instructions when using a chemical cleaner Benzene paint thinner or other organic solvents as well as insecticide may cause material changes and discoloration if brought into contact with the unit and should therefore not be used Features Easy to use Graphical User Interface This unit is equipped with an easy to see Graphical User Interface that uses menu displays and leve...

Страница 7: ...ower to all devices n For operation of the connected devices refer to the user manuals for each device Play back disc vpage 13 Enjoy Blu ray Disc in surround sound 5 Set up speakers vpage 7 Use the setup microphone DM A409 included with the product for automatic setup 4 Finish STEP 6 Store STEP 5 Check STEP 4 Calculation STEP 3 Measurement 2nd 8th listening position STEP 2 Detection Measurement Ma...

Страница 8: ...BACK AMP ASSIGN F HEIGHT AMP ASSIGN F WIDE AMP ASSIGN Use speakers where one speaker has an impedance of 4 to 16 Ω When using a speaker with impedance of 4 Ω or 6 Ω make sure to set the Speaker Impedance in the menu vpage 98 to 6 Ω ohms or 4 Ω ohms Install 1 2 3 4 5 This unit can perform 2 0 to 11 2 channel surround playback This page provides the speaker installation procedure for the 7 1 channel...

Страница 9: ...er TV If your TV does not support the ARC function vpage 16 make the audio connection referring to Connecting a TV vpage 18 TV sound can be played on this unit NOTE Do not plug in the power cord until all connections have been completed Do not bundle power cords together with connection cables Doing so can result in humming or noise Connect FL FR C SL SR SW SBL SBR Speaker cables sold separately A...

Страница 10: ...ng the measurement process as Radio Frequency Interference RFI may cause measurement disruptions even if the cell phone is not in use Do not unplug the setup microphone from the main unit until Audyssey Auto Setup is completed Do not stand between the speakers and setup microphone or allow obstacles in the path while the measurements are being made This will cause inaccurate readings Loud test sou...

Страница 11: ... z To run Audyssey multiple subwoofer calibration you must select Measure 2 spkrs in Set up Channel Select vpage 64 The Simple version section provides the speaker installation connection and setup methods for the 7 1 channel system with surround back speakers For the installing connecting and setup methods of speakers other than the 7 1 channel system with surround back speakers see page 54 Set u...

Страница 12: ...ey Auto Setup over again Press ui to select Retry and then press ENTER When measuring has stopped Press RETURN to the Cancel auto setup prompt is displayed Press o to select Yes then press ENTER Setting up the speakers again Repeat the operation from step 4 of STEP1 Preparation In STEP 2 you will perform measurements at the main listening position This step automatically checks the speaker configur...

Страница 13: ...s o then select Yes All the measured Audyssey Auto Setup data will be erased NOTE During saving of measurement results be sure not to turn off the power Remote control operation buttons Move the cursor Up Down Left Right Confirm the setting Return to previous menu NOTE If the result differs from the actual connection status or if Caution is displayed see Error messages vpage11 ThencarryoutAudyssey ...

Страница 14: ...ade Speaker or subwoofer sound is too low for accurate measurements to be made Either turn off any device generating noise or move it away Perform again when the surroundings are quieter Check the speaker installation and the direction in which the speakers are facing Adjust the subwoofer s volume 8 66 872 6 783 5 7851 URQW 5 1RQH DQFHO DXWLRQ 5HWU The displayed speaker could not be detected Check...

Страница 15: ...r level measurement begins During measuring a Testing message is displayed The measured level appears on the level indicator after about 3 to 5 seconds 8 66 872 6 783 5 7851 1H W G 6 7HVW 6WDUW 6XEZRRIHU HYHO 0DWFKLQJ 3OHDVH SODFH WKH PLFURSKRQH DW HDU KHLJKW DW PDLQ OLVWHQLQJ SRVLWLRQ WKHQ SXVK 17 5 6WDUW PHDVXUHPHQW 2XWSXW WHVW WRQH IURP VXEZRRIHU QWHU DQFHO 8 66 872 6 783 G 6WRS 6XEZRRIHU HYHO ...

Страница 16: ...KH OLVWHQLQJ PRGH Set the listening mode according to the playback contents cinema music etc or according to your liking vpage 50 Selecting a listening mode Surround Mode When power is switched to standby Press POWER OFF GPower indicator status in standby modeH Normal standby Off When HDMI Control Control is set to ON Red When Network Standby is set to ON Red You can also switch the power to stand...

Страница 17: ... vpage 29 Set top box Satellite tuner or cable TV vpage 17 19 Digital video recorder vpage 17 20 Game console vpage 17 Digital camcorder vpage 21 Control dock for iPod vpage 21 vpage 30 Audio Playback Connection iPod vpage 22 vpage 32 USB memory device vpage 22 vpage 48 SIRIUS satellite radio vpage 23 vpage 33 HD Radio receiver vpage 23 vpage 35 Record player vpage 24 CD player vpage 24 vpage 30 N...

Страница 18: ...of video signals for MAIN ZONEH HDMI connector Component video connectors S Video connector Video connector Monitor HDMI connector Component video connectors Component video connectors Component video connectors S Video connector Video connector HDMI connector Video connector HDMI connector Video connector Video device This unit Output Input IN Output MONITOR OUT Input when 480i 576i signals are i...

Страница 19: ...h Speed HDMI cable or High Speed HDMI cable with Ethernet When the ARC function is used connect a device with a Standard HDMI cable with Ethernet or High Speed HDMI cable with Ethernet for HDMI 1 4a HDMI control function vpage 65 This function allows you to operate external devices from the receiver and operate the receiver from external devices NOTE The HDMI control function may not work dependin...

Страница 20: ...cations of the connected device regarding permissible inputs Connecting to a device equipped with a DVI D connector When an HDMI DVI conversion cable sold separately is used the HDMI video signals are converted to DVI signals allowing connection to a device equipped with a DVI D connector NOTE No sound is output when connected to a device equipped with a DVI D connector Make separate audio connect...

Страница 21: ... Audio cable sold separately Optical cable 7 0 6 0 015 065 7 0 0 10 5 7 0 1 13 TV Set this to change the digital input connector or component video input connector to which the input source is assigned Input Assign vpage 82 in Set as Necessary Connecting a Blu ray Disc player You can enjoy video and audio from a Blu ray Disc Select the connector to use and connect the device For instructions on HD...

Страница 22: ...or or component video input connector to which the input source is assigned Input Assign vpage 82 in Set as Necessary Connecting a set top box Satellite tuner cable TV You can watch satellite or cable TV Select the connector to use and connect the device For instructions on HDMI connections see Connecting an HDMI compatible device vpage 16 Cables used for connections Video cable sold separately Vi...

Страница 23: ...ideo cable sold separately Video cable Yellow Component video cable Green Blue Red S Video cable Audio cable sold separately Audio cable White Red R L R L Optical cable R L R L R L R L 3 3 065 6 0 7 0 7 0 065 015 015 6 0 6 0 065 7 0 065 4 7 0 7 0 0 10 5 7 0 1 13 065 6 0 Digital video recorder NOTE To record video signals through this unit use the video cable for connection between this unit and th...

Страница 24: ...m a game machine or some other source is input the video conversion function might not operate In this case use the monitor output of the same connector as the input Connecting a control dock for iPod Connect a control dock for iPod to the unit to enjoy video and music stored on an iPod For a control dock for iPod use ASD 1R and ASD 11R made by DENON sold separately For instructions on the control...

Страница 25: ... adapter can be connected to supply power use the AC adapter NOTE You cannot use the USB ports on the front panel and rear panel simultaneously Select and connect the USB port to use USB memory devices will not work via a USB hub Do not use an extension cable when connecting a USB memory device This may cause radio interference with other devices This unit does not support playback on an iPad Do n...

Страница 26: ...ing map to determine which area you are in and position the antenna accordingly q w e r t SOUTH NORTH WEST SKY EAST HORIZON Area 1 Point the antenna toward the sky in the east northeast or southeast either through a window or outside Area 2 Point the antenna toward the sky in the north or northeast either through a window or outside Area 3 Point the antenna toward the sky in the north or northwest...

Страница 27: ...Connect it to reduce noise when noise is excessive Note that depending on the record player connecting the ground line may have the reverse effect of increasing noise In this case it is not necessary to connect the ground line n AM loop antenna assembly 1 3XW WKH VWDQG VHFWLRQ WKURXJK WKH ERWWRP RI WKH ORRS DQWHQQD IURP WKH UHDU DQG EHQG LW IRUZDUG Stand Square hole Projecting part Loop antenna 2 ...

Страница 28: ...als do not connect the speakers to the speaker terminals Component equipped with a DENON LINK connector Multichannel playback is possible That includes DVD Audio and Super Audio CD vpage 30 Playing an iPod Also refer to page 29 Playing a Blu ray Disc player compatible with DENON LINK 4th for information on connecting a player that supports DENON LINK 4th edition Cables used for connections Audio c...

Страница 29: ... 5 or greater recommended Use only shielded STP or ScTP LAN cable which is available at retailer Some flat type Ethernet cables are easily affected by noise We recommend using a normal type cable If you have an Internet provider contract for a line on which network settings are made manually make the settings at Network Setup vpage 101 With this unit it is possible to use the DHCP and Auto IP funct...

Страница 30: ... below beforehand q Turn on the power of this unit w Turn off the power of this unit from the external controller e Check that the unit is in the standby mode TRIGGER OUT jacks When a device with TRIGGER IN jack is connected the connected device s power on standby can be controlled through linked operation to this unit The TRIGGER OUT jack outputs a maximum 12 V 150 mA electrical signal 12 V 150 m...

Страница 31: ... SELECT is pressed q Press SOURCE SELECT Display the SOURCE SELECT menu 6285 6 7 6RXUFH 6 7 5HFHQW 3OD HU 9LGHR 1HWZRUN 7XQHU QWHU 0RYH The currently selected input source is highlighted q w e q Input Source The name of the highlighted input source is displayed w Recently used sources The recently used input sources up to five are displayed e Icons for the input sources in the different categories ...

Страница 32: ... XVLQJ WKH QSXW 0RGH PHQX vSDJH The default setting of Input Mode is Auto 7 3OD WKH FRPSRQHQW FRQQHFWHG WR WKLV XQLW Make the necessary settings on the player language setting subtitles setting etc beforehand NOTE Set the Blu ray disc player s DENON LINK setting to 4th For instructions on operation refer to the Blu ray disc player s manual The low jitter transmission function does not work except ...

Страница 33: ...ed in step 4 the following screen is displayed on a TV screen depending on the connected control dock for iPod 0XVLF 3OD OLVWV UWLVWV OEXPV 6RQJV HQUHV RPSRVHUV L3RG 0XVLF 9LGHRV When using an ASD 1R When using an ASD 11R In Browse mode the iPod display is as shown at right NOTE If the connections screen is not displayed the iPod may not be properly connected Reconnect it OK to disconnect 4 3UHVV ...

Страница 34: ...ack starts n Viewing photos and videos on an iPod in the Remote mode This unit can play back on a TV screen photos and data stored on an iPod equipped with a slide show or video function 1 3UHVV DQG KROG SEARCH WR VHW WKH 5HPRWH PRGH Remote iPod or Dock Remote is displayed on the display of this unit 2 DWFKLQJ WKH L3RG V VFUHHQ XVH ui WR VHOHFW 3KRWRV RU 9LGHRV Depending on the iPod model it may b...

Страница 35: ...p WR VHOHFW WKH OH WR EH SOD HG 7 3UHVV ENTER p RU 1 Playback starts You can specify the duration of the on screen display to be displayed default 30 sec at menu iPod vpage 104 Press uio p to return to the original screen To play back compressed audio with extended bass or treble reproduction we recommend playback in RESTORER mode vpage 92 The default setting is Mode3 In Browse mode press STATUS d...

Страница 36: ...s sold separately Taxes and a one time activation fee may apply XM tuners and home docks or SIRIUS tuners each sold separately are required to receive the SIRIUS or XM satellite radio service All programming and fees subject to change It is prohibited to copy decompile disassemble reverse engineer hack manipulate or otherwise make available any technology or software incorporated in receivers comp...

Страница 37: ...QQHO WR SHU EORFN WKHQ SUHVV CH CH RU 1 8 WR VHOHFW WKH SUHVHW QXPEHU 4 3UHVV MEMORY DJDLQ WR FRPSOHWH WKH VHWWLQJ To preset other stations repeat steps 1 to 4 NOTE Preset channels are erased by overwriting them n Listening to preset channels 3UHVV CH CH WR VHOHFW WKH GHVLUHG SUHVHW FKDQQHO WKHQ SUHVV ENTER Preset channels can also be selected by pressing SHIFT Block and 1 8 Channel You can also o...

Страница 38: ... 0 9 SHIFT Preset channel block selection MEMORY Preset memory registration TV POWER TV power on standby Default SONY TV INPUT Switch TV input Default SONY Listening to HD Radio stations 1 3UHVV TUNER DTU WR VZLWFK WKH LQSXW VRXUFH WR 5DGLR 2 3UHVV BAND WR VHOHFW 0 RU 0 FM When listening to an FM broadcast AM When listening to an AM broadcast 872 5DGLR 1RZ 3OD LQJ 0 0 7XQLQJ 3UHVHW DQG 0 025 0HPRU...

Страница 39: ...0 1 90 1 90 1 90 1 90 1 MHz C1 C8 530 600 930 1000 1120 1210 1400 1710 kHz D1 D8 90 1 MHz E1 E8 90 1 MHz F1 F8 90 1 MHz G1 G8 90 1 MHz Specify a name for the preset broadcast station Preset Name vpage 81 n Listening to preset stations 1 3UHVV SHIFT WR VHOHFW WKH PHPRU EORFN WR 2 3UHVV CH CH RU 1 8 WR VHOHFW WKH GHVLUHG SUHVHW FKDQQHO You can also operate via the main unit In this case perform the ...

Страница 40: ...album art can be displayed while the music files are playing For music files in WMA Windows Media Audio format the album art is only played when using Windows Media Player ver 11 Slide show function Still picture JPEG files stored in folders on a media server can be played as slide shows The duration each picture is displayed can be set This unit plays back image JPEG files in the orientation in which...

Страница 41: ...et radio 1 3UHSDUH IRU SOD EDFN q Check the network environment then turn on this unit s power vpage 26 Connecting to a home network LAN w If settings are required make the Network Connecting vpage 101 2 3UHVV NET USB WR VZLWFK WKH LQSXW VRXUFH WR 1 7 86 3 3UHVV ui WR VHOHFW QWHUQHW 5DGLR WKHQ SUHVV ENTER RU p Selecting in the SOURCE SELECT menu lets you directly select Internet Radio 4 3UHVV ui W...

Страница 42: ...H UHJLVWHUHG SUHVHW QXPEHU This unit automatically connects to the Internet and playback begins n Registering internet radio stations as your favorites Favorites are listed at the top of the menu screen so when a station is registered as a favorite it can be tuned in easily 1 3UHVV MEMORY ZKLOH WKH QWHUQHW UDGLR VWDWLRQ RX ZDQW WR UHJLVWHU LV SOD LQJ 2 3UHVV ui WR VHOHFW DYRULWHV WKHQ SUHVV ENTER ...

Страница 43: ...H OH WKHQ SUHVV ENTER RU p Playback starts once buffering reaches 100 Connections to the required system and specific settings must be made in order to play music files vpage 26 Before starting you must launch the computer s server software and set the files as server contents For details see the operating instructions of your server software Depending on the size of the still picture JPEG file some t...

Страница 44: ...may not be able to perform a character search Viewing photographs on the Flickr site You can view photographs shared by particular users or all of the photographs shared on Flickr n Viewing photographs shared by particular users 1 3UHSDUH IRU SOD EDFN q Check the network environment then turn on this unit s power vpage 26 Connecting to a home network LAN w If settings are required make the Network...

Страница 45: ... p Cursor operation Auto search cue ui ENTER Press and release Enter ENTER Press and hold Stop SEARCH Page Searchz RETURN Return 2 Stop 1 8 Preset channel selection SHIFT Preset channel block selection TV POWER TV power on standby Default SONY TV INPUT Switch TV input Default SONY Slide show playback vpage 85 Slide Show z When the menu screen is displayed press SEARCH then press o previous page or...

Страница 46: ... in my Napster library 1 8VH ui WR VHOHFW 0 1DSVWHU LEUDU WKHQ SUHVV ENTER RU p 2 8VH ui WR VHOHFW WKH LQIRUPDWLRQ RU WUDFN WKHQ SUHVV ENTER To play back compressed audio with extended bass or treble reproduction we recommend playback in RESTORER mode vpage 92 The default setting is Mode3 You can specify the duration of the on screen display to be displayed default 30 sec at menu NET USB vpage 104...

Страница 47: ...HFW KDYH D 3DQGRUD DFFRXQW WKHQ SUHVV ENTER RU p 3DQGRUD FFRXQW 2 QWHU PDLO DGGUHVV PDLO DGGUHVV 3DVVZRUG 5 7851 DQFHO 4 QSXW PDLO DGGUHVV DQG 3DVVZRUG For character input see page 78 5 IWHU LQSXWWLQJ WKH PDLO DGGUHVV DQG 3DVVZRUG VHOHFW 2 WKHQ SUHVV ENTER If the Email address and Password match the top menu for Pandora is displayed NOTE Press RETURN to cancel the input When Cancel input is displa...

Страница 48: ...ke this track Press when you don t like the track that is being played It will return to the Play Screen And Thumbs down icon is displayed The icon is not displayed on the next track Why is this track playing Displays the reason why Pandora selected this track Create station Creates a Station for the Track or Artist being played Bookmark this track Bookmarks the track currently being played You ca...

Страница 49: ...UFK 5KDSVRG KDQQHOV 0 LEUDU q w e r q Search from Rhapsody latest information 1 8VH ui WR VHOHFW 5KDSVRG 0XVLF XLGH WKHQ SUHVV ENTER RU p 2 3UHVV ui WR VHOHFW WKH LQIRUPDWLRQ IRU WUDFN VHOHFWLRQ WKHQ SUHVV ENTER RU p For character input see page 78 3 5HSHDW VWHS XQWLO WKH WUDFN LV GLVSOD HG 4 8VH ui WR VHOHFW WKH WUDFN WKHQ SUHVV ENTER RU p w Enter a character search for the track you want to list...

Страница 50: ...he original screen Use STATUS to switch between displaying the title name artist name or album name n Rhapsody operation Operation buttons Function CH Preset channel selection MENU Amp menu uio p Cursor operation Auto search cue ui ENTER Press and release Enter Pause ENTER Press and hold Stop SEARCH Page searchz1 Character searchz2 RETURN Return 1 Playback Pause 8 9 Auto search cue 3 Pause 2 Stop ...

Страница 51: ... standard This unit can show the artwork that was embedded by using MP3 ID3 Tag Ver 2 3 or 2 4 This unit is compatible with WMA META tags WAV format Quantization bit rate 16 bits FLAC format Quantization bit rate 16 or 24 bits z2 Copyright protected files can be played on certain portable players compatible with MTP z3 Only files that are not protected by copyright can be played on this unit Content...

Страница 52: ...ortable hard disk that can draw power from an AC adapter we recommend using the AC adapter It is not possible to connect and use a computer via the USB port of this unit using a USB cable Playing a USB memory device n USB operation Operation buttons Function CH Preset channel selection MENU Amp menu uio p Cursor operation Auto search cue ui ENTER Press and release Enter Pause ENTER Press and hold ...

Страница 53: ...Standard playback vpage 50 For 2 channel signal input Surround channel signals are created and played with surround playback For multichannel signal input The surround signal recorded in source is played as surround playback The sound is played according to the settings of the speaker size in Speaker Config vpage 95 Surround back channel or front height channel signals that are not recorded in sour...

Страница 54: ...us DOLBY DIGITAL DOLBY DIGITAL Plus EX DOLBY D EX DOLBY DIGITAL Plus PLgx CINEMA DOLBY D PL x C DOLBY DIGITAL Plus PLgx MUSIC DOLBY D PL x M DOLBY DIGITAL Plus PLgz HEIGHT DOLBY D PL z DOLBY TrueHD DOLBY TrueHD DOLBY TrueHD DOLBY TrueHD EX DOLBY HD EX DOLBY TrueHD PLgx CINEMA DOLBY HD PL x C DOLBY TrueHD PLgx MUSIC DOLBY HD PL x M DOLBY TrueHD PLgz HEIGHT DOLBY HD PL z DTS 5 1ch DTS ES Discrete 6 ...

Страница 55: ...usted Sound is output from the front left and right speakers and subwoofer If multichannel signals are input they are mixed down to 2 channel audio and are played 1 3OD LQJ WKH VRXUFH vSDJH 2 3UHVV D ST WR VHOHFW 67 5 2 Stereo playback begins If DIRECT STEREO on the main unit is pressed the same function as with the remote control unit can be obtained Direct playback Sound recorded in source is pl...

Страница 56: ...dvanced connection vpage 54 F Playback Advanced operation vpage 65 F Playback in ZONE2 ZONE3 Separate room vpage 72 F How to make detailed settings vpage 75 F Operating the connected devices by remote control unit vpage 108 Advanced version Here we explain functions and operations that let you make better use of this unit ...

Страница 57: ...This unit is compatible with Audyssey DSX vpage 132 and Dolby Pro Logic gz vpage 133 which offers an even wider and deeper surround sensation When using Audyssey DSX install front wide speakers or front height speakers When using Dolby Pro Logic gz install front height speakers Install the surround back speakers in a position 2 to 3 ft 60 to 90 cm higher than ear level z1 z2 45 Surround speaker 2 ...

Страница 58: ...L SR z1 z2 Listening position z1 22 30 z2 120 When Front A B speakers installed FR A FR B SW FL B FL A Listening position FL Front speaker L SBL Surround back speaker L FR Front speaker R SBR Surround back speaker R C Center speaker FHL Front height speaker L SW Subwoofer FHR Front height speaker R SL Surround speaker L FWL Front wide speaker L SR Surround speaker R FWR Front wide speaker R SB Sur...

Страница 59: ...back front height and front wide speakers before you start playback the audio is played back by automatically switching the speakers in accordance with the surround mode or input signals To set the speakers for automatic switching select Amp Assign and set Assign Mode to NORMAL using steps 3 and 4 of Set up Amp Assign vpage 63 n For connecting two subwoofers Two subwoofers can be connected to this...

Страница 60: ...akers can be used separately depending on the speaker s specifications or playback source such as front speakers A for multichannel playback and front speakers B for 2 channel playback vpage 98 Front Speaker Setup 6 1 channel Surround back speaker connection If using only one surround back speaker with a 6 1 channel connection connect to the L side of the SURR BACK AMP ASSIGN terminal For speaker s...

Страница 61: ... and you can enjoy playback with higher quality sound To use the bi amp connection for the front speakers select Amp Assign and set Assign Mode to Bi AMP using steps 3 and 4 of Set up Amp Assign vpage 63 FL FR SW w q w q R L z You can also connect the front speakers for bi amp connection to SURR BACK AMP ASSIGN or F HEIGHT AMPASSIGNspeakerterminalsusingthe AmpAssign AssignSp settings vpage95 To pe...

Страница 62: ...ti channel 2 channel connection You can connect the other front speakers for 2 channel playback using the DIRECT mode or STEREO mode The speakers used exclusively for multichannel playback and the speakers used exclusively for 2 channel playback are automatically switched for playback in accordance with the surround mode To set the speakers for automatic switching during playback select Amp Assign...

Страница 63: ...nnel playback are automatically switched for playback in accordance with the surround mode To set the speakers for automatic switching during playback via the bi amp connection select Amp Assign and set Assign Mode to 2CH Bi AMP using steps 3 and 4 of Set up Amp Assign vpage 63 zBi Amp connection FR FR FL FL C SBL SBR SL SR SW Multi channel playback Surround mode 2 channel playback Direct Stereo m...

Страница 64: ...for 9 channel and an external power amplifier for 2 channel Connect the external amplifier to the PRE OUT connector To perform 11 2 channel playback select Amp Assign and set Assign Mode to 11CH using steps 3 and 4 of Set up Amp Assign vpage 63 FL FR C SBL SBR SL SR FWR FWL FHR FHL SW1 SW2 69 R L R L Power amplifier z You can also change the PRE OUT connector for connecting the power amplifier to the ...

Страница 65: ...s a preamplifier select Amp Assign and set Assign Mode to PRE AMP using steps 3 and 4 of Set up Amp Assign vpage 63 When the PRE AMP mode is used the MAIN ZONE audio is not output from the speaker terminals of this unit To use the speakers for multizone ZONE2 ZONE3 in the PRE AMP mode set Amp Assign Assign Sp to ZONE2 3 vpage 95 This setting will output the ZONE2 audio from the surround back speake...

Страница 66: ...d You can also change the number of subwoofers or surround back speakers vpage 64 Set up Channel Select 3 Set up Amp Assign 8VH ui WR VHOHFW PS VVLJQ DQG WKHQ SUHVV ENTER 5 7851 VVLJQ SRZHU DPS WR 21 VWHUHR VLJQDO 5HWXUQ VVLJQ 6S VVLJQ 0RGH 21 21 21 03 66 1 8 66 872 6 783 PS VVLJQ 5 7851 XWR 6HWXS 6WDUW KDQQHO 6HOHFW 67 3 3UHSDUDWLRQ RQQHFW WKH VSHDNHUV DQG SODFH WKHP DFFRUGLQJ VQ VJG UHFRPPHQGDWL...

Страница 67: ...RIHU FKDQQHO VSHDNHU QWHU DQFHO 6XUURXQG DFN 0HDVXUH VSNUV URQW HLJKW 0HDVXUH 5 7851 8 66 872 6 783 PS VVLJQ 5 7851 XWR 6HWXS 6WDUW KDQQHO 6HOHFW 67 3 3UHSDUDWLRQ RQQHFW WKH VSHDNHUV DQG SODFH WKHP DFFRUGLQJ VQ VJG UHFRPPHQGDWLRQV LQ WKH PDQXDO 6HW WKH IROORZLQJ LWHPV I QHFHVVDU QDEOH VNLS RI PHDVXULQJ XQXVHG FKDQQHOV WR UHGXFH WLPH QWHU DQFHO 108VH ui WR VHOHFW D FKDQQHO Front Select for setting ...

Страница 68: ...tto OFF vpage99 this unit is not set to standby even if the connected device is in the standby mode When connection changes are implemented such as adding connections to HDMI devices linked operations may be initialized In this case you will need to reconfigure the settings When HDMI Control Control is set to ON it is not possible to assign an HDMI connector to TV at Input Assign vpage 82 1 6HW WKH...

Страница 69: ...H 3 3UHVV CH LEVEL 11 9 URQW URQW 5 G G 6XEZRRIHU 6XEZRRIHU 6XEZRRIHU G G 21 4 8VH ui WR VHOHFW WKH VSHDNHU The speaker that can be set switches each time one of the buttons is pressed 5 8VH o p WR DGMXVW WKH YROXPH You can directly turn OFF the subwoofer outputs during 2 channel playback in DIRECT or STEREO mode Select Subwoofer and use o p to select ON or OFF 11 9 URQW URQW 5 G G 6XEZRRIHU 2 Whe...

Страница 70: ... played track 1 3UHVV ZONE2 3 REC SELECT ZONE2 SOURCE is shown on the display 2 7XUQ SOURCE SELECT XQWLO 5 287 6285 LV GLVSOD HG The indicator illuminates ZONE2 SOURCE ZONE2 PHONO ZONE2 HD Radio RECOUT HD Radio RECOUT SIRIUS RECOUT SOURCE 3 7XUQ SOURCE SELECT WR FKRRVH WKH LQSXW VRXUFH WR EH UHFRUGHG For operating instructions refer to the respective equipment s operating instructions 4 6WDUW UHFR...

Страница 71: ...ees component is displayed 3 3UHVV o p WR VHOHFW HV RU 1R WKHQ SUHVV ENTER Yes The power of the attendees is turned off and the party mode is canceled No The party mode is canceled without turning off the power of the attendees n Participating in the party mode as an attendee When the organizer starts the party mode up to four attendees are selected automatically No operation is required When a de...

Страница 72: ...t q Select content w Select a player e Start playback r Operate Wireless LAN compatible router Media controller 1 6HOHFW WKH FRQWHQW RX ZDQW WR SOD IURP DPRQJ WKH PHGLD FRQWUROOHU 2 URP WKH PHGLD FRQWUROOHU VHOHFW WKLV XQLW IURP DPRQJ WKH SURGXFWV RQ WKH QHWZRUN Playback of the content selected in step 1 begins When selecting this unit from the media controller the name of this unit is displayed a...

Страница 73: ...g vGExample 3H t Click when you operate a small screen such as a PDA screen etc vGExample 4H 5 2SHUDWH GExample 1H Main zone control screen 21 21752 0 1 21 32 5 0 1 21 21 67 1 21 9 2 6OHHS 7LPHU 6285 3OD HU 9LGHR 1HWZRUN 7XQHU 92 80 G 1RWH 7R XVH WKH ZHE FRQWURO IXQFWLRQ VHW WKH 8 PHQX 0DQXDO 6HWXSµ 1HWZRUN 6HWXSµ 48 6 7 11 9 NET AUDIO USB L3RG RFN L3RG LUHFW 5 2 GG 7R RXU DYRULWH 7RS 0HQX u o y i...

Страница 74: ...RO Q8 Q8 Select this item to operate each zone NOTE You cannot change setup menu operations and zone name on the PDA menu screen GExample 5H Net Audio operating screen 1 7 8 2 86 0 1 21 121 95 DYRULWHV QWHUQHW 5DGLR 0HGLD 6HUYHU OLFNU 21 0 025 5 3 7 5 1 20 2 21 2 35 6 7 2 G 35 6 7 0 025 6WDUW QG WW 21 QG WW 2 3DUW 5 7 5 6 5 1DSVWHU 3DQGRUD 5KDSVRG Q9 W2 W6 W1 W0 W4 W5 W3 Q9 Click the menu items fr...

Страница 75: ...tput signal Monaural ZONE2 w q ZONE3 w q When Assign Mode is set to ZONE2 or ZONE2 3 MONO you can change the AMP ASSIGN speaker terminals for ZONE2 and ZONE3 in Amp Assign Assign Sp vpage 95 w Zone playback by audio output PRE OUT n Audio connections ZONE2 ZONE3 The audio signals of this unit s ZONE2 and ZONE3 audio output terminals are output to the ZONE2 and ZONE3 amplifiers and played on these a...

Страница 76: ...rangeH 0 41 99 When the Volume Display vpage 104 setting is Absolute At time of purchase Volume Limit vpage 103 is set to 10dB 71 Turn MASTER VOLUME after pressing ZONE2 3 REC SELECT on the main unit to adjust the sound volume Turning off the sound temporarily Press MUTE The sound is reduced to the level set at Mute Level vpage 103 in the menu To cancel either adjust the volume or press MUTE again...

Страница 77: ...H PRGH WR Z2 21 RU Z3 21 2 3UHVV QUICK SELECT DW ZKLFK WKH VHWWLQJV RX ZDQW WR FDOO RXW DUH VDYHG Naming quick select settings See Quick Select Name vpage 105 Sleep timer function This is useful when you want to sleep while listening in ZONE2 or ZONE3 1 3UHVV ZONE SELECT WR VZLWFK WKH RQH PRGH WR Z2 21 RU Z3 21 2 3UHVV SLEEP DQG GLVSOD WKH WLPH RX ZDQW WR VHW The indicator on the display lights Th...

Страница 78: ...nput connector assignment 82 Video Makes the video settings 83 Input Mode Sets the audio input mode and decode mode 84 Rename Changes the display name for this source 85 Source Level Adjusts the playback level of the audio input 85 Playback Mode Makes settings for iPod USB memory device or network source playback 85 Still Picture Makes settings for still picture playback 85 SURROUND MODE Selects a...

Страница 79: ... Options of the selected setup item GExample 2H Audyssey Auto Setup screen with illustration 8 66 872 6 783 PS VVLJQ 5 7851 XWR 6HWXS 6WDUW KDQQHO 6HOHFW 67 3 3UHSDUDWLRQ RQQHFW WKH VSHDNHUV DQG SODFH WKHP DFFRUGLQJ WR WKH UHFRPPHQGDWLRQV LQ WKH PDQXDO 6HW WKH IROORZLQJ LWHPV LI QHFHVVDU 6WDUW XWR 6HWXS QWHU DQFHO o Q2 Q3 Q1 i History icon o Operation guidance text Q0 Operation step indicators Q1 ...

Страница 80: ...7 1RQH 1RQH 1RQH 5 1RQH 5 5 1RQH 1RQH 1387 66 1 HIDXOW VVLJQ 0 LQSXW FRQQHFWRU 0 7 203 5 7851 QWHU 6HOHFW DQFHO 9 79 6 7 95 0 9 8 e Press ENTER q BD HDMI1 DVD HDMI2 e BD HDMI1 Press ENTER q Use uio p to move to the item you want to set w Press ENTER to set to the mode in which the setting can be made e 0 and 1 is displayed at the sides of item whose setting can be changed Use o p to change to the ...

Страница 81: ...SXWWLQJ FKDUDFWHUV vSDJH 0HQX PDS 2 3ODFH WKH FXUVRU DW WKH FKDUDFWHU WR EH FKDQJHG ZLWK o p DQG SUHVV WKH QXPEHU EXWWRQ 0 9 XQWLO WKH GHVLUHG FKDUDFWHU LV GLVSOD HG The types of characters that can be input are as shown below 1 _ M N O m n o 6 A B C a b c 2 P Q R S p q r s 7 D E F d e f 3 T U V t u v 8 G H I g h i 4 W X Y Z w x y z 9 J K L j k l 5 0 Space z When you press SHIFT while you type in ...

Страница 82: ...K X L Y Õ N M Z C F S r q Q0 w e t o y u i q Character input section w Cursor e Keyboard section r Uppercase and lowercase switch key t Space key y Cursor keys u Insert key i Delete key o OK key Q0 Guide for operation buttons 1 LVSOD WKH VFUHHQ IRU LQSXWWLQJ FKDUDFWHUV vSDJH 0HQX PDS 2 3UHVV SEARCH ZKLOH D QRUPDO VFUHHQ LV GLVSOD HG A keyboard screen is displayed 3 6HOHFW D FKDUDFWHU WR EH FKDQJHG...

Страница 83: ... with the SOURCE SELECT procedure 872 35 6 7 6WDUW 35 6 7 6 3 OO 0 0 0 0 0 0 0 0 0 0 3 5 17 2 RFN 6HWWLQJ GLW RFN RGH 35 6 7 1 1 0 0 0 0 0 0 0 0 0 0 0 0 6DWHOOLWH 7HUUHVWULDO 17 11 0 1 0 0 1RQH 0 0 0 1RQH 2 237 2 237 1RQH 1RQH 5 1RQH 5 5 1RQH 1387 66 1 HIDXOW 0 7 203 9 79 6 7 95 0 HIDXOW 5 1 0 9 2 9LGHR 6HOHFW 9LGHR 0RGH 9LGHR RQYHUW L S 6FDOHU 5HVROXWLRQ DQDORJ 3URJUHVVLYH 0RGH 6285 9 6 7 95 9 8 ...

Страница 84: ... not reset to the defaults Remote control operation buttons Move the cursor Up Down Left Right Confirm the setting Return to previous menu Auto Preset Use the auto preset function to program radio stations Setting items Setting details Start Start the auto preset process HD Radio If an FM station cannot be preset automatically select the desired station by tuning it in manually then preset it manua...

Страница 85: ...ctor to the selected input source At time of purchase the settings of the different input sources are as shown below Input source BD DVD TV SAT CBL DVR GAME V AUX DOCK Default setting HDMI 1 HDMI 2 None HDMI 3 HDMI 4 HDMI 5 HDMI 7 HDMI 6 An input source to which an HDMI input connector cannot be assigned is displayed as To play the video signal assigned at HDMI combined with the audio signal assig...

Страница 86: ...F Do not use i p scaler function Analog HDMI and HDMI can be set for input sources for which an HDMI input connector is assigned Which items can be set depend on the input source assigned to each input connector This function is not effective when the input signal is x v Color 3D sYCC 601 color Adobe RGB color Adobe YCC 601 color or computer resolution Setting items Setting details COMP Component ...

Страница 87: ...een assigned SOURCE SELECT Input Mode Audio Default settings are underlined The input modes available for selection may vary depending on the input source Setting items Setting details Input Mode Set the audio input modes for the different input sources It is normally recommended to set the audio input mode to Auto Auto Automatically detect input signal and perform playback HDMI Play only signals ...

Страница 88: ...a single image when playing back images in the slide show NET USB 5s 60s Remote control operation buttons Move the cursor Up Down Left Right Confirm the setting Return to previous menu Rename Change the display name of the selected input source Setting items Setting details Rename Change the display name of the selected input source Up to eight characters can be input For character input see page 7...

Страница 89: ...ers It may not be possible to set this item depending on the input signal vpage 126 Surround modes and parameters NOTE You cannot set the surround parameters in the PURE DIRECT mode Setting items Setting details Mode Set the play modes for the different surround modes n In the PLgx or PLg mode Cinema Surround sound mode optimized for movie sources Music Surround sound mode optimized for music sour...

Страница 90: ... Sets the method of generating of the surround back channel n For 2 channel sources ON The surround back channel is used OFF No signal is played from the surround back channels n For multi channel sources Set the decoding method for the surround back channel DSCRT ON Play the surround back signals included in the 7 1 channel source MTRX ON Generate and play the surround back channel signals from t...

Страница 91: ...bwoofer level when using EXT IN input ON Set OFF Do not set Usually use in this mode Set this to ON if the subwoofer channel level seems too high when playing audio signal Subwoofer Turn subwoofer output on and off ON The subwoofer is used OFF The subwoofer is not used NOTE This can be set when the surround mode is DIRECT vpage 52 and the Subwoofer Mode vpage 96 is LFE Main Effect Switch effect si...

Страница 92: ... the number of speakers measured only illuminates Pressing MULTEQ makes this setting NOTE MultEQ XT 32 and Manual cannot be selected when EQ Customize is set to Not Used vpage 100 When using headphones MultEQ XT 32 is automatically set to OFF MultEQ XT 32 Dynamic EQ and Dynamic Volume settings are stored for each input source Setting items Setting details Dynamic EQ Solve the problem of deteriorat...

Страница 93: ...ht expansion ON Wide Turn on A DSX processing for wide expansion OFF Do not set Audyssey DSX This can also be set by pressing A DSX on the remote control unit or press AUDYSSEY DSX on the main unit The indicator illuminates on the display ON Height Wide ON Height OFF ON Wide Stage Width Adjust sound stage width when using front wide speakers 10 10 0 Stage Height Adjust sound stage height when usin...

Страница 94: ...he frequency characteristic ON Enables the Dolby Volume function OFF Disables the Dolby Volume function Store Dolby Volume for each source When Dolby Volume is set to ON you cannot set Tone D COMP DRC vpage 86 88 When Dolby Volume is set to ON MultEQ XT 32 vpage 89 is automatically set to OFF NOTE If the playback level of a source you are listening to is high the data compression volume will becom...

Страница 95: ...This cannot be set when the surround mode is set to DIRECT or PURE DIRECT OFF Mode 1 RESTORER 64 Mode 2 RESTORER 96 Mode 3 RESTORER HQ n Audio Delay Default settings are underlined While viewing video manually adjust the time to delay audio output Setting details 0ms 200ms This item can be set within the range of 0 to 100 ms when Auto Lip Sync is set to ON and when a TV compatible with Auto Lip Sy...

Страница 96: ...QDPH 9ROXPH LVSOD 9ROXPH LPLW 3RZHU 2Q HYHO 0XWH HYHO OPTION OPTION Speaker Setup vpage 93 Zone Setup vpage 103 Network Setup vpage 101 Option Setup vpage 104 HDMI Setup vpage 98 Audio Setup vpage 99 1 8 QJOLVK UDQoDLV Language vpage 106 Remote control operation buttons Move the cursor Up Down Left Right Confirm the setting Return to previous menu Speaker Setup Default settings are underlined Perfo...

Страница 97: ...1 NORMAL ZONE2 Z2 3 MONO Bi AMP 2CH Front B 2CH Bi AMP ZONE2 3 11CH PRE AMP Assign Sp settings Select the speaker terminal from which to output the signals assigned to the power amplifier vpage 95 2 Ext Amp settings Select a channel that uses the PRE OUT connector vpage 95 3 Assign Sp settings Set whether or not to use the speaker terminals for multizone vpage 95 4 S BACK F HEIGHT F WIDE Height Fro...

Страница 98: ...in power amplifier operation of this unit is stopped and interference to the preamplifier from the power amplifier is reduced MANUAL SETUP Remote control operation buttons Move the cursor Up Down Left Right Confirm the setting Return to previous menu Setting items Setting details Amp Assign Continued n When you set Assign Mode to ZONE2 ZONE2 3 MONO Bi AMP 2CH or Front B perform the following setting 2...

Страница 99: ...ayback source In this case make Surround Parameters Surround Back setting other than OFF vpage 87 NOTE Surround Back cannot be set when Amp Assign Assign Mode vpage 95 is set to ZONE2 3 or when Assign Sp is set to S BACK Setting items Setting details Speaker Config Continued Front Height Set the presence and size of the front height speakers Large Use a large speaker that can adequately play back l...

Страница 100: ...rr Back L Surr Back R 10 0 ft 3 0 m Set the difference in the distance between the speakers to less than 20 ft 6 0 m NOTE Speakers set to None in Speaker Config vpage 95 are not displayed Setting items Setting details Channel Level Set the volume of the test tone to be the same when it is output from each speaker Test Tone Output test tone Front L Front Height L Center Front Height R Front R Front ...

Страница 101: ...nt B vpage 95 2CH DIRECT STEREO The front speakers used in the direct stereo and pure direct play modes 2 channel are set in advance A Front speaker A is used B Front speaker B is used A B Both front speakers A and B are used MULTI CH The front speakers used in modes other than the direct stereo and pure direct play modes 2 channel are set in advance A Front speaker A is used B Front speaker B is ...

Страница 102: ...al Control Monitor can be set when HDMI Control Control is set to ON ARC function works only with the terminal selected by Control Monitor Setting items Setting details HDMI Control Continued Power Off Control Links the power standby of this unit to external equipment All If power to a connected TV is turned off independently of the input source power to this unit is automatically set to standby V...

Страница 103: ...vel of each channel Auto Surround Mode Make setting for memorizing surround mode setting for each input signal type ON Memorize settings Automatically play with the last used surround mode OFF Do not memorize settings Surround mode does not change according to input signal The auto surround mode function lets you store in the memory the surround mode last used for playing the four types of input s...

Страница 104: ...eway router input its IP address Primary DNS Secondary DNS If there is only one DNS address indicated in the documentation supplied by your provider input it at Primary DNS If there are two or more DNS addresses input the first one at Secondary DNS Setting items Setting details Network Connecting Continued r Use i to select Exit and press ENTER Setup is complete When connecting to the network via a...

Страница 105: ...o page 68 Party mode function for more information on the party mode function Remote control operation buttons Move the cursor Up Down Left Right Confirm the setting Return to previous menu MANUAL SETUP Setting items Setting details Other Continued Party Start Level Make settings for volume level when the party mode is started Last The same volume as set before the party mode was started dB 0 Alway...

Страница 106: ...the signal output from multi zone Stereo Select stereo output Mono Select mono output When Amp Assign Assign Mode vpage 95 is set to Z2 3 MONO the Channel setting is automatically set to Mono Setting items Setting details Volume Level Set the volume output level Variable Volume adjustment is enabled by main unit and remote control unit 40dB 41 Fix volume at 40 dB Set when adjusting volume by exter...

Страница 107: ...HD Radio screen display if no operation is performed for an approximately 3 minute continuous period When you press uio p the screensaver is cancelled and the screen before that screen saver started is displayed OFF Screensaver is not activated Setting items Setting details GUI Continued Wall Paper Set wallpaper to display in the background when playback is stopped etc Picture Set the background t...

Страница 108: ... when the input source set to ON with When setting for input source is selected n When setting for HDMI monitor Activate trigger out when the HDMI monitor set to ON is selected Activate trigger out when the HDMI monitor set to ON is selected Active when the MAIN ZONE set to ON with When setting for zone is selected and when the input source set to ON with When setting for input source is selected ...

Страница 109: ...screen is needed when carrying out the procedure The ID number can also be displayed by pressing and holding o and RETURN for at least 3 seconds Notes concerning use of Firmware Update and Add New Feature In order to use these functions you must have the correct system requirements and settings for a broadband Internet connection vpage 26 Do not turn off the power until updating or upgrating is co...

Страница 110: ...when inputting signals including a surround back channel MATRIX is displayed with Dolby Digital EX and DTS ES Matrix signals DISCRETE with DTS ES Discrete signals Dialogue normalization function This function is automatically activated when playing Dolby Digital sources It automatically corrects the standard signal level for individual program sources The correction value can be checked using the ...

Страница 111: ...button the remote control unit of this unit can control another devices z2 This operation mode enables you to operate iPod USB Control dock for iPod Network function SIRIUS and HD Radio receiver When SOURCE SELECT is pressed the AMP operation mode starts automatically NOTE If the mode of the remote control unit is set to other than AMP operation mode press AMP to switch the remote control unit to ...

Страница 112: ... UHJLVWHU LQ WKH UHPRWH FRQWUROOHU 9ROXPH RQWURO 6RXUFH HOHWH 8 5HPRWH 3UHVHW RGHV 4XLFN 6HOHFW 1DPH RQH 5HQDPH OPTION OPTION 5 3UHVVLQJ ui VHOHFW WKH GHYLFH FDWHJRU IRU SUHVHW UHJLVWUDWLRQ 7KHQ SUHVV ENTER RU p 5 027 35 6 7 2 6 6HOHFW WKH GHYLFH FDWHJRU OX UD 5HFRUGHU 395 9 9 5HFRUGHU 9 379 67 395 0 1 2 3 6 7 OPTION For TV TV DVD or TV VCR categories only the preset code for TV can be registered ...

Страница 113: ...t correct Press POWER ON once then perform the operations from step 9 again 132SHUDWH WKH GHYLFH EHLQJ XVHG WR FKHFN WKH RSHUDWLRQ If the device is operating press QUICK SELECT 1 Go to step 14 If the device is not operating press QUICK SELECT 2 Go to step 15 147KH VFUHHQ VKRZQ EHORZ LV GLVSOD HG DQG UHJLVWUDWLRQ RI WKH SUHVHW FRGH LV FRPSOHWHG 3UHVV 48 LI GHYLFH ZRUNV 48 LI QRW 48 5HWXUQ 5 027 35 ...

Страница 114: ... TV input Default SONY zThis may power some devices on standby n Digital video recorder PVR video cassette recorder VCR operation Operation buttons Function ZONE DEVICE ON Power onz ZONE DEVICE OFF Power standbyz CH Switch channels up down MENU Menu uio p Cursor operation ENTER Enter SETUP Setup RETURN Return 6 7 Manual search fast reverse fast forward 1 Playback 8 9 Auto search cue 3 Pause 2 Stop...

Страница 115: ...our times on the remote control unit If this happens perform step 4 again 6 7R VWRUH DQRWKHU EXWWRQ UHSHDW VWHSV DQG 7 KHQ RX KDYH QLVKHG VWRULQJ WKH UHPRWH FRQWURO FRGHV SUHVV POWER ON SET flashes four times on the remote control unit and the normal operation mode is restored There are some remote control units that cannot be programmed or even if they can be programmed they may not operate correc...

Страница 116: ...R GLVSOD 0 52 RQ WKH UHPRWH FRQWURO XQLW DQG SUHVV ENTER 3 KHQ 0 1R DSSHDUV RQ WKH UHPRWH FRQWURO XQLW SUHVV WKH QUICK SELECT EXWWRQ WKDW RX ZDQW WR VWRUH Button Macro number QUICK SELECT 1 MACRO 1 QUICK SELECT 2 MACRO 2 QUICK SELECT 3 MACRO 3 4 3UHVV WKH EXWWRQV WR EH VWRUHG RQH E RQH The step number for the storing procedure and mode are alternately displayed on the remote control unit You canno...

Страница 117: ...he factory setting is M234 1 3UHVV DQG KROG POWER ON DQG ZONE DEVICE ON IRU DW OHDVW VHFRQGV SETUP flashes twice on the remote control unit 2 8VH ui WR GLVSOD 21 RQ WKH UHPRWH FRQWURO XQLW DQG SUHVV ENTER 3 8VH ui WR VHW WKH RQH WR EH XVHG DQG SUHVV ENTER SET flashes four times on the remote control unit and the normal operation mode is restored Remote control unit display Zone to be used M MAIN ZON...

Страница 118: ...vorites Setting the display time length of the remote control unit display Use the following procedure to set the length of time for which to display data such as zone and mode on the display panel of the remote control unit 1 3UHVV DQG KROG POWER ON DQG ZONE DEVICE ON IRU DW OHDVW VHFRQGV SETUP flashes twice on the remote control unit 2 8VH ui WR GLVSOD RQ WKH UHPRWH FRQWURO XQLW DQG SUHVV ENTER 3...

Страница 119: ...3 The input source switches to NET USB and the files on the USB memory device are played z4 The input source switches to NET USB and the files in Music on the media server are played z5 The input source switches to NET USB and the files in Favorites are played Operating the sub remote control unit Operating AV equipment Use this procedure to select the zone to be operated by the sub remote control un...

Страница 120: ...emory registration uio p Category search Cursor operation ENTER To Parental Lock password check screen press and hold TUNING df Channel selection USB z3 ALL MUSICz1 Media server only z4 FAVORITESz1 z5 z1 Whether Music or Favorites is selected depends on the Direct Play setting vpage 85 z2 Affects the currently selected zone z3 The input source switches to NET USB and the files on the USB memory dev...

Страница 121: ...s USB r To set to ZONE4 Press ALL MUSIC FAVORITES 3 8VH WKH WLS RI D SHQ WR SUHVV ADVANCED SETUP The multi zone indicator turns off n To cancel 1 8VH WKH WLS RI D SHQ WR SUHVV ADVANCED SETUP The currently selected multi zone indicator illuminates ADVANCED SETUP 2 3UHVV ZONE SELECT All the multi zone indicator illuminates 3 8VH WKH WLS RI D SHQ WR SUHVV ADVANCED SETUP The multi zone indicator turns...

Страница 122: ...sion Simple version Advanced version Information F Part names and functions vpage 120 F Other information vpage 125 F Troubleshooting vpage 135 F Specifications vpage 139 F Index vpage 140 Information Here we list various information related to this unit Please refer to this information as needed ...

Страница 123: ...ton 34 36 Q3ZONE2 3 REC SELECT button 67 73 Q4iPod PLAY button 33 Part names and functions GWith the door openH W3 Q5 Q6 Q7 Q8 Q9 W2 W1 W0 W4 W8 E3 W6 W7 E1 E2 W9 E0 W5 Q5Headphones jack When the headphones are plugged into this jack audio will no longer be output from the connected speakers or from the PRE OUT connectors NOTE To prevent hearing loss do not raise the volume level excessively when ...

Страница 124: ...is light when receiving stereo broadcasts TUNED Lights when the broadcast is properly tuned in AUTO This light when in the auto tuning mode Q1PARTY indicators Theselightduringpartymode vpage68 Party mode function ORGANIZER This lights to indicate that party mode has started as Organizer ATTENDEE This lights to indicate that party mode has started as Attendee Q2Audyssey indicators Lighting is as fo...

Страница 125: ...nals 5 6 56 62 uAC inlet AC IN 6 iEXT IN connectors 25 oDigital audio connectors 18 20 Q0HDMI connectors 6 17 Q1DENON LINK connector 25 Q2COMPONENT VIDEO connectors 18 20 Q3ETHERNET connector 26 Q4USB iPod port 22 Q5DOCK CONTROL jack 21 Q6REMOTE CONTROL jacks 27 Q7SIRIUS connector 23 Q8S VIDEO VIDEO connectors 18 21 Q9TRIGGER OUT jacks 27 NOTE Do not touch the inner pins of the connectors on the r...

Страница 126: ...tton 2 Tuner system buttons 33 35 FM AM band switching button BAND Tuning mode button MODE Tuning up Tuning down buttons TUNING df Q2Audyssey buttons 89 90 MULTEQ XT 32 button MULTEQ Dynamic EQ DYNAMIC VOLUME button DYN EQ VOL Audyssey DSX button A DSX Q3Surround mode buttons 50 52 STANDARD button Direct Stereo button D ST DSP simulation button SIMULATION Q4SHIFT button 34 36 39 78 Q5TV operation ...

Страница 127: ...rks in the battery compartment R6 AA RC 1145 RC 1148 R03 AAA e Put the rear cover back on Sub remote control unit RC 1148 q t r y i o Q0 u e w Q6 Q5 Q8 W0 W1 W2 W3 Q9 Q7 Q2 Q3 Q4 Q1 qZone indicators 116 wQUICK SELECT buttons 67 74 eInput source select buttons 28 116 117 rSHIFT button 34 36 39 78 117 tChannel buttons CH 34 36 39 109 117 yMENU button 80 116 118 uCursor buttons uio p 77 80 116 117 iS...

Страница 128: ...ered trademarks of Microsoft Corporation in the United States and or other countries SIRIUS XM and all related marks and logos are trademarks of Sirius XM Radio Inc and its subsidiaries All rights reserved Service not available in Alaska and Hawaii HDRadio TechnologyManufactured Under License From iBiquity Digital Corp U S and Foreign Patents HD Radio and the HD Radio logo are proprietary trademar...

Страница 129: ... S S DTS Express S D D D Dz4 D Sz13 S S MULTI CH STEREO S D D D Dz5 Dz6 D S S SUPER STADIUM S D D D Dz5 Dz6 D S S S ROCK ARENA S D D D Dz5 Dz6 D S S S JAZZ CLUB S D D D Dz5 Dz6 D S S S CLASSIC CONCERT S D D D Dz5 Dz6 D S S S MONO MOVIE S D D D Dz5 Dz6 D S S S VIDEO GAME S D D D Dz5 Dz6 D S S S MATRIX S D D D Dz5 Dz6 D S S S S VIRTUAL S Dz9 S S S z1 During playback in PURE DIRECT mode the surround ...

Страница 130: ...LOGIC gx A DSX S S S S DOLBY PRO LOGIC g A DSX S S S S DOLBY PRO LOGIC A DSX S DTS NEO 6 S S DTS NEO 6 A DSX S S Audyssey DSX S S DOLBY DIGITAL S S S DOLBY DIGITAL Plus S S S DOLBY TrueHD S S S DTS SURROUND S S S DTS 96 24 S S S DTS HD S S S DTS Express S S S MULTI CH STEREO SUPER STADIUM S S ROCK ARENA S S S JAZZ CLUB S S S CLASSIC CONCERT S S S MONO MOVIE S S S VIDEO GAME S S S MATRIX S VIRTUAL ...

Страница 131: ... 96 24 S S S S S S S S DTS HD S S S S S S S S DTS Express S S S S S S S S MULTI CH STEREO S S S S S S S S SUPER STADIUM Dz23 S S S S S S S ROCK ARENA Dz24 S S S S S S S JAZZ CLUB S S S S S S S S CLASSIC CONCERT S S S S S S S S MONO MOVIE S S S S S S S S VIDEO GAME S S S S S S S S MATRIX S S S S S S S S VIRTUAL S S S S S S S S z1 During playback in PURE DIRECT mode the surround parameters are the s...

Страница 132: ...4 S S S S S S S DTS HD PLgx MUSIC z1z4 S S S S S S S DTS HD PLgz z3 S S S S S S S DTS EXPRESS z4 F DTS HD NEO 6 z1z4 S S S S S S DTS NEO 6 CINEMA z5 S S S S S DTS NEO 6 MUSIC z5 S S S S S DTS NEO 6 CINEMA A DSX z6 S S S S S DTS NEO 6 MUSIC A DSX z6 S S S S S Audyssey DSX z6 S S S S S S S DOLBY SURROUND DOLBY TrueHD z4 F DOLBY DIGITAL z4 F DOLBY DIGITAL EX z1z4 S S S DOLBY D HD EX z1z4 S S DOLBY DI...

Страница 133: ... DSD DIRECT S S PURE DIRECT PURE DIRECT S S S S S S S S S S S S S S S S S S S DSP SIMULATION MULTI CH STEREO S S S S S S S S S S S S S S S S S S S WIDE SCREEN S S S S S S S S S S S S S S S S S S S SUPER STADIUM S S S S S S S S S S S S S S S S S S S ROCK ARENA S S S S S S S S S S S S S S S S S S S JAZZ CLUB S S S S S S S S S S S S S S S S S S S CLASSIC CONCERT S S S S S S S S S S S S S S S S S S S ...

Страница 134: ...DEO z2 ON S S S S OFF A A A S A A VIDEO Only the menu is displayed OFF A A S A S VIDEO OFF A A S S S VIDEO OFF A S A A COMPONENT A OFF A S A S VIDEO OFF A S S A S VIDEO OFF A S S S S VIDEO OFF S A A A HDMI A A OFF S A A S VIDEO OFF S A S A S VIDEO OFF S A S S S VIDEO OFF S S A A COMPONENT A OFF S S A S VIDEO OFF S S S A S VIDEO OFF S S S S S VIDEO S Video signal input present A No video signal inp...

Страница 135: ...s Adding surround channels behind the listener has a very small impact compared to the increase in envelopment and soundstage width that the front wide channels will provide After side refl ections the next most important acoustical and perceptual cues come from refl ections above the front stage DSX provides a pair of Height channels LH and RH at a 45 azimuth angle and elevated to a 45 angle in the...

Страница 136: ...realistic sound effect as if you are in a movie theater can be obtained DTS 96 24 DTS 96 24 is a digital audio format enabling high sound quality playback in 5 1 channels with a sampling frequency of 96 kHz and 24 bit quantization on DVD Video DTS Digital Surround DTS Digital Surround is the standard digital surround format of DTS Inc compatible with a sampling frequency of 44 1 or 48 kHz and up t...

Страница 137: ...uthorized subsidiary W Windows Media DRM This is a copyright protection technology developed by Microsoft Content providers are using the digital rights management technology for Windows Media contained in this device WM DRM to protect the integrity of their content Secure Content so that their intellectual property including copyright in such content is not misappropriated This device uses WM DRM...

Страница 138: ...ot output Check the connections for all devices Check the speaker connections and configurations Check whether the audio device power is turned on Adjust the master volume Cancel the mute mode Select a suitable input source Select a suitable input mode Disconnect the headphones No sound is output from the speakers or the PRE OUT connectors when headphones are connected 6 17 26 5 6 54 62 13 28 13 29...

Страница 139: ... while SiriusConnect Home Tuner is connected Reposition your SiriusConnect Home Tuner and Home Dock antenna Call SIRIUS z is displayed Channels are not subscribed to If you subscribe to the channel you can receive the channel SUBSCRIPTION UPDATED is displayed While updating contract information Enter Lock Code is displayed Selected channels are locked Please insert pass word 4 digits into z After ...

Страница 140: ...ck the computer s or router s firewall settings Radio station is not currently broadcasting Choose a radio station that is currently broadcasting IP address is wrong Check the set s IP address 26 37 38 38 103 Symptom Cause Solution Page Files stored on a computer cannot be played Files are stored in a non compatible format Record in a compatible format You are attempting to play a file that is copyr...

Страница 141: ...been properly entered Re enter the Password Password is not displayed http www pandora com denon 44 GRemote Control UnitH Symptom Cause Solution Page The set cannot be operated with the remote control unit Batteries are worn out Replace with new batteries Operate the remote control unit within a distance of about 23 ft 7 m from this unit and at an angle of within 30 Remove any obstacle between thi...

Страница 142: ...put Rated output 150 mV Distortion factor 0 03 1 kHz 3 V n Video section Standard video connectors Input output level and impedance 1 Vp p 75 Ω Frequency response 5 Hz 10 MHz 0 3 dB when Video Convert set to OFF Color component video connector Input output level and impedance Y brightness signal 1 Vp p 75 Ω PB CB signal 0 7 Vp p 75 Ω PR CR signal 0 7 Vp p 75 Ω Frequency response 5 Hz 60 MHz 0 3 dB...

Страница 143: ...HDMI 16 HD Radio reception 23 Home network LAN 26 iPod USB 22 Multi channel 25 Multi channel 2 channel 59 Power cord 6 PRE AMP mode 62 Record player 24 Satellite tuner 19 Set top box 17 19 SIRIUS 23 Speaker 5 56 TV 6 17 18 USB memory device 22 Content Type 16 Contrast 92 Crossover Freq 98 Curve Copy 91 vD D Comp 86 Decode Mode 84 Deep Color 16 132 Delay Time 87 DENON LINK 132 DENON LINK cable 25 D...

Страница 144: ...ode 84 Protection circuit 134 vQ Quick select 67 74 Quick Select Name 105 vR Random 85 Rch Level 103 Rear panel 122 REC OUT mode 67 Reference Level Offset 89 Remote control setting 8 63 Remote control unit 108 123 Inserting the batteries 124 Operating AV equipment 108 116 Operating components 111 Registering Preset Codes 108 Remote ID 105 114 118 Remote mode 30 32 Remote Preset Codes 105 Rename 85...

Страница 145: ...D M Holdings Inc Printed in Japan 5411 10573 005D www denon com ...

Страница 146: ...0RGH XQFWLRQ 3DUW 6WDUW HYHO RQH 0DQDJHPHQW 8SGDWH 1RWLILFDWLRQ KHFN WKH VWDWXV RI RWKHU HQRQ SURGXFWV RQ RXU QHWZRUN DQG EURZVH WKH QHWZRUN PHQX 2 3UHVV ui WR VHOHFW WKH GHYLFH DQG WKHQ SUHVV ENTER RU p 21 0 1 0 17 121 95 vpage 93 Change MANUAL SETUP The Network Setup Other menu was changed GNETWORK SETUPH 1 7 25 6 783 1HWZRUN RQQHFWLQJ 2WKHU 5KDSVRG FFRXQW 1DSVWHU FFRXQW 1HWZRUN QIR GOTHERH 27 5...

Страница 147: ......

Страница 148: ......

Страница 149: ...s coverage EXCLUSIVE ENTERTAINMENT TALK Howard Stern The Foxxhole produced by Jamie Fox Maxim Radio Martha Stewart Cosmo Radio and more WORLD CLASS NEWS Fox CNN NPR BBC plus local traffic weather FAMILY KIDS It s G rated fun for everyone Wit 1Radio Disney Kids Stuff and Laugh Break Com dy plus SIRIUS allows you to block out channels ith mature programming at the time of acti tion or through channe...

Страница 150: ......

Страница 151: ...ordan Street Alexandria NSW 2015 PO Box 150 Mascot NSW 1460 Australia Tel 1300134400 Fax 61 295780159 Digital Professional Audio Vertriebsges m b H Seebockgasse 59 A 1160 Wien Tel 01 480 1006 Fax 01 485 7679 Yusif Bin Yysif Fakhro W W L POBox 214 Manama Kingdom of Bahrain Tel 97317408111 Fax 97317406080 Neotechnostyle MOSKOVSKAJA STR 20 ROOM 1 220007 Minsk Tel 375 17 2286986 Transtel Sabima P V BA...

Страница 152: ......

Страница 153: ......

Страница 154: ...same passion for audio as we do J Il tT 1001il 8c IlH T l J tfl t t t J1Jft l 90 l J tflJil t ll lfRt t f t ttlfillfl J 9 lfllfRf 1f l ft r t ijittl l r J 9 0 1001il 3G T t l r iliO IfR I f J l t l 90 t t t ji Il IfR ffJIIl t t 9J l Etal J tf 90 tf Jfl1001il 1C 31l r t T t 0 1 tlM fit 1J g tjFr nl l 1 90 AV Surround Receiver Model name Serial number AVR A100 Masao Kimura General Manager Product De...

Страница 155: ...s listed below DENON REGIONAL SUPER SERVICE CENTERS Repair only No parts orders please PYRAMID AUDIO 305 E Braker Lane Austin TX 78753 2746 512 458 8292 512 453 4542 Fax INNER SOUND 1416 S E Morrison Street Portland OR 97214 2646 503 238 1955 503 238 1787 Fax ELECTRONIC EXPRESS Inc 1809 E Fabyan Parkway West Chicago IL 60185 630 208 4600 630 208 4601 Fax UNITED RADIO SERVICE 5717 Enterprise Parkwa...

Страница 156: ...option replace with new used or equivalent model such defective product without charge for parts or labor t How to Obtain Warranty Performance y If your unit ever needs service it may be taken or shipped to any authorized DENON service station or DENON ELECTRONICS if you are uncertain as to whether a service station is DENON authorized please visit our website at http www usa denon comlServiceCent...

Страница 157: ...harge for pans or labor How to Obtain Warranty Performance If your unit ever needs service it may be taken or shipped to any authorized DENON service station or D M CANADA INC For an authorized DENON service station near you please check our website http www ca denon comlServiceCenterLocator asp or contact D M CANADA INC as listed below In all other cases the following procedures apply whenever yo...

Страница 158: ...eparation il peut etre apport6 ou envoye atout atelier de service autorise DENON ou directement chez D M CANADA INC Pour trouver I atelier autorise Ie plus pres priere de verifier sur Ie site Internet de DENON au http www ca denon com ServiceCenterLocator asp t ou bien contactez D M Canada Inc aux coordonnes indiquees ci bas Dans tous les autres cas les procedures suivantes s appliquent si votre a...

Отзывы: