background image

67

Operation and Installation Manual for SOL10.0-1TR3-E4 and SOL11.0-1TR3-E4

11. Saving and loading data and settings

EN

11.4  Updating fi rmware

The fi rmware can be updated via the USB interface.

The fi rmware update is performed in the solar power inverter in two 

steps:


Manual loading of data from USB drive


Automatic updating of solar power inverter‘s individual cont-

rollers

It is possible to load the data under AC or DC voltage. The data can 

also be loaded at night with no DC voltage.
The solar power inverter‘s individual controllers can, however, only 

be updated under DC voltage. The DC voltage must be applied for 

10 minutes uninterrupted so that the fi rmware update is automati-

cally performed. 
The following instructions describe loading the fi rmware data from a 

USB drive to the solar power inverter. The fi rmware update is then 

automatic.

nOTE

The fi le containing the fi rmware data must have 

the name "Image.hex" and must be located in the 

main directory of the USB stick.
Rename the fi le correctly if necessary! This 

requires a computer!

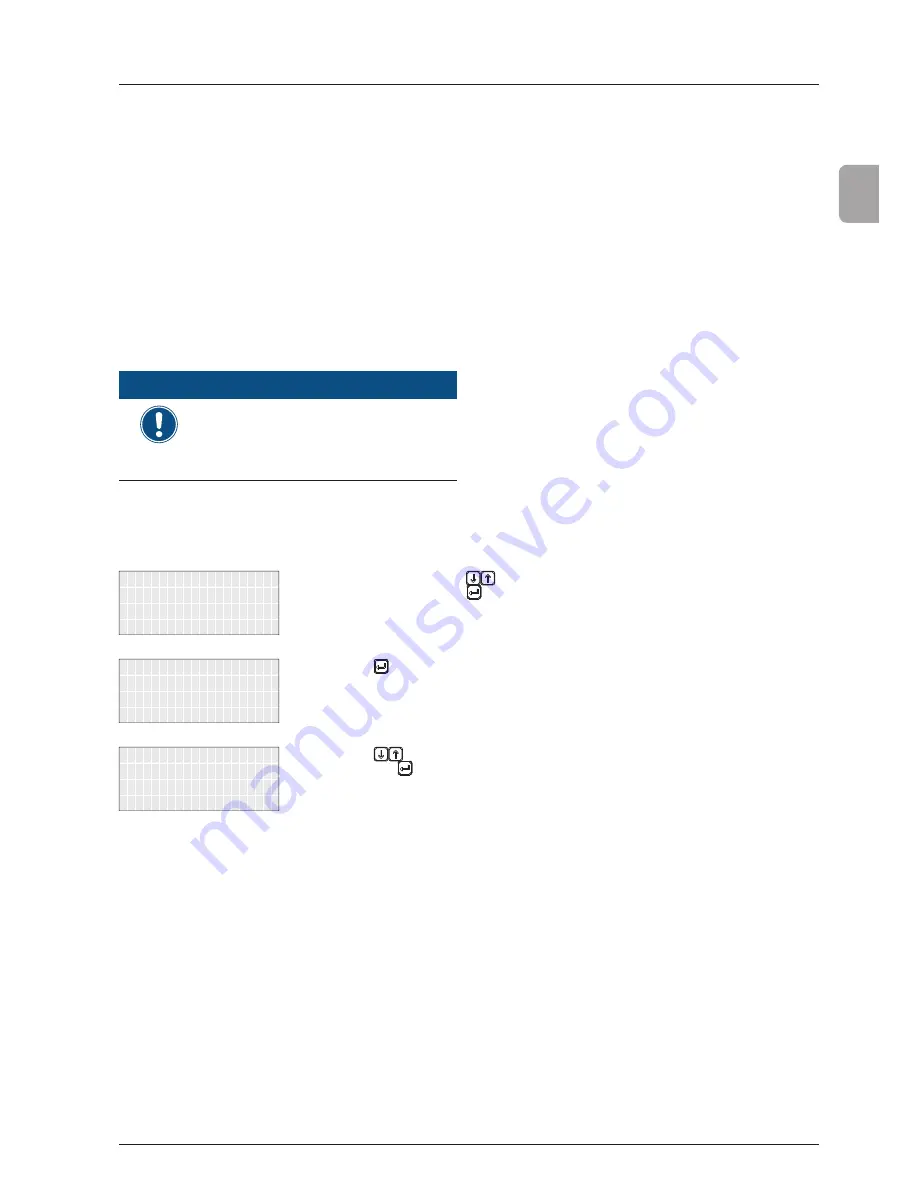
1.  Enable the USB interface (see 

„11.3 Enabling/disabling 

the USB interface“, p. 66

).

USB features

Options

Install settings

-------------------

Production info

     SOLIVIA ##

2.  In the main menu, press the 

 buttons to select 

USB 

features

 and then press the   button.


→ A note on IP65 protection is then displayed.


protection.

will lose the IP65

Without cover, you 

3.  Press the   button to confi rm.


→ The 

300 USB features

 menu is then displayed.

Save swap data

Firmware update

-------------------

300   USB features

4.  Press the 

 buttons to select 

Firmware Update

 and 

then press the   button.


→ The data is then loaded from the USB drive to the 

solar power inverter.
Once DC voltage has been applied for at least 10 

minutes, the fi rmware is updated.

nOTE

: If the message 

No fi les 

found

 is displayed, make sure the 

fi les are in the main directory of the 

USB drive.

nOTE

: If the message 

Pendrive 

error

 is displayed, make sure the 

USB drive is properly inserted.

5.  Disable the USB interface (see 

„11.3 Enabling/disabling 

the USB interface“, p. 66

).

Содержание SOL10.0-1TR3-E4

Страница 1: ...Operation and Installation Manual for SOL10 0 1TR3 E4 SOL11 0 1TR3 E4...

Страница 2: ...bH All rights reserved This manual is included with our solar power inverter and is intended for use by the installer and end user The technical instructions and illustrations in this manual are to be...

Страница 3: ...Navigating the Menu 13 5 4 8 Selecting a Submenu 13 5 4 9 Exiting a Menu 13 5 4 10 Setting Values 14 5 5 Electrical connections 16 5 5 1 Overview 16 5 5 2 DC connections and DC isolating switch 17 5...

Страница 4: ...for VDE AR N 4105 grids 35 8 6 Commissioning for grids as per BDEW 38 8 7 Commissioning by loading the settings from another solar power inverter 41 8 8 Commissioning after replacing a solar power inv...

Страница 5: ...2 1 2 Messages on display 74 12 2 Analyzing Failures 75 12 2 1 Procedure for External Events 75 12 2 2 Procedure for Internal Events 76 12 3 Overview of Failure Messages Troubleshooting 76 12 4 Loggin...

Страница 6: ...cate these hazards DAnGER Indicates a hazardous situation An accident will result in death or serious injury WARnInG Indicates a hazardous situation An accident can lead to death or severe physical in...

Страница 7: ...the local power grid for converting the direct current in the PV system to alter nating current and feeding it into the grid Use within the specified power range see 15 Technical data p 83 and under...

Страница 8: ...s sioning may only be performed by an electrician using the in stallation and commissioning instructions found in this manual The solar power inverter must be disconnected from power and the PV module...

Страница 9: ...cause injury if not handled properly The solar power inverter must be lifted and carried by at least two people b e c d f Check the scope of delivery for completeness Mounting plate a Operation and i...

Страница 10: ...Connections Fig 5 1 Solar Power Inverter Components and Connections no Component Connection Description Status LEDs See Chapter 5 3 Status LEDs p 12 Display and Buttons See Chapter 5 4 Display and Bu...

Страница 11: ...andards and settings see manual IP class IP65 5min Safety class 1 Ambient temp 25 C 70 C derating 55 C Fig 5 3 SOL11 0 1TR3 E4 type plate Information on the Type Plate Meaning of the Information 5 min...

Страница 12: ...ach The first row contains the name and number of the currently dis played menu The second to fourth rows show the menu elements A small arrow in the third row shows the currently selected menu item 5...

Страница 13: ...d 5 4 6 Button combinations The table lists special button combinations for the display buttons Buttons Action ESC Pressing the ESC and buttons at the same time displays the 100 Install Settings menu...

Страница 14: ...1 Time 14 26 51 Time 14 26 51 Time 14 26 51 Time 14 26 51 Time 14 26 51 Time 14 26 51 Time 14 26 51 Time 14 26 51 Time 14 26 51 Time 14 26 51 Time 14 26 51 Time 14 26 51 9 Press the button to apply th...

Страница 15: ...26 51 Time 14 26 51 Time 14 26 51 Time 14 26 51 Time 14 26 51 Time 14 26 51 Time 14 26 51 Time 14 26 51 Time 14 26 51 Time 14 26 51 13 Press the button to apply the new value The value is adopted and...

Страница 16: ...ctrical Connections no Designation Description DC Connections 5 5 2 DC connections and DC isolating switch p 17 AC Connection 5 5 3 AC connection p 17 Fan connection 5 6 Fan p 17 2 x RS485 interfaces...

Страница 17: ...onitoring system can be connected The RS485 interfaces are internally wired 1 1 This means that both RS485 interfaces can be used as an input or an output If multiple solar power inverters are connect...

Страница 18: ...em perature More exact information on temperature dependency is provided in the PV module data sheet The feed in voltage range of the solar power inverter defines the range of input voltages over whic...

Страница 19: ...intended for the installer and should make analyzing and resolving problems easier The internal log helps Delta Solar Support when analyzing more difficult problems Reports The reports combine the va...

Страница 20: ...n 7 1 1 General Instructions Possible noise emissions can be disruptive when the device is used in living areas Therefore choose your installation loca tion carefully Always use the mounting plate sup...

Страница 21: ...and other solar power inverters when installing the device see Fig 7 2 p 21 Do not install two solar power inverters directly above one another Avoid direct sunlight Ensure adequate air circulation H...

Страница 22: ...ng plate Retaining clip not included in delivery Screws 6 mm dowels for attaching the mounting plate to the wall At least four screws are required Drill and drill bits suitable for the wall material a...

Страница 23: ...system installation must be satisfied UTE C15 712 1 VDE 0100 712 These requirements specify the minimum cable cross section and the protective measures required to prevent overheating due to high cur...

Страница 24: ...C016 20E005 Not included in delivery Flexible 5 core cable L1 L2 L3 N PE with a conductor cross section from 4 0 mm2 to 6 0 mm2 Cable end sleeves suitable for the conductor cross section Cable strain...

Страница 25: ...to 5 Nm and the cable housing to 1 2 Nm Insert the AC plug into the AC socket on the solar power inverter and tighten the locking ring to a torque of 6 to 8 Nm Fit a cable strain relief clamp directly...

Страница 26: ...power inverter and the maximum allowed current load of the DC connec tions see Chapter 15 Technical data p 83 The DC MINUS connection is a socket A connection plug is required for the DC cable The DC...

Страница 27: ...d in UTE C 15 712 1 Multi Contact UTE Kit Delta Part num ber Multi Contact UTE kit for SOLIVIA EU G4 TR EOE90000341 7 4 3 Establishing Connection 1 Check the polarity of the DC voltage at the DC conne...

Страница 28: ...p 30 and during ongo ing operation see 10 6 RS485 EIA485 Settings p 54 Pin Assignments Pin Assignment 8 1 1 Reserved 2 Reserved 3 Reserved 4 GND 5 Reserved 6 Reserved 7 TX_A 8 RX_B 7 5 2 Required Too...

Страница 29: ...elta Support RS485 Cover unused connections Fig 7 8 Connection of a single solar power inverter to a moni toring system via RS485 7 5 4 Connecting Multiple Solar Power Inverters 8 1 Data logger Termin...

Страница 30: ...d the settings from other power invertors of the same type All Grid selection The most important commissioning step The grids are sorted by country For some countries several grids are available and a...

Страница 31: ...TINENT Greece continental VDE 0126 1 1 GR ISLAND Greece islands VDE 0126 1 1 Netherlands NL VDE 0126 1 1 EN 50438 Poland PL EN 50438 Portugal PT EN 50438 Romania RO VDE 0126 1 1 Slovakia SK VDE 0126 1...

Страница 32: ...rect the installation if necessary DC DISCONNECT OFF ON 2 Switch on the DC isolating switch The startup process of the solar power inverter will begin After the startup process and the automatic self...

Страница 33: ...sing the buttons Press the button to apply the value Available date formats DD MM YYYY DD MM YYYY DD MM YYYY MM DD YYYY MM DD YYYY MM DD YYYY YYYY MM DD YYYY MM DD YYYY MM DD Available time formats 12...

Страница 34: ...reselect ESC to confirm ENTER 16 Press the button to complete commissioning or Press the ESC button to change settings Commissioning is now finished nOTE The solar power inverter offers some optional...

Страница 35: ...anian Slovak Slovenian Spanish continue Language English Installation 4 Press the buttons to select continue and then press the button This displays the Load USB Data menu No Yes Load USB data 5 Press...

Страница 36: ...If you change one of the val ues you must fill out the provided label after commissioning and place it next to the type plate nOTE The configured values can only be changed after commissioning with a...

Страница 37: ...19200 ID 1 continue RS485 19 Press the buttons to select continue and then press the button The completion screen will be displayed to reselect ESC to confirm ENTER 20 Press the button to complete co...

Страница 38: ...u No Yes Load USB data 5 Press the buttons to select No and then press the button The Grid Selection menu is displayed continue Grid DE MVD Grid selection 6 To change the grid press the button and the...

Страница 39: ...To change a value press the button and then set the value using the buttons Press the button to apply the value nOTE If you change one of the val ues you must fill out the provided label after commiss...

Страница 40: ...ration option RS485 termina tion resistor On Off Termination On Baudrate 19200 ID 1 continue RS485 19 Press the buttons to select continue and then press the button The completion screen will be displ...

Страница 41: ...ll begin After the startup process and the automatic self test the commissioning procedure of the inverter starts and the Installation menu is displayed continue Language English Installation 4 To cha...

Страница 42: ...button to confirm each No Yes Change loaded values 12 Press the buttons to select No and then press the button The Date and Time menu is displayed nOTE If you wish to change the loaded values select Y...

Страница 43: ...change settings Commissioning is now finished nOTE If the solar power inverter is configured to the DE LVD DK LVD or DE MVD grids you can also configure active and reactive power control see 10 9 Act...

Страница 44: ...5 ID of the solar power inverter from which the data is to be loaded for example 001 2 Check all connections and cables for damage and correct seating Correct the installation if necessary DC DISCONNE...

Страница 45: ...balancing was activated on the solar power inverter from which the data was loaded the following message appears activated Power balancing is If active or apparent power limitation was activated on t...

Страница 46: ...9200 ID 1 continue RS485 16 Press the buttons to select continue and then press the button The completion screen will be displayed to reselect ESC to confirm ENTER 17 Press the button to complete comm...

Страница 47: ...larm SOLIVIA 1 In the main menu press the buttons to select Produc tion Info and then press the button Day statistics Current data 400 Production info 2 Press the buttons to se lect the required stati...

Страница 48: ...ned by pressing the button For a detailed description see Chapter 12 3 Overview of Failure Messages Troubleshooting p 76 Day Energy generation on the current day Ext Events Current operating state see...

Страница 49: ...ent Data L1 L3 Freq ___Hz L3 Current ___A L3 Voltage ___V 415 Current data L3 416 Current data PV PV1 voltage Current DC voltage on MPP tracker 1 PV1 Current ____A PV1 Voltage ____V 416 Current data P...

Страница 50: ...L1 f 50 00 50 10 Hz L2 f L3 f Minimum maximum frequency in the selected period for every phase L1 Imax L2 Imax L3 Imax Maximum AC current for each phase in the selected period for every phase L1 U 228...

Страница 51: ...dure USB features Options Install settings Production info Diagnostic Alarm SOLIVIA 1 In the main menu press the buttons to select Pro duction Info and then press the button Month statistics Year stat...

Страница 52: ...Page 63 10 2 Display language Menu 100 Install Settings Description Allows the display language to be configured Accessing the Menu Main Menu Install Settings Options Install settings SOLIVIA 1 In th...

Страница 53: ...e value Configurable Parameters Display Text Designation Description Date Date format DD MM YYYY DD MM YYYY DD MM YYYY MM DD YYYY MM DD YYYY MM DD YYYY YYYY MM DD YYYY MM DD YYYY MM DD Time Time forma...

Страница 54: ...ched on Contrast Display contrast 1 10 10 6 RS485 EIA485 Settings Menu 140 RS485 Description Allows the ID and baudrate of the RS485 interface to be configured Accessing the Menu Main menu Install set...

Страница 55: ...ts Day statistics Week stats Week statistics Month stats Month statistics Year stats Year statistics Total stats Total statistics History History Statistics for the last seven days the solar power inv...

Страница 56: ...If a power limit was set during commissioning the percent value relates to the maximum active power that was set Example You have a SOLIVIA 5 0 EU G4 TR and the maximum active power Pmax at commission...

Страница 57: ...he solar power inverter behaves as described in variant 1 However as soon as the grid frequency exceeds fStop the active power feed is stopped Active power feed will resume once the grid frequency fal...

Страница 58: ...ilable for DK LVD DE LVD DE MVD grids This function can be used to determine a separate cos for four different power ratios P Pn see Fig 10 3 auf Seite 58 P Pn is the ratio between the current active...

Страница 59: ...int A Point B Point C Point D cos inductive capacitive 10 kW 8 kW 5 kW Example SOLIVIA 10 EU G4 TR limited to 8 kW Fig 10 5 Effect of active power limitation on the cos P function This active power re...

Страница 60: ...n to change the value Configurable Parameters Display Text Designation Description Cos Phi cos Defines cos to be the set value inductive capacitive 1 0 8 10 10 4 Reactive power constants Menu 520 Reac...

Страница 61: ...nfirm Reactive PwCtrl Active PwCtrl 500 User settings 3 Press the buttons to se lect Reactive PwCtrl and then press the button Cos phi ind 1 00 Mode Fix cosPhi 520 Reactive PwCtrl 4 Press the buttons...

Страница 62: ...um reactive current in the case of a symmetric failure 3 phases 0 100 Max I asym Maximum power asymmetrical Maximum reactive current in the case of an asymmet ric failure 2 phases 0 100 10 12 Shadowin...

Страница 63: ...d menu 800 Standard menu 800 Standard menu 800 Standard menu 800 Standard menu 800 Standard menu 800 Standard menu 800 Standard menu 800 Standard menu 800 Standard menu 800 Standard menu 800 Standard...

Страница 64: ...N You can obtain this PIN from Delta Support Procedure for changing the grid Main Menu Grid Selection Grid Change You must provide a key in order to receive a PIN You will find the key in the 132 Grid...

Страница 65: ...e under STUP_ TXT The stands for the RS485 ID of the solar power inverter e g 001 The RS485 ID is a number for identifying the solar power inverter The RS485 ID for all solar power inverters is set by...

Страница 66: ...and then press the button A note on IP65 protection is then displayed protection will lose the IP65 Without cover you 2 Press the button to confirm The 300 USB features menu is then displayed Save set...

Страница 67: ...ave the name Image hex and must be located in the main directory of the USB stick Rename the file correctly if necessary This requires a computer 1 Enable the USB interface see 11 3 Enabling disabling...

Страница 68: ...features and then press the button A note on IP65 protection is then displayed protection will lose the IP65 Without cover you 3 Press the button to confirm The 300 USB features menu is then displaye...

Страница 69: ...ayed Save settings Save swap data Create reports Load settings Service 300 USB features 4 Press the buttons to select Load Settings and then press the button The solar power inverter searches for avai...

Страница 70: ...interface p 66 USB features Options Install settings Production info SOLIVIA 2 In the main menu press the buttons to select USB features and then press the button A note on IP65 protection is then di...

Страница 71: ...protection will lose the IP65 Without cover you 3 Press the button to confirm The 300 USB features menu is then displayed Save settings Save swap data Firmware update Create reports Load settings 300...

Страница 72: ...problems within the solar power inverter Warning Yes Failure No Change events Certain parameters can be changed manu ally in the display or externally via the service software All parameter changes ar...

Страница 73: ...ounding failure simultaneously with other warning Insulation or grounding warning during normal operation Insulation or grounding warning during syn chronization Insulation or grounding warning simult...

Страница 74: ...th Fault Failure For external events Ext Events For internal events Warning 3 digit number For a warning the yellow Failure LED flashes The solar power inverter con tinues to feed power into the grid...

Страница 75: ...e attempting to resolve the failure If events from both categories occur simultaneously those in the internal events category take priority In this instance therefore Delta Solar Support should always...

Страница 76: ...it number Please contact Delta Support Failure Internal failure Failure three digit number Please contact Delta Support L1 Voltage failure AC overvoltage or undervoltage on phase L Check the grid volt...

Страница 77: ...fail The startup insulation is too low Check the insulation resistance at the DC side of the PV modules PV1 ISO running fail Operating insulation 150 k Check the insulation resistance at the DC side o...

Страница 78: ...16 04 2012 17 25 36 481 External events 4 You can view the whole list by pressing the buttons Message Structure Each message consists of three lines defined as follows Begin 1014V Voltage too high 16...

Страница 79: ...LVD 1 Line Failure number the higher the number the more current the failure 2 Line Date and time when the event occurred 3 and Other Lines Brief description of the failure s 12 4 3 Log for BDEW Menu...

Страница 80: ...ower 90 Max power 100 16 04 12 17 25 36 S 482 Change events 1 Line Date and time when the external event occurred Source of the change D Display E External RS485 U USB Interface S System 3 Line Name o...

Страница 81: ...open the solar power inverter The solar power inverter contains no components that must be maintained or repaired by the operator or installer Opening the cover will void the warranty nOTE The solar p...

Страница 82: ...er inverter is very heavy see 15 Technical data p 83 Improper handling may result in injury The solar power inverter must be lifted and carried by at least two people 14 1 Decommissioning 1 Disconnect...

Страница 83: ...t power Power factor configuration area 0 8 cap 0 8 ind 0 8 cap 0 8 ind Total harmonic distortion THD 5 at rated apparent power 5 at rated apparent power Nighttime consumption 1 3 W 1 3 W Typical leak...

Страница 84: ...interfaces 2x RJ45 RS485 1x USB 1x I O interface 2x RJ45 RS485 1x USB 1x I O interface DC Isolating Switch Integrated Integrated Display 3 LEDs 4 line LCD 3 LEDs 4 line LCD General Specifications Mode...

Страница 85: ...g sticker The UTE kit allows you to conform to the DC protection and signal requirements specified in UTE C 15 712 1 Multi Contact UTE Kit Delta Part number Multi contact UTE kit for SOLIVIA EU Solar...

Страница 86: ...the ESC button for at least three seconds Go to menu opens 411 Current data Menu 411 Go to menu 2 Press the button to enter the menu number The first digit flashes 3 Use the buttons to enter the rst...

Страница 87: ...features Updating firmware Save swap data Save settings Create reports Load settings Service 310 Service Status Monitoring 511 Power reduction Max P 510 Active PwCtrl Power reduction Power vs freq 51...

Страница 88: ...Qmax L1 Qmin L2 Qmin L3 Qmin 431 Week stat AC 441 Month stat AC 451 Year stat AC 461 Total stat AC 420 Day Statistics Day stat AC Day stat PV Day stat ISO 430 Week Statistics 440 Month Statistics 450...

Страница 89: ......

Страница 90: ...9 Italy supporto italia solar inverter com 800 787 920 Free Call netherlands ondersteuning nederland solar inverter com 0800 022 1104 Free Call Austria service oesterreich solar inverter com 0800 291...

Отзывы: