


18
|
Setting up your tablet
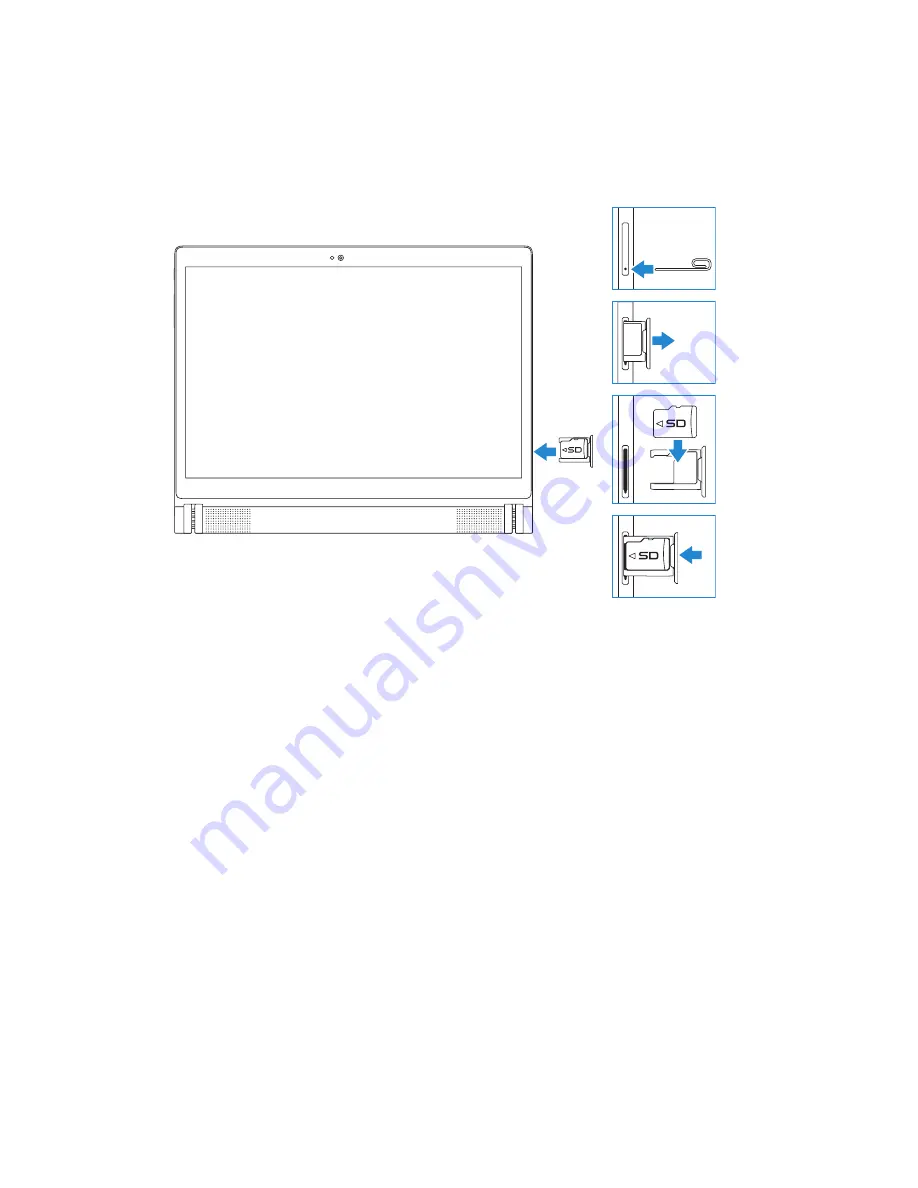
Inserting microSD card
1
Insert and press a pin or paper clip into the pinhole on the
microSD‑card tray to eject the microSD‑card tray.
2
Remove the microSD‑card tray.
3
Align and place the microSD card in the tray so that the pins are
pointed toward the card slot and are facing toward the rear of the
tablet.
4
Slide the microSD‑card tray into the card slot.