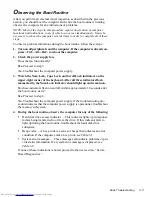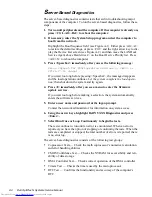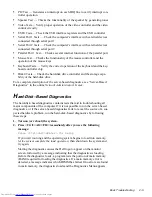
Basic Troubleshooting
2-9
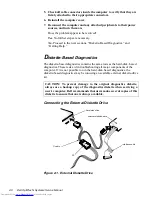
To install the external diskette drive, follow these steps:
1. Turn off the computer, including any attached peripherals, and dis-
connect all the AC power cables from their power sources.
2. Disconnect the DC power cable from the back of the hard-disk drive.
3. Connect the interface cable to the back of the external diskette drive
and to the DSKT connector on the system board (see Figure 4-7).
4. Attach the Y-cable to DC power connector P3 as shown in Figure 2-1.
5. Connect the Y-cable’s hard-disk drive connector to the hard-disk drive.
6. Connect the Y-cable’s diskette drive connector to the back of the exter-
nal diskette drive.
Running the Diskette-Based Diagnostics
To run the diskette-based diagnostics, follow these steps:
1. Insert the diagnostics diskette into the diskette drive. Turn on all
peripherals and the computer.
2. Enter the System Setup program, set Diskette Drive A to 3.5 inch,
1.44 MB, and set Diskette to Auto (see Figure A-1). Then press
<Alt><b> to reboot the computer.
Starting the diagnostics causes the Dell logo to appear on the monitor
screen, followed by a message indicating that the diagnostics is loading.
Before the diagnostics loads, a program tests the portion of main memory
(RAM) required for loading the diagnostics. If a main memory error is
detected, a message indicates which DIMM has failed. If no errors are found
in main memory, the diagnostics loads and the Diagnostics Menu appears.
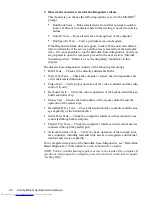
3. Observe the monitor screen for the Diagnostics Menu.
This menu lets you choose the following options or exit to the MS-DOS
prompt:
•
Run Quick Tests — Runs selected tests from all test groups to quickly
locate a failure or to indicate where further testing is needed to isolate a
failure
•
Run All Tests — Runs all tests for a thorough test of the computer
•
Run Specific Tests — Tests a particular area or subsystem
If the Diagnostics Menu does not appear, check the diskette drive connec-
tions, insert another copy of the diagnostics diskette into the diskette drive,
and reboot the computer. If the Diagnostics Menu still does not appear, pro-
ceed to the next section, “Getting Help.”
The diskette-based diagnostics consists of the same test groups as described in
“Hard-Disk–Based Diagnostics” found earlier in this chapter. For a complete
description of the diskette-based diagnostics, see “Diskette-Based Diagnostics”
in the online Network Administrator’s Guide.
Содержание OptiPlex N
Страница 1: ... HOO 2SWL3OH 1 6 VWHPV 6 59 0 18 ...
Страница 62: ...4 18 Dell OptiPlex N Systems Service Manual ...
Страница 71: ...Index 3 internal visual inspection 2 7 V video controller 1 4 visual inspection external 2 2 internal 2 7 ...
Страница 72: ...4 Dell OptiPlex N Systems Service Manual ...

