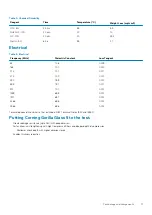
Table 5. Chemical Durability
Reagent
Time
Temperature (ºC)
Weight Loss (mg/cm2)
HCl - 5%
24 hrs
95
5.9
NH4F:HF - 10%
20 min
20
1.0
HF - 10%
20 min
20
25.2
NaOH - 5%
6 hrs
95
2.7
Electrical
Table 6. Electrical
Frequency (MHz)
Dielectric Constant
Loss Tangent
54
7.08
0.009
163
7.01
0.010
272
7.01
0.011
272
7.00
0.010
490
7.99
0.010
599
7.97
0.011
912
7.01
0.012
1499
6.99
0.012
1977
6.97
0.014
2466
6.96
0.014
2986
6.96
0.014
Terminated coaxial line similar to that outlined in NIST Technical Notes 1520 and 1355-R
Putting Corning Gorilla Glass 5 to the test.
•
Greater damage resistance (upto 1.8X) with deep abrasion.
•
Faster chemical strengthening with high Compressive Stress and deeper depth of compression
•
Shallower check depth with higher abrasions levels
•
Enables thickness reduction
Technology and components
11
Содержание Latitude 9410
Страница 1: ...Dell Latitude 9410 Service Manual Regulatory Model P110G Regulatory Type P110G001 ...
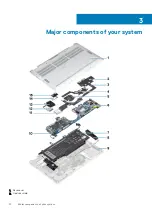
Страница 12: ...Major components of your system 1 Base cover 2 Heatsink shield 3 12 Major components of your system ...
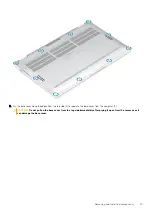
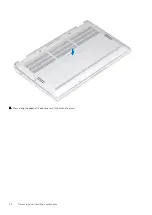
Страница 22: ...2 Press along the edges of the base cover until it clicks into place 22 Removing and installing components ...
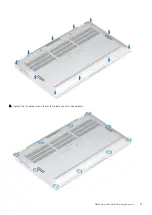
Страница 23: ...3 Tighten the 10 captive screws to secure the base cover to the computer Removing and installing components 23 ...
Страница 36: ...5 Place the metal shield on the WWAN card 36 Removing and installing components ...
Страница 44: ...8 Adhere the Mylar sheet on the system board 1 Connect the battery cable 44 Removing and installing components ...
Страница 49: ...4 Remove the metal foil from the heatsink shield Removing and installing components 49 ...
Страница 50: ...5 Remove the heatsink shield from the system board 50 Removing and installing components ...
Страница 53: ...3 Place the heatsink shield on the heatsink Removing and installing components 53 ...
Страница 54: ...4 Adhere the metal foils on the heatsink shield 54 Removing and installing components ...
Страница 80: ...8 Lift the keyboard off the palmrest assembly 80 Removing and installing components ...
Страница 81: ...Installing the keyboard 1 Place the keyboard on the palmrest assembly Removing and installing components 81 ...


