Using Windows NT to Conserve Battery Power
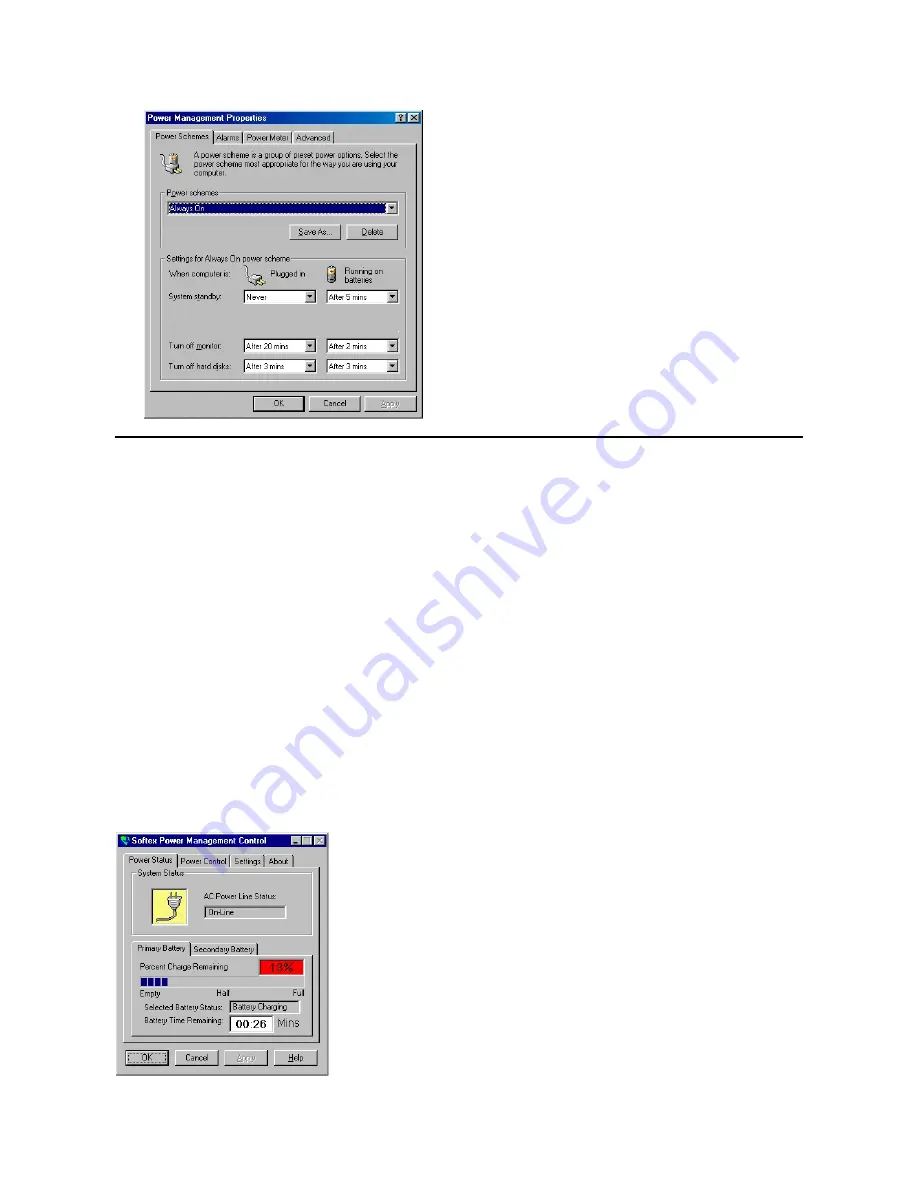
To access the
Power Management Control
window (see Figure 2) and set the power management features in Windows NT, perform the
following steps:
1.
Click the
Start
button, point to
Settings
, and click
Control Panel
.
2.
Double-click the
Softex Power Management
icon.
The
Softex Power Management Control
window contains the following tabs:
l
Power Status
tells you if the computer is using battery power or AC power, the percent of battery charge remaining, and how much battery
operating time remains.
l
Power Control
allows you to put the computer into save-to-disk suspend mode.
l
Settings
allows you to select one of three power mode settings
—
Advanced, Standard,
and
Off
. This tab also allows you to enable the low-
battery warning and to place the
Power Management
icon on or remove it from the taskbar.
Click
Advanced
to let the operating system and basic input/output system (BIOS) work together for maximum power savings. You can use the
Windows NT Power Management Control
window or the
Power
menu of the Setup program to change power management settings.
Click
Standard
to allow the BIOS to control all power management settings. You must use the
Power
menu of the Setup program to change
power management settings.
Click
Off
to disable power management features when you want the maximum performance from the computer.
Figure 2. Softex Power Management Control Window
Содержание Inspiron 7500
Страница 6: ...Back to Contents Page AC Adapter Dell Inspiron 7500 ...
Страница 7: ...Back to Contents Page Audio Jacks Dell Inspiron 7500 ...
Страница 10: ...Back to Contents Page Component Locations Back View Dell Inspiron 7500 ...
Страница 12: ...Back to Contents Page Battery Charge Gauge Dell Inspiron 7500 ...
Страница 13: ...Back to Contents Page Removing and Installing a Battery Dell Inspiron 7500 ...
Страница 26: ...Back to Contents Page ...
Страница 38: ...Exploded View of 13 3 Inch Display Assembly Dell Inspiron 7500 ...
Страница 39: ...Exploded View of 14 1 Inch Display Assembly Dell Inspiron 7500 ...
Страница 40: ...Back to Contents Page Exploded View of 15 Inch SXGA Display Assembly Dell Inspiron 7500 New artwork pending ...
Страница 42: ...Back to Contents Page Exploded View of 15 4 Inch SXGA Display Assembly Dell Inspiron 7500 New artwork pending ...
Страница 44: ...Back to Contents Page Exploded View of Computer Dell Inspiron 7500 ...
Страница 45: ...Back to Contents Page Exploded View of Palmrest Assembly Dell Inspiron 7500 Back to Contents Page ...
Страница 47: ...Back to Contents Page Component Locations Front View Dell Inspiron 7500 New artwork pending ...
Страница 54: ...Back to Contents Page I O Connectors Dell Inspiron 7500 ...
Страница 60: ...Back to Contents Page 30 Cone of Infrared Light Dell Inspiron 7500 ...
Страница 64: ...Back to Contents Page Embedded Numeric Keypad Dell Inspiron 7500 ...
Страница 88: ...system You can also double click the PC Card icon on the Windows 98 desktop Back to Contents Page ...
Страница 89: ...Back to Contents Page PC Card Slots Dell Inspiron 7500 ...
Страница 103: ...Back to Contents Page Removing the Memory Module Dell Inspiron 7500 ...
Страница 104: ...Back to Contents Page Removing the Memory Module Cover Dell Inspiron 7500 ...
Страница 136: ...Back to Contents Page Removing the Hard Disk Drive Dell Inspiron 7500 ...
Страница 138: ...Back to Contents Page Removing Devices From the Media Bay Dell Inspiron 7500 ...
Страница 140: ...Back to Contents Page Security Cable Slot Dell Inspiron 7500 ...
Страница 159: ...Back to Contents Page Touch Pad Dell Inspiron 7500 ...
Страница 162: ...8 Unlatch the display assembly and lift the assembly off the computer base Back to Contents Page ...


