background image

Removing the Mini PCI Card 


1.

Follow the instructions in "

Preparing to Work Inside the Computer

."  


2.

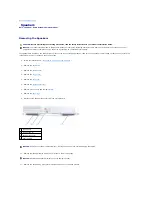
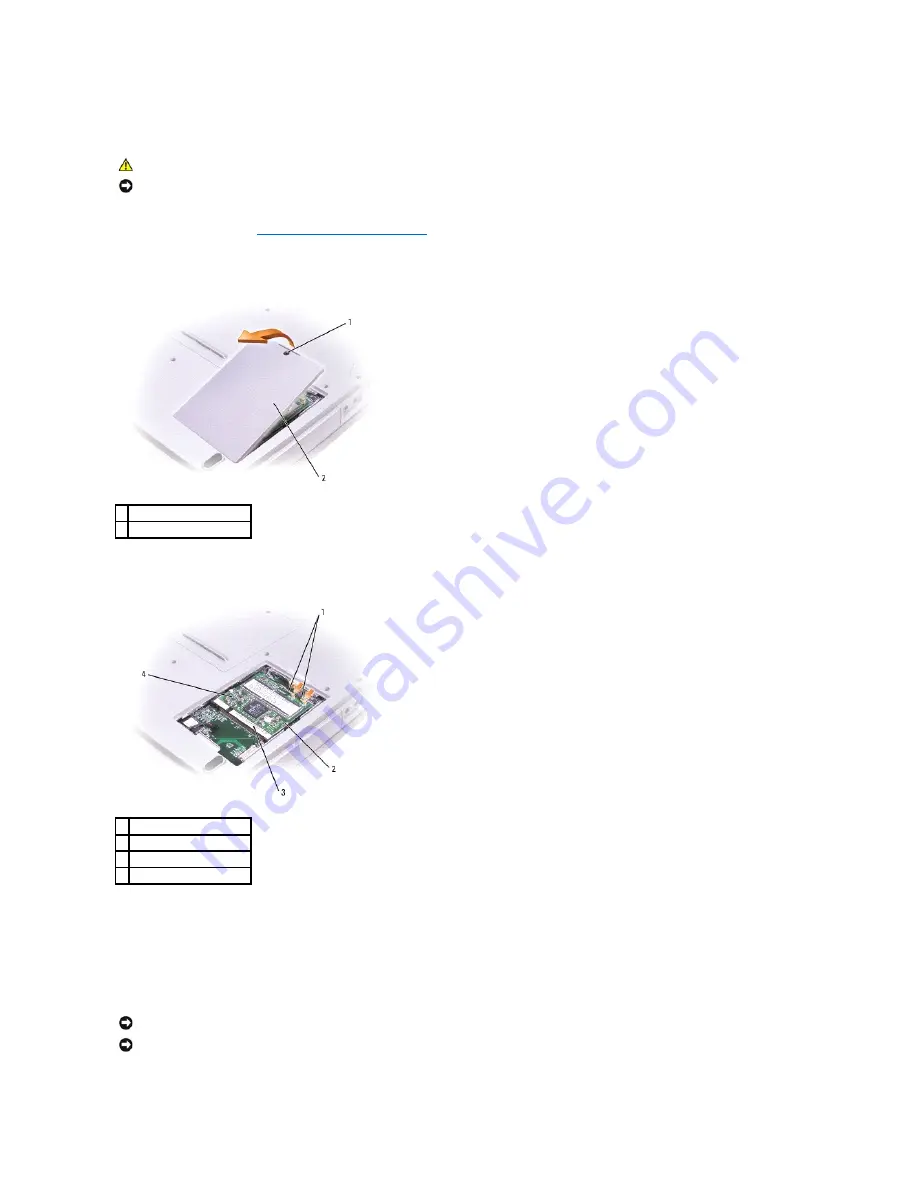
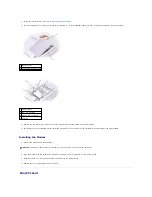
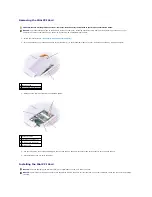
Turn the computer over, loosen the captive screw (labeled "C") in the modem/Mini PCI card cover, and lift the cover away from the computer.  


3.

Disconnect the Mini PCI card from the attached cables.  


4.

Use your fingertips to carefully spread apart the securing taps on each end of the Mini PCI card connector until the card pops up. 


5.

Lift the Mini PCI card out of its connector.  


Installing the Mini PCI Card 


CAUTION: 

Before working inside your Dell™ computer, read the safety instructions in your 

Product Information Guide


NOTICE: 

To prevent static damage to components inside your computer, discharge static electricity from your body before you touch any of your 

computer's electronic components. You can do so by touching an unpainted metal surface.

1  captive screw 

2  modem/Mini PCI card cover 

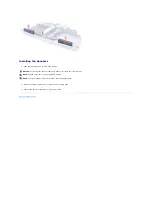
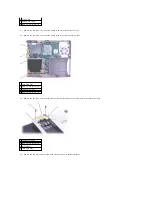
1  antenna cables 

2  metal securing tabs (2) 

3  Mini PCI card connector 

4  Mini PCI card 


NOTICE: 

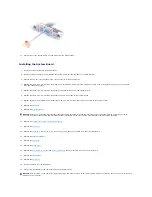
To avoid damaging the Mini PCI card, never place cables on top of or under the card.


NOTICE: 

The Mini PCI card and its connector are keyed with a notch to ensure correct insertion. If you feel resistance, check the connector and realign 

the card.

Содержание Inspiron 5160

Страница 1: ...d Cautions Information in this document is subject to change without notice 2004 Dell Inc All rights reserved Reproduction in any manner whatsoever without the written permission of Dell Inc is strictly forbidden Trademarks used in this text Dell the DELL logo and Inspiron are trademarks of Dell Inc Microsoft and Windows are registered trademarks of Microsoft Corporation Other trademarks and trade...

Страница 2: ... board and the EMI shield 11 Remove the video card 12 Remove the palm rest 13 Remove the microprocessor thermal cooling assembly 14 Remove the microprocessor 15 Remove the speakers 16 Remove the system board Back to Contents Page CAUTION Before performing the following procedures read the safety instructions in your Product Information Guide NOTICE To prevent static damage to components inside you...

Страница 3: ...ician should perform repairs on your computer Damage due to servicing that is not authorized by Dell is not covered by your warranty NOTICE To prevent static damage to components inside your computer discharge static electricity from your body before you touch any of your computer s electronic components You can do so by touching an unpainted metal surface NOTICE When you disconnect a cable pull o...

Страница 4: ...cedures in this manual require the following tools l 1 Phillips screwdriver l inch flat blade screwdriver l Small plastic scribe l Hex nut driver l Flash BIOS update program CD Computer Orientation Screw Identification When you are removing and replacing components photocopy this section to lay out and keep track of the screws and their sizes 1 front 2 left 3 back 4 right Hard Drive Door 2 each Mo...

Страница 5: ...Panel 4 each Display Latch 2 each Hard Drive in Hard Drive Carrier 4 each EMI Shield 1 each Top of Palm Rest to Computer Base 2 each Palm Rest to Base Plastics 12 each Video Card to System Board 2 each Palm Rest to Battery Bay 1 each System Board to Base Plastics 2 each hard drive cage 2 each optical drive cage Battery Bay Shield to System Board 2 each Left Antenna to Hard Drive and Optical Drive ...

Страница 6: ...computer Follow the instructions that appear on the screen The computer continues to boot and updates the new BIOS When the update is complete the computer will automatically reboot 3 Press during POST to enter the system setup program 4 Press to reset the computer defaults 5 Press and press to save configuration changes 6 Remove the flash BIOS update program CD from the drive and restart the comp...

Страница 7: ... your Product Information Guide NOTICE To prevent static damage to components inside your computer discharge static electricity from your body before you touch any of your computer s electronic components You can do so by touching an unpainted metal surface NOTICE Press and hold the microprocessor down by applying slight pressure to the center of the microprocessor while turning the cam screw to p...

Страница 8: ...queeze all of the contents of the thermal grease packet provided with the kit on to the microprocessor thermal cooling assembly 5 Replace the microprocessor thermal cooling assembly 6 Replace the palm rest and then replace the display panel 7 Replace the EMI shield and the button board 8 Replace the keyboard 9 Replace the hinge cover 10 If you are installing a new microprocessor module with a diff...

Страница 9: ...m screws 8 Open the display assembly approximately 180 degrees and support the display assembly so that it does not open past this position 9 Remove the two M2 5 x 5 mm screws from each hinge bracket CAUTION Before performing the following procedures read the safety instructions in your Product Information Guide NOTICE To prevent static damage to components inside your computer discharge static el...

Страница 10: ...le to disconnect the cable from the system board 11 Lift the display assembly up and out of the computer base 1 screw covers 2 5 display bezel 2 14 display panel 6 M2 x 3 mm screws 4 for 14 inch display 3 display bumpers 3 7 top cover 4 M2 5 x 5 mm screws 5 8 display feed flex cable ...

Страница 11: ...side edge of the bezel away from the top cover Display Panel 1 display bumpers 3 5 M2 x 3 mm screws 8 for 15 inch display 2 M2 5 x 5 mm screws 5 6 top cover 3 display bezel 7 display feed flex cable 4 15 display panel 8 screw covers 2 CAUTION Before performing the following procedures read the safety instructions in your Product Information Guide NOTICE To prevent static damage to components insid...

Страница 12: ...ring tabs on each side of the connector and pulling straight down from the display panel connector 10 Disconnect the bottom flex cable connector from the inverter connector on the inverter board by peeling up the pull tab and pulling the tab straight up away from the inverter connector CAUTION Before performing the following procedures read the safety instructions in your Product Information Guide...

Страница 13: ...splay Latch Assembly 1 Follow the instructions in Preparing to Work Inside the Computer 2 Remove the hinge cover 3 Remove the keyboard 4 Remove the display assembly 5 Remove the display bezel 6 Remove the two M2 5 x 5 mm screws that secure the display latch assembly to the top cover 7 Lift the display latch assembly up and out of the top cover CAUTION Before performing the following procedures rea...

Страница 14: ...e of the display latch and attach the other end of the spring to the spring hook in the top cover 2 Align the screw holes in the display latch assembly with the screw holes in the top cover 3 Replace the two M2 5 x 5 mm screws that secure the display latch assembly to the top cover Back to Contents Page ...

Страница 15: ...the hard drive from the computer when the drive is hot do not touch the metal housing of the hard drive CAUTION Before you begin any of the procedures in this section follow the safety instructions in the Product Information Guide NOTICE To prevent data loss shut down your computer before removing the hard drive Do not remove the hard drive while the computer is on in standby mode or in hibernate ...

Страница 16: ... 1 Insert the hard drive assembly into the bay and push the drive assembly until it is fully seated in the bay 2 Replace and tighten the two M2 5 x 5 mm screws 3 Install the operating system for your computer 4 Install the drivers and utilities for your computer Back to Contents Page 1 interposer board connector 3 hard drive 2 M3 x 5 mm screws 4 4 carrier NOTICE When removing the interposer board ...

Страница 17: ...ay Rest the keyboard face down on the palm rest 6 Grasp the keyboard flex cable near the connector and pull up on the flex cable to disconnect it from the interface connector on the system board 7 Remove the keyboard from the computer base CAUTION Before working inside your Dell computer read the safety instructions in your Product Information Guide NOTICE To prevent static damage to components in...

Страница 18: ...at the keyboard 3 Replace the four M2 x 3 mm keyboard screws 4 To replace the hinge cover first insert the left side of the hinge cover into the notches Snap down the hinge cover and ensure that it is flush with the palm rest 1 M2 x 3 mm screws 4 2 keyboard 3 keyboard connector 4 interface connector NOTICE To avoid damage to the connector pins press the keyboard connector evenly into the interface...

Страница 19: ...Back to Contents Page ...

Страница 20: ...eparing to Work Inside the Computer 2 Pivot the bottom feet of the EMI shield into place and place the shield down on the computer base Align the screw hole and replace the one M2 5 x 8 mm screw that secures the EMI shield to the system board 3 Replace the keyboard 4 Replace the hinge cover CAUTION Before performing the following procedures read the safety instructions in your Product Information ...

Страница 21: ...t is labeled PUSH until you feel the assembly click into place 3 Replace the two M2 5 x 8 mm screws Palm Rest Removing the Palm Rest CAUTION Before performing the following procedures read the safety instructions in your Product Information Guide NOTICE To prevent static damage to components inside your computer discharge static electricity from your body before you touch any of your computer s el...

Страница 22: ...ard located in the top center of the palm rest Lift the button board straight up out of the computer base 7 Remove the EMI shield 8 Remove the display assembly 9 Turn the computer over and remove the twelve M2 5 x 8 mm screws not labeled 10 Remove the M2 5 x 4 mm screw from the battery bay 11 Turn the computer back over and remove the two M2 5 x 5 mm screws from the top of the palm rest 1 button b...

Страница 23: ...the palm rest use your fingers to join the palm rest and the base plastics by pushing the inside edge of the palm rest into the base plastics 3 Connect the touch pad connector to the system board 4 Replace the two M2 5 x 5 mm screws in the top of the palm rest 5 Turn the computer over and replace the M2 5 x 4 mm screw in the battery bay 6 Replace the twelve M2 5 x 8 mm screws not labeled in the bo...

Страница 24: ...7 Replace the display assembly 8 Replace the EMI shield and the button board 9 Replace the keyboard 10 Replace the hinge cover 11 Remove the optical drive 12 Replace the hard drive Back to Contents Page ...
Страница 25: ...0 Systems Service Manual S Video TV Out Connector USB Connector Video Connector IEEE 1394 Connector S Video TV Out Connector USB Connector S Video Pin Signal 1 GND 2 GND 3 DLUMA L 4 DCRMA L Composite Video Pin Signal 5 NC 6 DCMPS L 7 COMP B Pin Signal 1 USB5V 2 USBP 3 USBP 4 GND ...

Страница 26: ...E 1394 Connector Back to Contents Page Pin Signal Pin Signal 1 CRT_R 9 5V 2 CRT_G 10 GND 3 CRT_B 11 MONITOR_DETECT 4 NC 12 DDC_DATA 5 GND 13 CRT_HS 6 GND 14 CRT_VS 7 GND 15 DDC_CLK 8 GND Pin Signal 1 TPB 2 TPB 3 TPA 4 TPA ...

Страница 27: ...sconnect the speaker connector from the system board 10 Remove the speaker cables from under or between their routing clips 11 Remove the speakers by pulling them straight up and out of the base plastics CAUTION Before performing the following procedures read the safety instructions in your Product Information Guide NOTICE To prevent static damage to components inside your computer discharge stati...

Страница 28: ...er or between their routing clips 3 Connect the speaker connector to the system board Back to Contents Page NOTICE Ensure that the speaker cables are under or between their routing clips NOTE Speakers face out in the base plastics holders NOTE The right speaker cable is longer than the left speaker cable ...

Страница 29: ...move the modem 6 Remove the Mini PCI card 7 Remove the hinge cover 8 Remove the keyboard 9 Remove the display assembly 10 Remove button board and the EMI shield 11 Remove the video card 12 Remove the palm rest 13 Remove the microprocessor thermal cooling assembly 14 Remove the microprocessor 15 Remove the speakers 16 Remove the two M2 5 x 5 mm screws from the battery bay shield and remove the shie...

Страница 30: ... mm screws that secure the left antenna to the hard drive and optical drive cages 20 Remove the two hex nuts that secure the video connector to the base plastics 1 battery bay 2 battery bay shield 3 M2 5 x 5 mm screws 2 1 hard drive cage 2 M2 5 x 5 mm screws 2 3 optical drive cage 4 M2 5 x 5 mm screws 2 1 optical drive cage 2 M2 5 x 6 mm screws 2 3 left antenna 4 hard drive cage ...

Страница 31: ... the speakers 9 Replace the microprocessor 10 Replace the microprocessor thermal cooling assembly 11 Replace the palm rest 12 Replace the video card the button board and the EMI shield that you removed from the old system board 13 Replace the display assembly 14 Replace the keyboard 15 Replace the hinge cover 16 Replace the Mini PCI card modem and memory module s that you removed from the old syst...

Страница 32: ...e replacement system board into the appropriate drive and turn on the computer Follow the instructions on the screen Back to Contents Page NOTE After replacing the system board enter the computer Service Tag sequence into the BIOS of the replacement system board ...

Страница 33: ...rwise noted each procedure in this document assumes that a part can be replaced or if purchased separately installed by performing the removal procedure in reverse order 1 display 11 speakers 2 display feed flex cable 12 base plastics 3 hinge cover 13 battery 4 keyboard 14 optical drive 5 button board 15 left antenna 6 palm rest 16 hard drive 7 microprocessor thermal cooling assembly 17 system boa...

Страница 34: ...g assembly remove the mylar that covers the thermal grease on the assembly If you are installing the assembly that you removed in the previous section a Wipe the thermal grease off of the microprocessor thermal cooling assembly with a clean paper towel CAUTION Before performing the following procedures read the safety instructions in your Product Information Guide NOTICE To prevent static damage t...

Страница 35: ...or thermal cooling assembly in place on the system board 3 Connect the fan power cable to the system board 4 Tighten the four captive screws labeled 1 through 4 in consecutive order 5 Replace the palm rest and then replace the display panel 6 Replace the button board and the EMI shield 7 Replace the keyboard 8 Replace the hinge cover Back to Contents Page ...
Страница 36: ...red trademarks of Microsoft Corporation Other trademarks and trade names may be used in this document to refer to either the entities claiming the marks and names or their products Dell Inc disclaims any proprietary interest in trademarks and trade names other than its own Back to Contents Page NOTE A NOTE indicates important information that helps you make better use of your computer NOTICE A NOT...

Страница 37: ...uring clips on each end of the memory module connector until the module pops up 4 Remove the module from the connector Installing the Memory Modules CAUTION Before working inside your Dell computer read the safety instructions in your Product Information Guide NOTICE To prevent static damage to components inside your computer discharge static electricity from your body before you touch any of your...

Страница 38: ...tely when the DELL logo appears If you wait too long and the logo for the Microsoft Windows operating system appears continue to wait until you see the Windows desktop Then shut down your computer and try again See Using the System Setup Program in your Owner s Manual Optical Drive Removing the Optical Drive 1 Follow the instructions in Preparing to Work Inside the Computer 2 Turn the computer ove...

Страница 39: ... Replace the M2 5 x 8 mm screw next to the memory module cover Modem Removing the Modem 1 captive screw 2 memory module cover 3 screw labeled O 1 lever 2 Optical drive 3 M2 5 x 8 mm screw labeled O CAUTION Before working inside your Dell computer read the safety instructions in your Product Information Guide NOTICE To prevent static damage to components inside your computer discharge static electr...

Страница 40: ...its connector on the system board and disconnect the modem cable Installing the Modem 1 Connect the modem cable to the modem 2 Align the modem with the screw holes and press the modem into the connector on the system board 3 Install the two M2 x 3 mm screws to secure the modem to the system board 4 Replace the cover and tighten the captive screw Mini PCI Card 1 captive screw 2 modem Mini PCI card ...

Страница 41: ...efore working inside your Dell computer read the safety instructions in your Product Information Guide NOTICE To prevent static damage to components inside your computer discharge static electricity from your body before you touch any of your computer s electronic components You can do so by touching an unpainted metal surface 1 captive screw 2 modem Mini PCI card cover 1 antenna cables 2 metal se...

Страница 42: ... 2 Connect the antenna cables to the Mini PCI card 3 Replace the cover and tighten the captive screw Back to Contents Page 1 antenna cables 2 Mini PCI card connector 3 Mini PCI card NOTICE To prevent damage to the antenna cables carefully tuck the cables into the area directly beside the Mini PCI card before replacing the cover ...

Отзывы: