


120
Adding and Replacing Parts
To replace the hard drive:
1
Follow the procedures in "Before You Begin" on page 117.
2
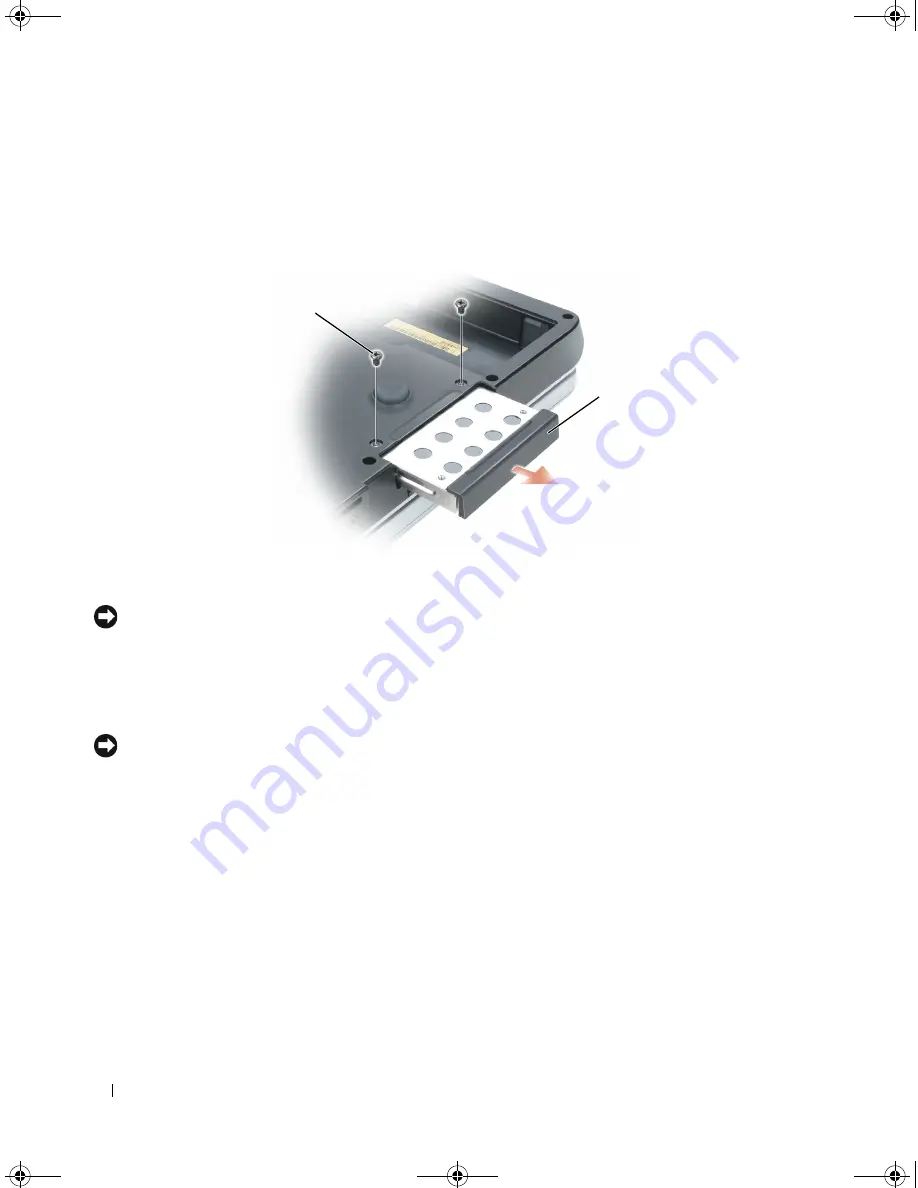
Turn the computer over, and remove the hard drive screws.
NOTICE:
When the hard drive is not in the computer, store it in protective antistatic packaging. See "Protecting
Against Electrostatic Discharge" in the
Product Information Guide
.
3
Slide the hard drive out of the computer.
4
Remove the new drive from its packaging.
Save the original packaging for storing or shipping the hard drive.
NOTICE:
Use firm and even pressure to slide the drive into place. If you use excessive force, you may damage the
connector.
5
Slide the hard drive into the bay until it is fully seated.
6
Replace and tighten the screws.
7
If the new hard drive is not already pre-imaged, install the operating system and drivers for your
computer.
See "Restoring Your Operating System" on page 111 and "Reinstalling Drivers and Utilities" on page 108.
1
hard drive screws (2)
2
hard drive
2
1
PD598a01.book Page 120 Monday, February 6, 2006 2:24 PM
Содержание E1705 - Inspiron Laptop
Страница 36: ...36 Setting Up Your Computer PD598a01 book Page 36 Monday February 6 2006 2 24 PM ...
Страница 50: ...50 Dell QuickSet Features PD598a01 book Page 50 Monday February 6 2006 2 24 PM ...
Страница 76: ...76 Using Cards PD598a01 book Page 76 Monday February 6 2006 2 24 PM ...
Страница 116: ...116 Troubleshooting PD598a01 book Page 116 Monday February 6 2006 2 24 PM ...
Страница 172: ...172 Contacting Dell PD598a01 book Page 172 Monday February 6 2006 2 24 PM ...
Страница 188: ...88 Index 188 Index PD598a01 book Page 188 Monday February 6 2006 2 24 PM ...


