


support.dell.com
Installing Drives
3-3
Removing and Replacing a 3.5-Inch
Front-Panel Insert
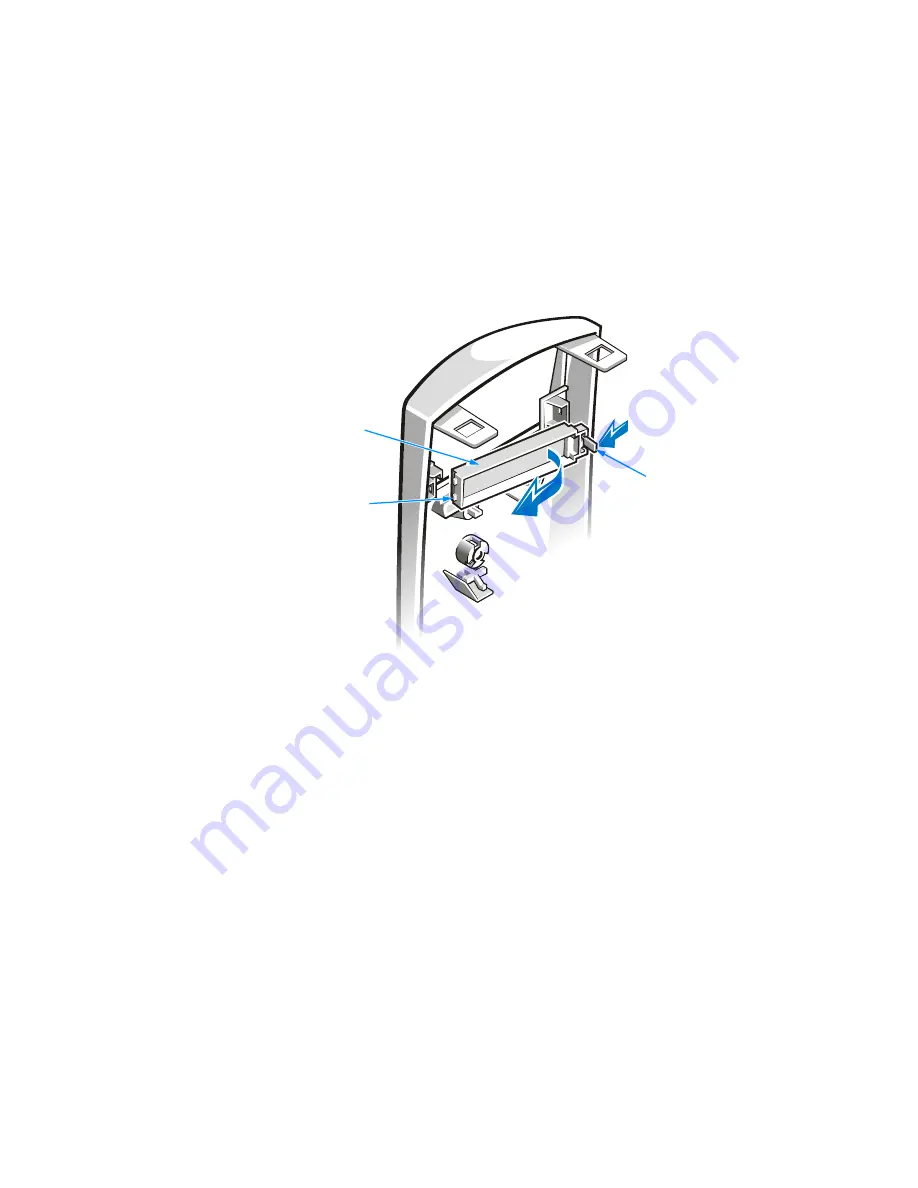
Empty drive bays in the drive cage are covered by a front-panel insert. The insert for a
3.5-inch drive bay is mounted to the inside of the bezel.
After you have removed the bezel, remove the front-panel insert for the bay you plan
to use. From the back of the bezel, as shown
From the back of the bezel, as shown in Figure 3-2, press the release tab to
the side. Then rotate the insert toward you, and remove it from the bezel.
Figure 3-2. Removing a 3.5-Inch Insert
If you permanently remove a drive from the drive cage, replace the front-panel insert
by inserting its two tabs into the slot in the bezel and rotating the insert forward until
it snaps into place.
insert
release tab
tabs (2)
Содержание Dimension L Series
Страница 1: ...www dell com support dell com Dell Dimension L Series Systems ...
Страница 10: ...xii ...
Страница 24: ...1 8 Dell Dimension L Series Systems Reference and Troubleshooting Guide ...
Страница 42: ...2 18 Dell Dimension L Series Systems Reference and Troubleshooting Guide Guide ...
Страница 108: ...7 20 0 Dell Dimension L Series Systems Reference and Troubleshooting Guide ...
Страница 114: ...A 6 6 Dell Dimension L Series Systems Reference and Troubleshooting Guide ...
Страница 140: ...C 8 Dell Dimension L Series Systems Reference and Troubleshooting Guide ...
Страница 156: ...E 8 8 Dell Dimension L Series Systems Reference and Troubleshooting Guide ...
Страница 162: ...6 Dell Dimension L Series Systems Reference and Troubleshooting Guide ...