Faxing
303
9
Enter the number of the remote machine using the numeric keypad, and
then press the
button.
You can also use speed dial or group dial numbers. For more information,
see "Automatic Dialing" on page 311.
Press the
(Start)
button to begin faxing.
Once Delayed Start mode is activated, your printer stores all the documents
to be faxed to its memory and sends them at the specified time. After faxing
in the Delayed Start mode is complete, the data in the memory is cleared.
NOTE:
If you turn off and on the printer, the stored documents are sent as soon as
the printer is activated.
Sending a Fax from the Driver (Direct Fax)
You can send a fax directly from your computer by using the driver.
NOTE:
Only black and white faxes can be sent using Direct Fax.
Example
For Microsoft Windows:
NOTE:
The names of the windows and the buttons may be different from those
given in the following procedure depending on the application you are using.
NOTE:
To use this feature, you must install the fax driver.
1
Open the file you want to send by fax.
2
Open the print dialog box from the application, and then select
Dell
1355cnw Color MFP FAX
.
3
Click
Preferences
.
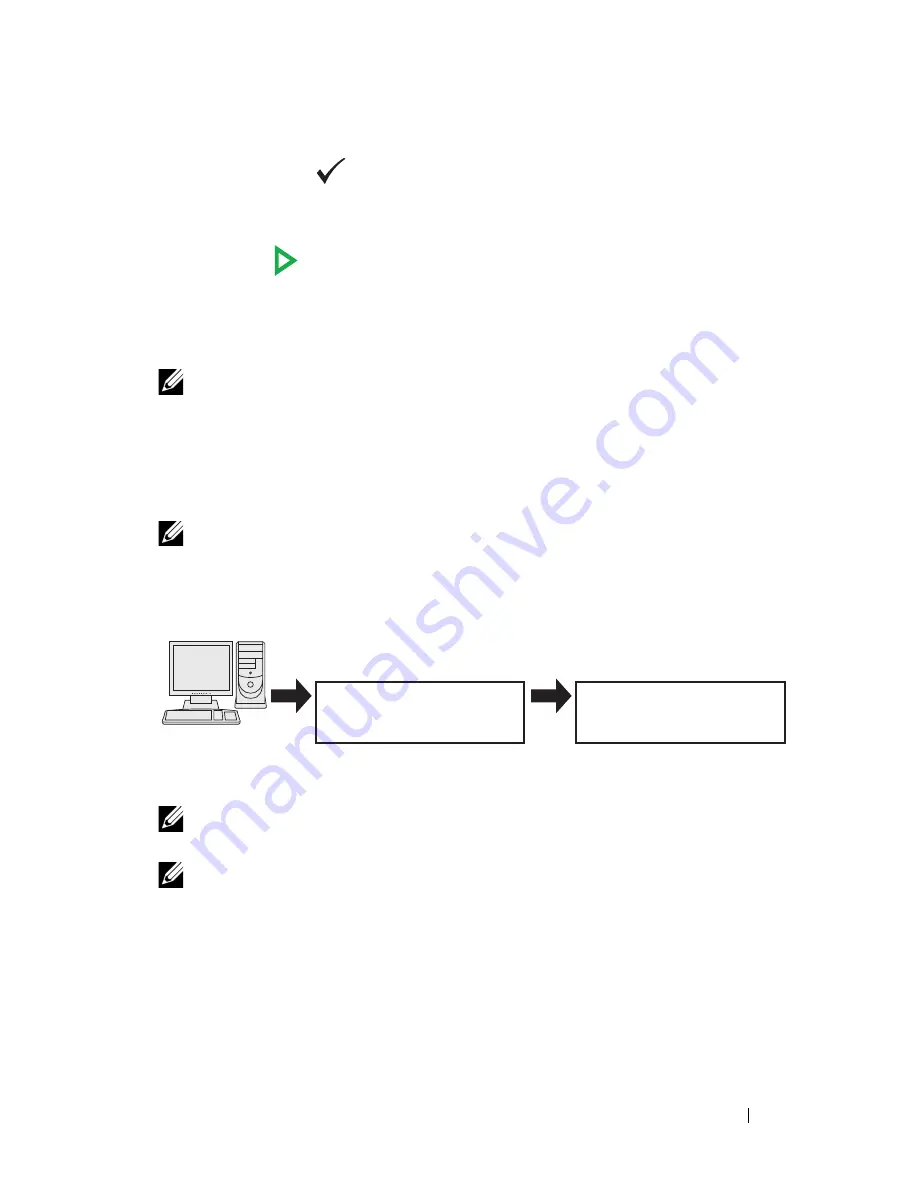
Send data via the Dell 1355cnw
Color MFP FAX driver
Sending machine (Dell
1355cn Multifunction
Color Printer)
Send fax
Receiving machine (fax
machine/multifunction
printer)
Содержание 1355 Color
Страница 1: ...www dell com support dell com Dell 1355cn 1355cnw Multifunction Color Printer User s Guide ...
Страница 2: ......
Страница 19: ...Contents 17 Online Services 503 Warranty and Return Policy 504 Recycling Information 504 Contacting Dell 504 ...
Страница 20: ...18 Contents ...
Страница 21: ...19 Before Beginning ...
Страница 22: ...20 ...
Страница 26: ...24 Dell 1355cn 1355cnw Multifunction Color Printer User s Guide ...
Страница 30: ...28 Finding Information ...
Страница 34: ...32 Product Features ...
Страница 41: ...39 Setting Up Printer Printer Setup ...
Страница 42: ...40 ...
Страница 44: ...42 Removing Packaging Material ...
Страница 52: ...50 Connecting Your Printer ...
Страница 67: ...Loading Paper 65 11 Insert the PSI into the printer and then align the PSI to the marking on the paper tray ...
Страница 118: ...116 Installing Printer Drivers on Computers Running Windows ...
Страница 123: ...121 Using Your Printer ...
Страница 124: ...122 ...
Страница 190: ...188 Dell Printer Configuration Web Tool ...
Страница 202: ...200 Print Media Guidelines ...
Страница 224: ...222 Loading Print Media ...
Страница 229: ...227 Printing Copying Scanning and Faxing ...
Страница 230: ...228 ...
Страница 254: ...252 Copying ...
Страница 275: ...Scanning 273 The Server Address page appears To fill in the fields enter the information as follows 1 2 3 4 5 6 7 8 9 ...
Страница 286: ...284 Scanning ...
Страница 323: ...321 Know Your Printer ...
Страница 324: ...322 ...
Страница 360: ...358 Understanding the Tool Box Menus The printer restarts automatically to apply the settings ...
Страница 410: ...408 Understanding the Printer Menus ...
Страница 426: ...424 Understanding Printer Messages ...
Страница 430: ...428 Printing with Web Services on Devices WSD ...
Страница 438: ...436 Specifications ...
Страница 439: ...437 Maintaining Your Printer ...
Страница 440: ...438 ...
Страница 447: ...Maintaining Your Printer 445 2 Pinch the cartridge firmly as shown in the illustration 3 Pull the toner cartridge out ...
Страница 459: ...Maintaining Your Printer 457 ...
Страница 460: ...458 Maintaining Your Printer ...
Страница 465: ...Clearing Jams 463 5 Close the document feeder tray 6 Close the ADF cover and then load the documents back into the ADF ...
Страница 468: ...466 Clearing Jams 2 Remove any paper jammed from the front of the printer 3 Replace the PSI in the printer ...
Страница 470: ...468 Clearing Jams 2 Lift up the fuser release levers 3 Remove any paper jammed from the back of the printer ...
Страница 471: ...Clearing Jams 469 4 Lower the fuser release levers to their original position 5 Close the rear cover ...
Страница 474: ...472 Clearing Jams 4 Lift and open the scanner unit 5 Remove any paper jammed out of the output tray ...
Страница 475: ...Clearing Jams 473 6 Lower and close the scanner unit 7 Lower the fuser release levers to their original position ...
Страница 476: ...474 Clearing Jams 8 Close the rear cover ...
Страница 477: ...475 Troubleshooting ...
Страница 478: ...476 ...
Страница 503: ...501 Appendix ...
Страница 504: ...502 ...
Страница 508: ...506 Appendix ...
Страница 522: ...520 Index ...


