


Installing the control panel assembly
Prerequisite
Follow the safety guidelines listed in
Steps
1
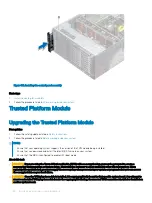
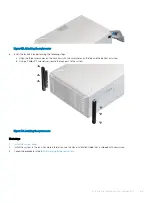
Replace the blank information tag in the new control panel with the information tag retained from the old control panel.
Figure 102. Installing the information tag
2
To install the information tag, push the information tag into the control-panel slot.
3
Connect the control panel cable and the control panel USB cable to the control panel assembly.
4
Align and insert the control panel into the control panel slot in the chassis.
5
Secure the control panel to the chassis by using the screw.
6
Connect the control panel cable and the control panel USB cable to the system board.
Installing and removing system components
153
Содержание PowerEdge T640
Страница 23: ...Figure 16 Configuration and layout Dell EMC PowerEdge T640 overview 23 ...
Страница 24: ...Figure 17 Electrical overview 24 Dell EMC PowerEdge T640 overview ...
Страница 25: ...Figure 18 Memory information Dell EMC PowerEdge T640 overview 25 ...
Страница 26: ...26 Dell EMC PowerEdge T640 overview ...


