CAUTION:
Many repairs may only be done by a certified service technician. You should only perform troubleshooting and simple
repairs as authorized in your product documentation, or as directed by the online or telephone service and support team.
Damage due to servicing that is not authorized by Dell is not covered by your warranty. Read and follow the safety instructions
that are shipped with your product.
1
Turn off the system, including any attached peripherals, and disconnect the system from the electrical outlet and peripherals.
2
Open the system.
3
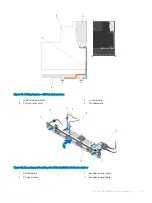
Press the touch points and lift the system battery cover up and away from the network daughter card cooling shroud.
Figure 43. Removing the system battery cover
1
system battery cover
2
network daughter card cooling shroud
3
touch points
4
Locate the battery socket.
CAUTION:
To avoid damage to the battery connector, you must firmly support the connector while installing or removing a
battery.
5
To remove the battery, press down firmly on the positive side of the connector and lift the battery out of the securing tabs at the
negative side of the connector.
Figure 44. Replacing the system battery
1
positive side of battery connector
2
system battery
3
negative side of battery connector
6
To install a new system battery, hold the battery with the "+" facing up and slide it under the securing tabs at the positive side of the
connector.
Installing and removing system components
79


