


www.dejero.com
!
14
|
LIVE+ GoBox User Guide
!
of range, or is not responding to connection requests
•
a pulsing grey icon indicates that transmitter is
initializing a connection
When you start a live stream on the transmitter, each modem connection displays the network
type (HSPA, LTE, UMTS, etc.). A received signal strength indicator (RSSI) value also appears
to show approximate strength of the connection.
Note:
After you press Play for a live broadcast, cellular coverage appears
(indicated by a green dot).
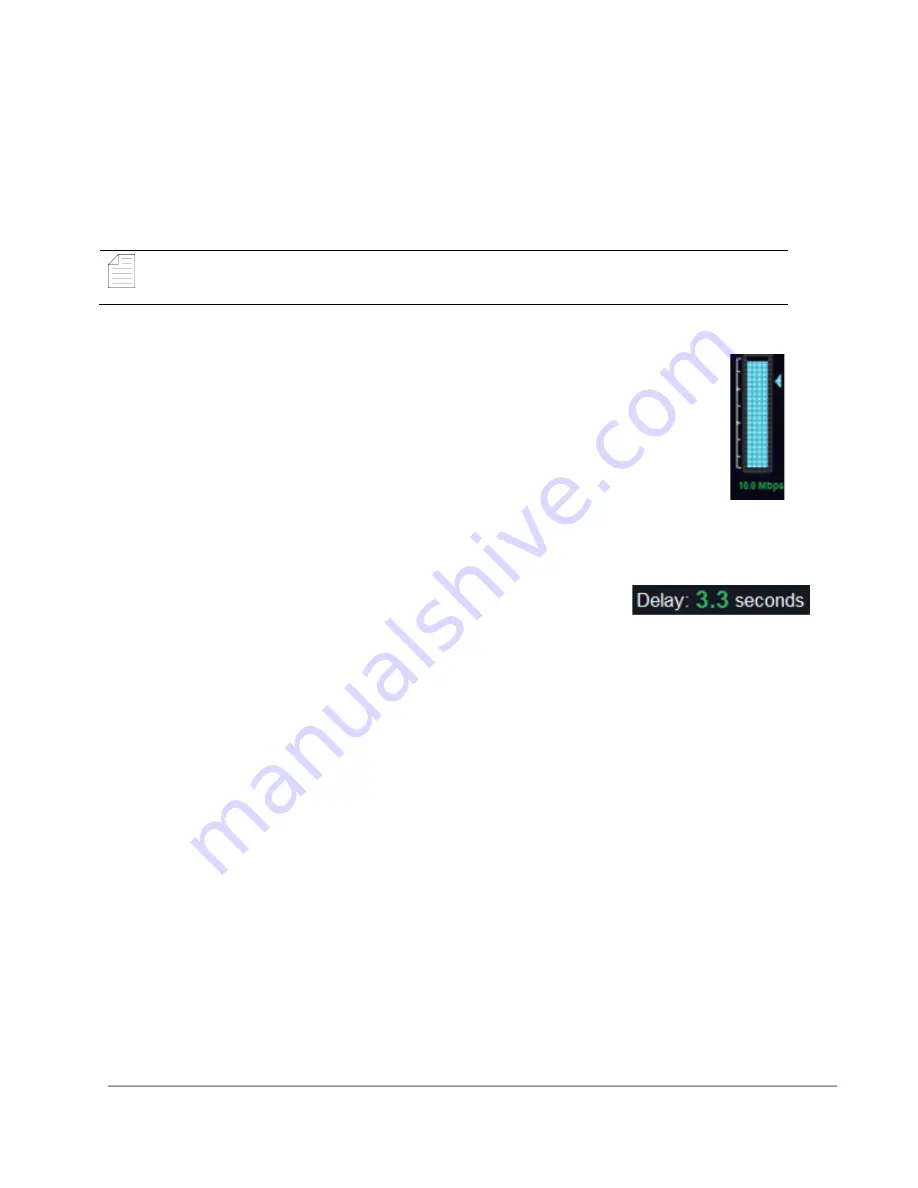
Combined Transmission meter
The Combined Transmission meter shows the total data transmitted by all
connections, in increments of 500 Kb/s.
The blue bar indicates the total data transmitted by all connections. The blue arrow
is the current target rate for encoding the data and indicates the Encoder Bit Rate.
It corresponds to the number located under the server status bar.
Network and Server Indicators
Glass-to-Glass latency
Latency measures time delay. The delay represents the glass-to-
glass latency of the transmission, calculated in real-time. Glass-to-
glass refers to the total amount of delay from the camera lens to the
video output from the SDI port of LIVE+ Broadcast Server in the
studio.
Stream Health indicator
The Stream Health indicator measures the quality of the live video stream received, decoded,
and displayed by the output server.
The two components that have the strongest effect on the health of the stream are:
•
The number of video frames that arrive at the server in time. Frames that are late or
missing can result in paused or stuttering video, or video artifacts such as smearing or
discoloration.
•
The bitrate at which the video frames are encoded. Excessively low bitrates result in
poor quality picture, indicated by blockiness and lack of detail.
When neither of these events occurs, the Stream Health indicator displays as 100%.
Lost or late video frames drop the indicator value very quickly and it displays as 0% in a very
short period of time. If there are no lost or late frames for 5 seconds, the indicator returns to
100%.
If the encoder bitrate is consistently low, the indicator displays a value between 0% and 100%.
The number under the server percentage shows what the encoder is running at. It corresponds
to the blue transmission meter.


