H
A R D W A R E
I
N S T A L L A T I O N
Remote Computer Installation
9
Installing with a Remote Computer
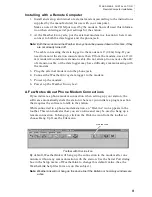
1. Install and set up an internal or external modem (according to the instructions
supplied by the manufacturer) for use with your computer.
Make a note of the COM port used by the modem. You will need this informa-
tion when entering serial port settings for the station.
2. At the Weather Envoy site, put the external modem in a location where it can
connect to both the data logger and the phone jack.
Note: Both the modem and the Weather Envoy should be powered down at this time, if they
are not already turned off.
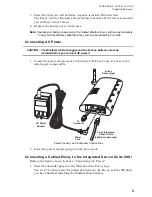
The cable connecting the data logger to the modem is 8’ (2.4 m) long. If you
need to mount the station console more than 8’ from the modem, use a 40’ (12
m) standard 4-conductor extension cable. Do not attempt to use more than 40’
of extension cable, or the data logger may have difficulty communicating with
the modem.
3. Plug the external modem into the phone jack.
4. Connect the Weather Envoy data logger to the modem.
5. Power up the modem.
6. Power up the Weather Envoy last.
A Few Notes About Phone Modem Connections
If you indicate a phone modem connection when setting up your station, the
software automatically dials the station whenever you initiate a program action
that requires the software to talk to the station.
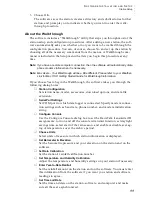
While connected to a phone modem station, an “On-Line” icon appears in the
toolbar. This icon indicates that you are on-line and may be used to hang up a
remote connection. To hang up, click on the On-Line icon from the toolbar or
choose Hang Up from the File menu.
Toolbar with On-Line Icon
By default, WeatherLink will hang up the connection to the modem after one
minute without any communication with the station. Use the Serial Port dialog
box in the Setup menu of WeatherLink to change this default value. (See the
WeatherLink help files for more on this subject.)
Note: WeatherLink will not hang up the phone line if the Bulletin or Summary windows are
active.
On-Line Icon


