49
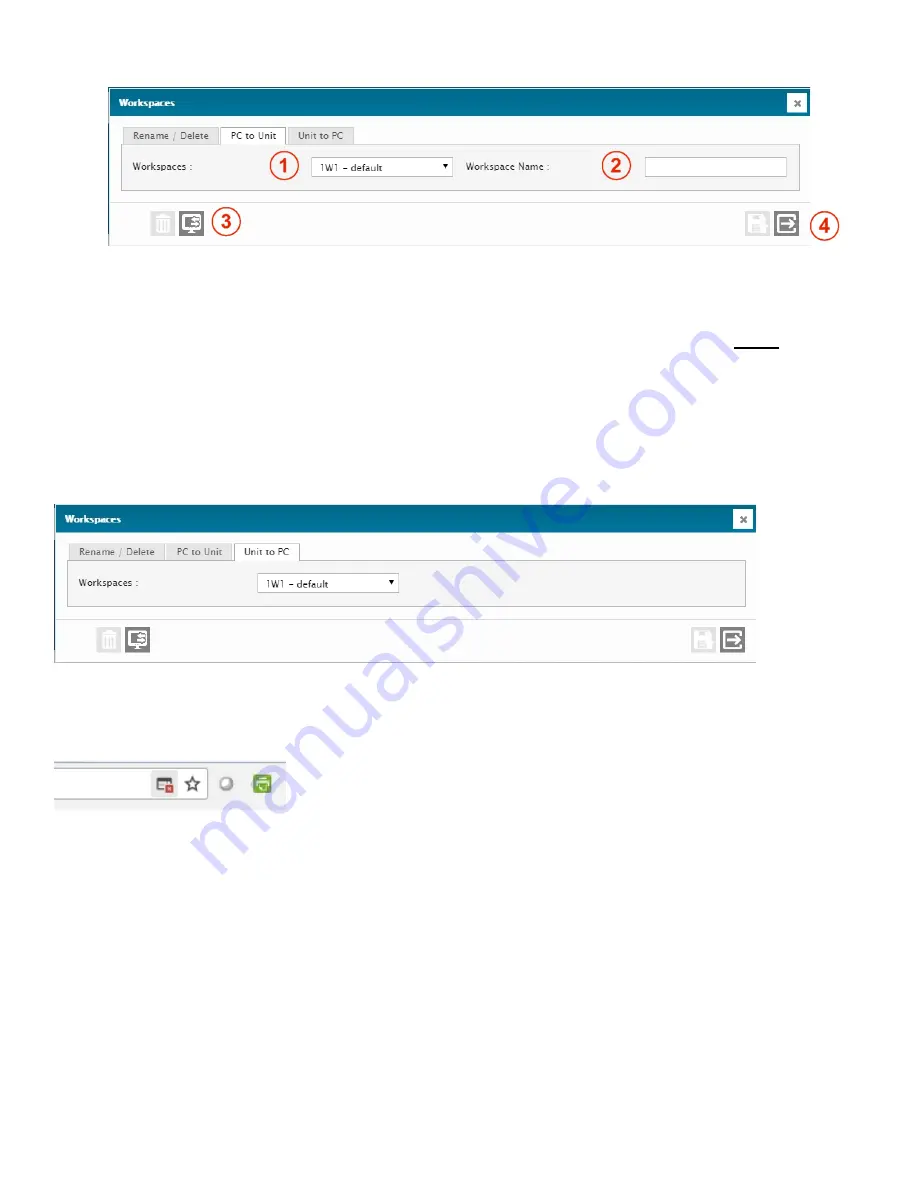
1 –
WORKSPACES
Selects a workspace slot. There are 32 possible Workspace slots in the Cortex.
2 –
WORKSPACE NAME
Workspace name edition box. Note that you must enter the name you wish to give to the slot
before
you transfer
the file from your PC to the Cortex unit.
3 –
TRANSFER
Transfers the selected workspace from the PC to the Cortex. When you press on this button, a File Explorer window
will open on your computer to allow you to select the file you wish to transfer from your computer.
4 –
EXIT
Exit menu.
The Unit to PC Tab is similar. The Transfer button will initiate the download of a .zip file to your PC’s download folder.
Note that your web browser may block these downloads, so you may have to enable them by clicking on the small red x
in Chrome’s address bar as shown below:
See Section 6 for more details on Workspace management and creation.
Содержание Cortex 320
Страница 2: ...2 ...
Страница 5: ...5 ...
Страница 9: ...9 1 3 Specifications ...
Страница 18: ...18 2 4 2 Jumpers for the Cortex 320 Jumpers and switches location on the Cortex 320 main board ...
Страница 91: ...91 ...


