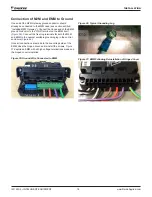
background image

IM 1240-4 • INTELLIGENT EQUIPMENT 22 www.DaikinApplied.com

Installation

Figure 44: Example Alternative Location for Mounting 

Brackets - DPS Unit                  

Wire Routing


DANGER

Electric shock hazard . Can cause personal injury or 

equipment damage .

Prior to installing Intelligent Equipment hardware, power must be removed 

from the unit. This means removing power at the breaker panel serving 

the unit, and following proper lockout/tagout procedures at said breaker 

panel for the duration of the install. Power should not be reapplied until all 

electrical interconnections have been made and verified.

This equipment must be properly grounded. Connections and service to 

the MicroTech II WMC Water-Cooled chiller, MicroTech III Air cooled Chiller, 

MicroTech III Commercial Packaged Rooftop Unit Controller, Applied 

Packaged Rooftop, or Commercial Outdoor Air Handling Unit, Machine-to-

Machine Gateway and Energy Management Module must be performed 

only by personnel knowledgeable in the operation of the equipment being 

controlled.

 WARNING

Care must be taken to ensure a minimum of 5 inches of clearance between 

all cables and conductors with 300V-rated insulation or less and areas of the 

control enclosure containing higher voltage components and conductors.

 NOTICE

In the event that 300V or lower rated cables and conductors cannot be 

practically isolated from 600V-rated cables and conductors, a section 

of 600V-rated shrink wrap tubing is included in the installation kit. This 

tubing can be cut-to-fit and placed over the lower voltage rated cables and 

conductors to increase their rating to 600V.

When routing wiring through the control enclosure, care must be 

taken to maintain a minimum of 5 inches of clearance between 

all cables and conductors with 300V-rated insulation or less 

and areas of the control enclosure containing higher voltage 

components and conductors, such as 575V. For practical 

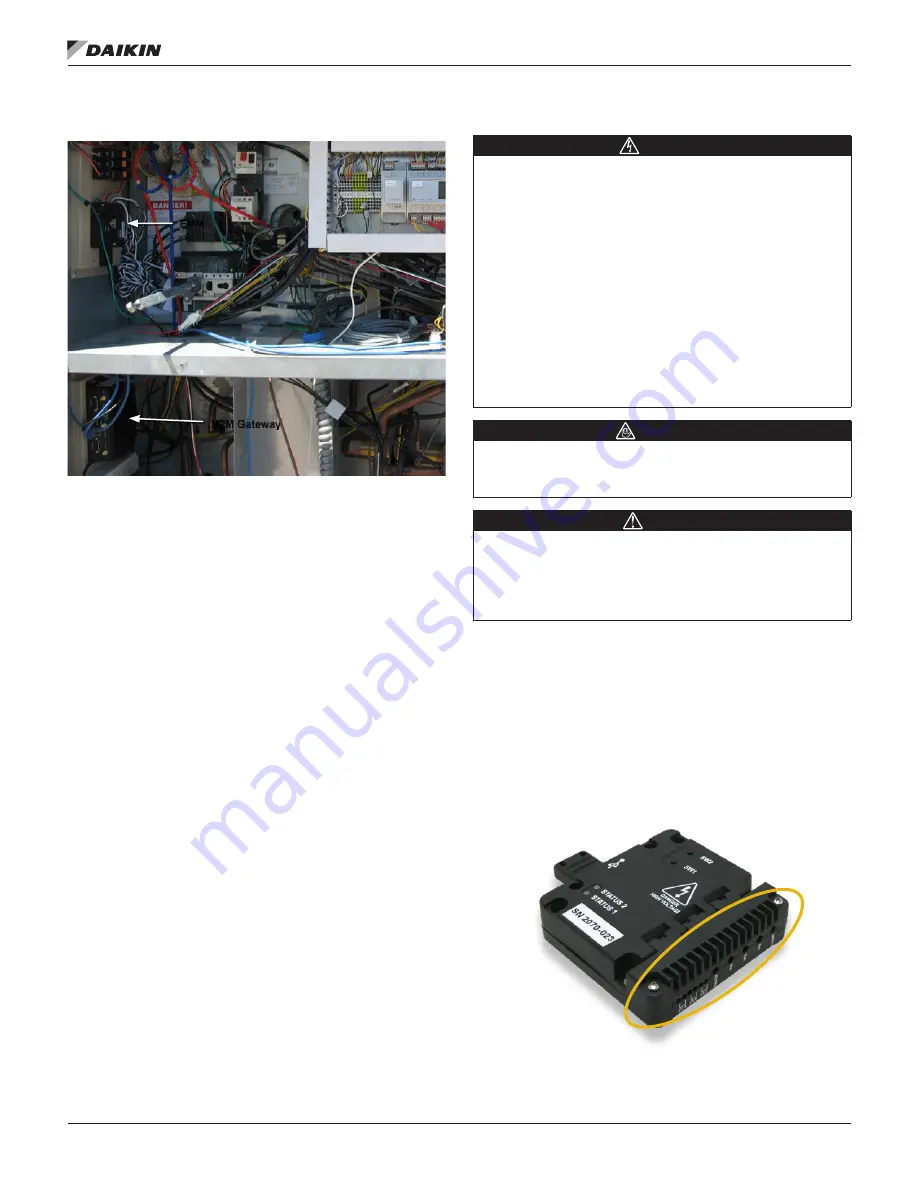
purposes, this means routing all cables and conductors from the 

high-voltage side of the EMM (

Figure 45

) away from any cables 

and conductors connected to the M2M Gateway. 

Figure 45: Line Voltage Side of EMM      

M2M Gateway

EMM

Содержание AGZ-D

Страница 1: ...des IM 1219 Intelligent Equipment for Daikin Pathfinder and Trailblazer Air cooled Chillers Magnitude Magnetic Bearing Chillers Rebel and Maverick II Commercial Packaged Rooftops RoofPak Applied Packa...

Страница 2: ...MTIII 12 M2M Connection to WMC 12 M2M Connection to EMM 12 Connection of Power Supply 13 Connection of EMM to Split Core CT s 14 Connection of EMM to Rogowski Coil CT s 14 Connection of Rogowski Coil...

Страница 3: ...ponents consist of one Machine to Machine M2M Gateway one Energy Management Module EMM Antenna and three Current Transformers CT s Hazardous Information Messages Recognize Safety Symbols Words and Lab...

Страница 4: ...on of appropriately sized CT s See Table 1 for CT sizing and specifications In the case of a unit ordered with Intelligent Equipment the CT s will be factory installed within the unit control panel Fo...

Страница 5: ...grommet 2 grounding harnesses 1 3 wire voltage harness wire ties wire tie hangers 12 self tapping sheet metal screws 1 section of 600V rated heat shrink tubing Upon receiving verify that all component...

Страница 6: ...controlled CAUTION Static sensitive components Can cause equipment damage Discharge any static electrical charge by touching the bare metal inside the control panel before performing any service work...

Страница 7: ...On AWS models locate IE Hardware as space allows within control enclosure Figure 6 and Figure 7 provide the typical layout of AWS small and large enclosures On WMC chillers only the M2M gateway and ga...

Страница 8: ...PMENT 8 www DaikinApplied com Installation Figure 3 Component Locations AGZ D Large Panel Figure 4 Component Locations AGZ E Large Panel Figure 5 Component Locations AWV Large Panel Figure 6 Component...

Страница 9: ...just created using a 7 64 drill bit Finally attach the EMM to the backplane using 4 of the provided 6 sheet metal screws 5 16 head Installing Power Supply Prior to installing any Intelligent Equipmen...

Страница 10: ...arks just created using a 1 8 drill bit Finally attach the fuse block to the backplane using 2 of the provided 8 sheet metal screws 5 16 head Fuses can be reinstalled but the covers should remain off...

Страница 11: ...NT Figure 13 AGZ Large Enclosure Knockout Location Rear of Enclosure Figure 14 AWV Large Enclosure Knockout Location Rear of Enclosure Figure 15 AWS Small Enclosure Knockout Location Rear of Enclosure...

Страница 12: ...e a minimum of 5 inches of clearance between all cables and conductors with 300V rated insulation or less and areas of the control enclosure containing higher voltage components and conductors NOTICE...

Страница 13: ...icroTech III AGZ D or AGZ E unit connect the Line brown conductor to terminal TB1 11B and the Neutral blue conductor to terminal TB1 32B Figure 21 On a MicroTech III AWV or AWS unit connect the Line b...

Страница 14: ...ered terminal Figure 25 Figure 24 Hinged Cover Screw Locations Figure 25 Connection of EMM to CT s Connection of EMM to Rogowski Coil CT s Not on Gateway on the Go IE Express or WMC kits Chillers with...

Страница 15: ...should be connected to terminal TB2 42 or TB2 43 and terminal GND Vin on the power supply should be connected to terminal TB2 81 TB2 83 or TB2 84 Figure 29 On an AWV chiller terminal Vin on the power...

Страница 16: ...ted to EMM terminal CT_B on phase L2 and the Rogowski Coil CT connected to EMM terminal CT_C on phase L3 Figure 32 Ensure that the Load indicator on the CT is oriented correctly The molded arrow on th...

Страница 17: ...connect the VinA Tan VinB Orange and VinC Violet terminals on the EMM to the Load terminals on the Fuse Block Figure 33 If needed remove the plastic protective shield from Power Distribution Block 1 P...

Страница 18: ...minal on the EMM itself Figure 35 Connect the free ring terminals for both the M2M and EMM to the nearest available grounding lug in the control enclosure Figure 36 Once all connections are made to th...

Страница 19: ...d CAUTION Static sensitive components Can cause equipment damage Discharge any static electrical charge by touching the bare metal inside the control panel before performing any service work Never unp...

Страница 20: ...Figure 39 Figure 39 3G and WLAN Connections LAN Installation If Applicable LAN Connection If using the local area network LAN for cloud connectivity a USB to Ethernet Adapter must be used for connecti...

Страница 21: ...2M bracket is designed for installation on the inside of the lower left internal enclosure door Figure 42 and the EMM bracket is designed for installation on the inside of the lower right internal enc...

Страница 22: ...eable in the operation of the equipment being controlled WARNING Care must be taken to ensure a minimum of 5 inches of clearance between all cables and conductors with 300V rated insulation or less an...

Страница 23: ...and areas of the control enclosure containing higher voltage components and conductors In RoofPak installations all non 600V rated wires Ethernet Coax USB must be wrapped in the 600V rated insulation...

Страница 24: ...smaller diameter hole should be present on the inside of the enclosure Again using the step drill bit drill this hole on the inside of the enclosure to a 5 8 diameter Drill no deeper than necessary t...

Страница 25: ...ause equipment damage Discharge any static electrical charge by touching the bare metal inside the control panel before performing any service work Never unplug cables circuit board terminal blocks or...

Страница 26: ...58 On a MicroTech III Maverick II unit connect the Line brown conductor to terminal TB1A 1 2 3 or 4 and the Neutral blue conductor to terminal TB1A 5 6 7 8 or 9 Figure 59 On a MicroTech III RPS RPR RD...

Страница 27: ...e must go to terminal labeled CT and the black wire must go to the associated lettered terminal Figure 62 Figure 61 Hinged Cover Screw Locations Figure 62 Connection of EMM to CT s Installing CT s Not...

Страница 28: ...gure 66 Once all connections are made to the line voltage side of the EMM close the hinged cover and reinstall the screws Figure 67 depicts an EMM with all high voltage terminations made and the hinge...

Страница 29: ...nel knowledgeable in the operation of the equipment being controlled CAUTION Static sensitive components Can cause equipment damage Discharge any static electrical charge by touching the bare metal in...

Страница 30: ...Figure 69 Figure 69 3G and WLAN Connections LAN Installation If Applicable LAN Connection If using the local area network LAN for cloud connectivity a USB to Ethernet Adapter must be used for connect...

Страница 31: ...ateway defect Simply click the advanced menu link within the browser then accept the security exception a When prompted enter the User Name service b Enter the unique password that was provided with t...

Страница 32: ...the M2M Gateway 14 Reconnect the Ethernet cable between the M2M Gateway and the MicroTech III controller NOTE Be certain that the IT staff has allowed incoming and outgoing Internet traffic on TCP po...

Страница 33: ...Installation www DaikinApplied com 33 IM 1240 4 INTELLIGENT EQUIPMENT Figure 73 Wireless Configuration Screen Figure 74 Wireless Signal Strength...

Страница 34: ...croTech III controller to make use of the ETH port on the M2M Gateway 3 Navigate to your laptop s Local Area Connection settings screen and change the IP subnet mask to 255 255 0 0 and set the IP addr...

Страница 35: ...r in parentheses next to Review Changes If so proceed to step 15 if not repeat steps 8 14 18 Click the Apply Changes button in the lower right hand corner of the screen The page will automatically ref...

Страница 36: ...IM 1240 4 INTELLIGENT EQUIPMENT 36 www DaikinApplied com Installation Figure 76 WAN Configuration Settings Figure 77 Add New Interface Selection...

Страница 37: ...ag which opens the unit details screen Figure 82 Click the Commissioning Procedure button You will then receive a message indicating that you have 30 days to complete the commissioning procedure Figur...

Страница 38: ...IM 1240 4 INTELLIGENT EQUIPMENT 38 www DaikinApplied com Installation Figure 83 Thirty Day Message Figure 84 Commissioning Procedures Screen...

Страница 39: ...E Your browser will likely notify you of a security risk related to an unsigned security certificate This is expected and does not indicate a gateway defect Simply click the advanced menu link within...

Страница 40: ...IM 1240 4 INTELLIGENT EQUIPMENT 40 www DaikinApplied com Troubleshooting Figure 85 M2M Gateway Home Page Figure 86 Verify Cellular Signal Strength...

Страница 41: ...Under Time Zone verify that the indicated Time Zone is accurate If so continue to step 5 6 If the Time Zone is inaccurate use the list to select the correct Time Zone then click Save Changes a After...

Страница 42: ...IM 1240 4 INTELLIGENT EQUIPMENT 42 www DaikinApplied com Troubleshooting Figure 87 System Tab Figure 88 Time Updated to Time Zone Figure 89 Keypad Controls Figure 90 Date Time Schedules Menu...

Страница 43: ...cation Wi Fi connection cannot be established Check antenna connection to magnetic base Check antenna connection to WLAN connection on Gateway Check signal strength through WebIF Verify Wi Fi IP addre...

Страница 44: ...following information as necessary prior to a technician going to the jobsite and commissioning the gateway A CAT 5E Ethernet communication cable with an extra feet of coiled cable and a RJ45 connect...

Страница 45: ......

Страница 46: ...nt to its standard terms and conditions of sale including Limited Product Warranty Consult your local Daikin Applied Representative for warranty details To find your local Daikin Applied Representativ...

Отзывы: