


17
D-Link ShareCenter Pro 1100-04 User Manual
Section 2 - Installation
Before connecting to the ShareCenter Pro 1100-04, test to see if the device is powered on correctly.
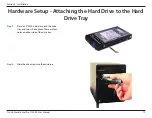
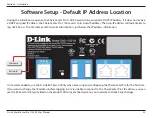
Step 1:
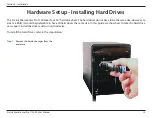
Do not slot any of the hard drive bays into the
ShareCenter Pro.
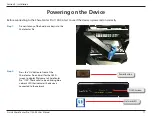
Step 2:
Press the “On” button in front of the
ShareCenter Pro and wait for the OLED
screen to display “Welcome to ShareCenter
Pro “1100”. There will also be a blinking blue
network LED that indicates the device is
connected to the network.
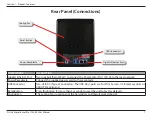
Power Button
Network LED
Powering on the Device
OLED Screen
Содержание Share Center Pro 1100
Страница 1: ......
Страница 147: ...141 D Link ShareCenter Pro 1100 04 User Manual Section 3 Configuration Step 4 The program saves all configurations ...
Страница 227: ...221 D Link ShareCenter Pro 1100 04 User Manual Section 3 Configuration Step 10 Enter the Host address Click Apply ...
Страница 228: ...222 D Link ShareCenter Pro 1100 04 User Manual Section 3 Configuration Step 11 The NFS table now shows the changes made ...
Страница 237: ...231 D Link ShareCenter Pro 1100 04 User Manual Section 3 Configuration Step 2 Click Accounts Management Click ISO Mount ...
Страница 240: ...234 D Link ShareCenter Pro 1100 04 User Manual Section 3 Configuration Step 5 Click Next to continue ...
Страница 267: ...261 D Link ShareCenter Pro 1100 04 User Manual Section 3 Configuration Step 2 Click System Management ...
Страница 268: ...262 D Link ShareCenter Pro 1100 04 User Manual Section 3 Configuration Step 3 Click Power Management ...
Страница 366: ...360 D Link ShareCenter Pro 1100 04 User Manual Section 4 Knowledge Base Theprintershouldnowappearasanavailable printer ...


