background image

Contour  Shuttle  Multimedia  Controllers  

23  


3.     Click   on  

Add   in   group  

or  

New   Group  

in   the   Action   Sequence  window   to   create   a   new  

action  or  a  new  group.  

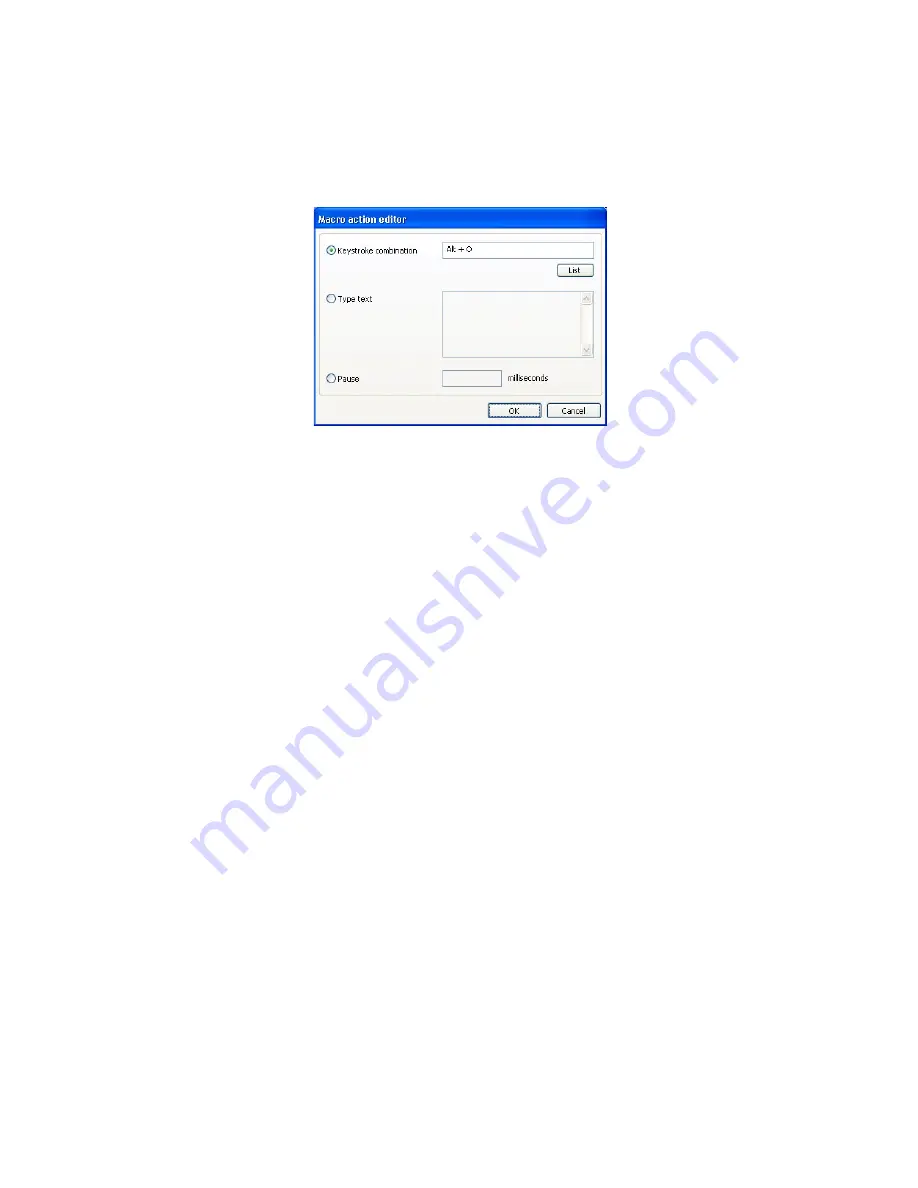
4.     A  dialog  box  will  prompt  you  to  choose  if  you  want  to  type  a  keystroke  combination  or  some  

text,  or  if  you  want  to  associate  a  pause  event.  


Select  the  option  you  prefer,  than  click  

OK  

in  the  lower  right  hand  corner  of  the  dialog  box.  

The  newly  created  action  will  appear  in  the  Action  Sequence  window.  

5.     Repeat  steps  1  and  4  for  as  many  macros  and  actions  as  you  want  to  add.  


Let’s  explain  how  macros  work  through  three  examples.  We  will  create:  


one  macro  composed  by  one  group  of  multiple  actions,  


one  macro  composed  by  multiple  groups  of  multiple  actions  each.  


6.1        Macro  with  one  group  of  multiple  actions


Let’s  create  a   macro  that  will   apply  the  following  font:  Tahoma  font,  style  bold,  size  11,  in   a  

program  like  Microsoft  Word  or  Notepad.  


You   usually   apply   this   font   by   using   the   mouse   or   by   typing   a   keystroke   sequence   on   your  

keyboard.  Here  are  the  actions  you  usually  perform  to  apply  these  changes:  

1.     click  on  Format  on  the  standard  toolbar  (or  type  Alt+O)  

2.     go  down  to  Font  (or  type  F)  
3.     click  on  the  Font  click  (or  type  Alt+F)  

4.     select  Tahoma  from  the  list  (or  type  Tahoma  in  the  Font  field)  

5.     click  on  the  Font  Style  field  (or  type  Alt+Y)  
6.     select  Bold  from  the  list  (or  type  Bold  in  the  Font  Style  field)  
7.     click  on  the  Size  field  (or  type  Alt+S)  

8.     select  11  from  the  list  (or  type  11  in  the  Size  field)  
9.     click  OK  (or  press  the  Enter  key)  to  confirm  our  changes.

Содержание ShuttlePRO

Страница 1: ...Contour Shuttle Device Control Panel ...

Страница 2: ...ist of two 2 components the ergonomically designed device itself and the software that allows you to manage it All Contour Shuttle devices have a Jog wheel and a Shuttle ring that are programmable The ShuttleXpress has five 5 programmable buttons the ShuttlePRO has thirteen 13 programmable buttons and the ShuttlePRO v2 has fifteen 15 The two top rows of buttons on the ShuttlePRO series have remova...

Страница 3: ...ically select the appropriate configuration according to the current active application The installation package provides pre installed settings factory settings for many common applications you can modify these settings at anytime and or create new settings for other applications through the Shuttle device Control Panel 1 1 Installing Shuttle Device Software It is recommended to install the softw...

Страница 4: ... If you have any previous Shuttle devices driver installed on your system please refer to paragraph 7 Updating or Uninstalling your Shuttle device Software before proceeding 3 For Windows 7 and later users installing the driver requires system administrator security privileges Step 1 Step 2 Locate and double click the Contour Shuttle device driver installer A dialog box will prompt you through the...

Страница 5: ...ated differently the Control Panel manages application settings Changes performed on the application settings are enabled as soon as you click on the Apply or OK button in the Control Panel The Control Panel does not need to be open when you use the Shuttle device The software automatically detects the program you are using and automatically switches to the correct application settings associated ...

Страница 6: ...Control Panel from the menu Note The Contour Shuttle Device Configuration panel is an applet of the Windows Control Panel Therefore the Contour Shuttle Device icon also appears in the Windows Control Panel The Shuttle configuration icon may also appear in the Programs submenu depending on the installation options you chose 2 3 Control Panel Components The Control Panel consists of two sections the...

Страница 7: ...be Premiere specific settings and NOT Global Settings 2 3 1 2 Options Button This button allows you to select functions to work on settings These functions include Create new settings does what the name implies selection of this option allow you to create new settings either from empty settings or copying from Global settings or the current application selected in the Target Application Menu Renam...

Страница 8: ...ction 2 3 2 1 User Action Menu This menu allows you to choose which button s or feature s you wish to program You can select any of the buttons Jog right or left Shuttle positions and transitions Shuttle positions are points set in intervals along the right and left clockwise and counterclockwise sides of the Shuttle Knob The Shuttle ring has seven 7 distinct zones in each direction and a rest zon...

Страница 9: ...pplication setting defined Macro ShuttlePRO v2 only allows you to associate one of the available macros to a Shuttle component or to create your own macro 2 3 2 2 1 Modifier Keys and Smart Release Check Box A Modifier key is one of the following keys Shift Alt Control Win Modifier keys can be selected one at a time or combined together Fig 2 4 You can program the Shuttle components to perform repe...

Страница 10: ...elease Hold Down simulates a keystroke pressure until the associated Shuttle component is released Hold Down and Auto Repeat simulates many time spaced keystroke pressures until the associated Shuttle component is released The Frequency Menu is available for the following Computer Response actions Type Keystroke Mouse Click Mouse Wheel 2 3 2 2 4 Type Keystroke Choosing this action allows you to ty...

Страница 11: ...mponent A Modifier key can also be associated to the mouse click in order to modify its behavior The click frequency can be set through the Frequency Menu This action allows you to associate the scrolling feature wheel up or wheel down to a Shuttle component A Modifier key can also be associated to the wheel movement The wheel tick frequency can be set through the Frequency Menu ...

Страница 12: ...erent settings for a specific program and that Button 1 is defined as Switch to the Next Setting for all the three settings When the program is first loaded the first setting is the default When you press Button 1 you will switch to the second setting And when you press it again you will switch to the third setting Press Button 1 again to go back to the first setting 2 3 2 2 8 Macro ShuttlePRO v2 ...

Страница 13: ... controller or select the Jog Shuttle positions and the Shuttle transitions in the User Action Menu to see the computer response associated to each position of the Jog and Shuttle components For a more general overview of settings functions proceed to the paragraph below 3 2 Exporting Settings Info To create an html file that contains all the settings information 1 Click on the Target Application ...

Страница 14: ...Fig 3 1 Exported settings info for Adobe Premiere Clip Edit Contour Shuttle Multimedia Controllers 13 ...

Страница 15: ...on in the Comment Field 4 Click Apply when completed 3 4 Modifying Existing Settings This section explains how to modify a function of the Shuttle device for an existing application setting 1 Click on the Target Application Menu and select the application setting you would like to modify 2 Click on the User Action Menu and select the Shuttle component whose function you wish to change Once chosen ...

Страница 16: ...ontrol Panel Global Settings is always selected in the Target Application Menu By default all the Shuttle components in Global Settings are set to Do Nothing However Global Settings can be used to close applications and or for scrolling purposes For example associate Alt F4 close the current window to a button the mouse wheel movement to the jog directions and the left and right arrows to the Shut...

Страница 17: ...ed application listed The current active setting is shown by a small check mark Click the setting you want to use 3 Once you have selected the desired setting you can use it immediately inside the application Through the Shuttle device Helper you can verify that the software is recognizing the application currently in use simply move the mouse cursor above the Shuttle device Helper icon without cl...

Страница 18: ... After so doing you should now see this setting name in the Target Application Menu 2 Click on the Options button in the Settings Management section and select Create new settings 3 Select either the second item Copy contents from Global Settings or the third Copy contents from Current Settings 4 A dialog box will prompt you to locate the target application Select the application you want the new ...

Страница 19: ...o create new settings 1 Click on the Options button in the Settings Management section and select Create new settings 2 Click on the first item Create Empty Settings 3 A dialog box will prompt you to locate the Target Application Select the application you want to target and click Open in the right hand of the dialog box The file you should select is normally the executable file exe for the applic...

Страница 20: ...ation setting that you would like to associate to another application After so doing you should now see this setting name highlighted in the Target Application Menu 2 Click on the Options button in the Settings Management section Select Change target application from the pull down menu 3 A dialog box will prompt you to locate the target application Select the application you want and click Open in...

Страница 21: ... settings from the pull down menu 3 The setting is reverted to the original factory settings and tagged as Factory Settings as it was at installation 4 Click Apply to validate the change Note This operation also reverts to the original target application in case you retargeted the setting to a different executable 5 6 Remove Settings You may want to remove delete an application setting from the ta...

Страница 22: ... would like to export After so doing you should now see this setting name highlighted in the Target Application Menu 2 Click on the Options button Select Export settings from the pull down menu 3 A dialog box will prompt you to type a name for the file that will be created and to choose its destination folder Once you have done so click on Save in the lower right hand of the dialog box The created...

Страница 23: ...le component 1 event on the Shuttle component Group 2 action 1 action 2 1 event on the Shuttle component 1 event on the Group n action 1 action 2 Shuttle component This definition leads to two different kinds of macros macros composed by one group of actions identified by the icon macros composed by two 2 or more groups of actions also called step by step macros identified by the icon Step by step...

Страница 24: ...acro composed by multiple groups of multiple actions each 6 1 Macro with one group of multiple actions Let s create a macro that will apply the following font Tahoma font style bold size 11 in a program like Microsoft Word or Notepad You usually apply this font by using the mouse or by typing a keystroke sequence on your keyboard Here are the actions you usually perform to apply these changes 1 cl...

Страница 25: ...box and type Tahoma 11 Click on Add in group in the Action Sequence window 12 Choose Keystroke combo from the dialog box and type Alt Y to enable Font Style field 13 Click on Add in group in the Action Sequence window 14 Choose Type text from the dialog box and type Bold 15 Click on Add in group in the Action Sequence window 16 Choose Keystroke combo from the dialog box and type Alt S to enable Si...

Страница 26: ...rmal or typing N Web Layout or typing W Print Layout or typing P Outline or typing O Let s create a step by step macro based on these actions 1 Click on New in the Macro selection window 2 Type Word views then type Enter 3 Click on New group in the Action Sequence window 4 Choose Keystroke combo from the dialog box and type Alt V to enable the View tab 5 Click on Add in group in the Action Sequenc...

Страница 27: ...O to select the Outline view 19 Type the description of your choice in the description field for example This macro allows to toggle between views in Microsoft Word Your newly created macro will be displayed as depicted in Fig 6 3 Fig 6 3 From your ShuttlePRO v2 tab you will now be able to associate the newly created macro to a Shuttle component let s say Button 13 again as shown in Fig 6 4 Each t...

Страница 28: ...o export 3 Click on the Target Application Functions Menu The setting you selected should be highlighted Select Export Settings from the pull down menu 4 A dialog box will prompt you to type a name for the file that will be created and to choose its destination folder Once you have done so click on Save in the lower right hand of the dialog box The created file will have the pref extension and wil...

Страница 29: ...s 7 4 Uninstalling Shuttle Device Software This section describes how to uninstall the Shuttle Device software Step 1 Step 2 Step 3 Step 4 Step 5 Step 6 Step 7 Step 8 Step 9 Click on the Start Menu in the lower left corner of your screen only for Windows 98 and 2000 users Go up to Settings Select Control Panel Double click on Add Remove Programs Locate and click on Contour Shuttle Click on Change ...

Страница 30: ...Contour Shuttle Multimedia Controllers 30 ...

Страница 31: ...Contour Shuttle Multimedia Controllers 33 ...

Страница 32: ...Contour Shuttle Multimedia Controllers 34 ...

Отзывы: